
Raspberry Pi OS installation with Raspberry Pi Imager
Installing Raspberry Pi OS starts with preparing storage and writing the operating system before the Raspberry Pi is powered for first boot. For most desktop and headless installations, the method is Raspberry Pi Imager.
For most desktop and headless installations, the method is Raspberry Pi Imager.
Raspberry Pi Imager is a desktop application used to select Raspberry Pi OS, apply customization settings, and write the system image to a microSD card or other selected boot media. A completed write prepares the selected storage as installation storage for the first boot attempt.
A completed write prepares the selected storage as installation storage for the first boot attempt.
For a desktop installation, first boot uses connected power, a display, and input devices so setup can continue locally. For a headless installation, Raspberry Pi Imager should store the required hostname, user credentials, Wi-Fi details, and SSH setting before writing the image, separating the desktop and headless paths before startup.
Before starting the write process, confirm the installation requirements and readiness checks.
This page covers how to install Raspberry Pi OS rather than how to choose every operating system or diagnose every possible boot fault; broader device guidance remains available through the Raspberry Pi hub. Before starting the write process, confirm the installation requirements and readiness checks.
- Use a microSD card or other boot storage that matches the supported storage options for the Raspberry Pi model.
- Connect the storage to the computer running Raspberry Pi Imager and select it as the write destination.
- For headless use, configure Wi-Fi, SSH, hostname, and user credentials before writing Raspberry Pi OS.
- After the write and verification stages complete, insert the storage, connect the required power and peripherals, and confirm whether first boot begins.
- If an install problem causes a write failure, stop and check the storage connection, selected destination, and verification result before attempting another write.
Table of Contents
Raspberry Pi OS installation requirements
Raspberry Pi OS installation requirements are met when you have compatible hardware, writable installation storage, Raspberry Pi Imager on a host computer, and any network details needed for your chosen setup. Confirming these requirements before writing the operating system reduces avoidable write errors and first-boot confusion.
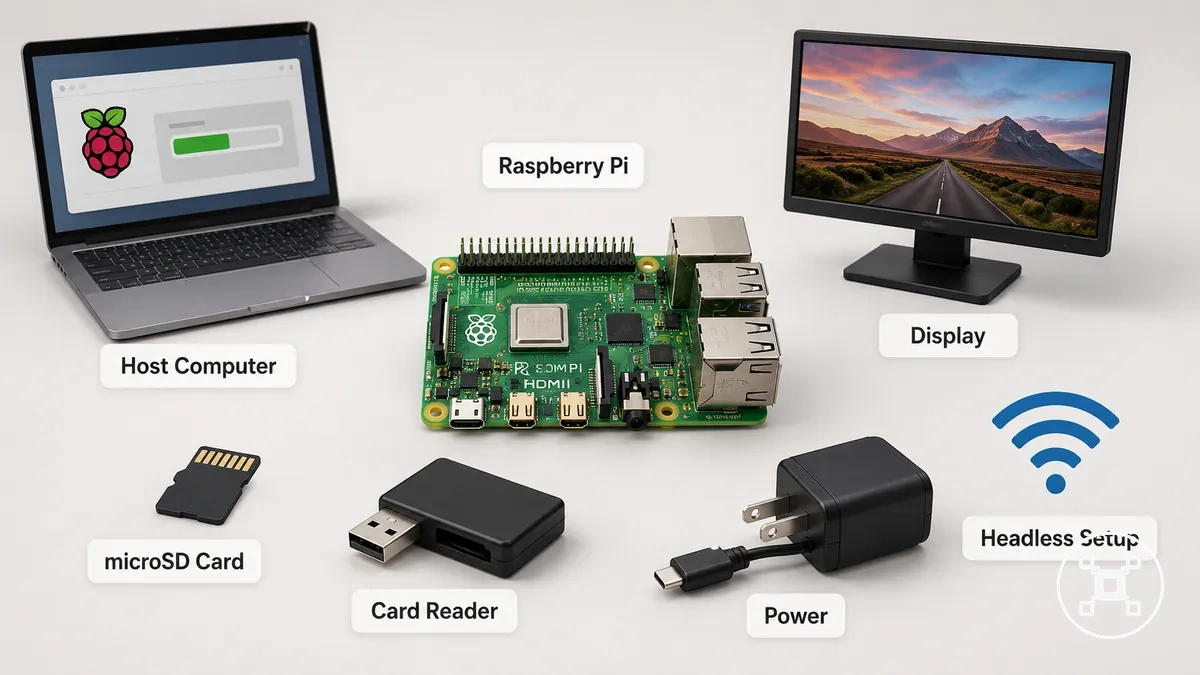
Desktop and headless installations share the same core prerequisites, but the setup path differs after the operating system is written. A desktop setup uses a display and local input devices during first boot, while a headless setup should have Wi-Fi, SSH, and user credentials configured in Raspberry Pi Imager before writing the boot media. Check hardware, storage, software, and network conditions before writing Raspberry Pi OS.
Use the checklist below to verify readiness before writing Raspberry Pi OS.
Use the checklist below to verify readiness before writing Raspberry Pi OS. The required combination of components changes with the Raspberry Pi board model, selected boot media, and whether the installation is for a desktop or headless system.
- Use a Raspberry Pi board that supports the Raspberry Pi OS release you intend to install.
- Prepare a host computer with Raspberry Pi Imager and permission to download or access the operating system image.
- Select a microSD card or other supported boot media and confirm that the correct installation storage is selected because the write process erases the chosen drive.
- Connect a card reader or compatible storage adapter so the host computer can write to the removable storage.
- Provide internet access when Raspberry Pi Imager needs to download Raspberry Pi OS or retrieve available operating system options.
- Connect stable power before attempting the first boot after the operating system has been written.
- For a desktop installation, connect a display and input devices so setup can continue locally after startup.
- For a headless installation, configure Wi-Fi, SSH, and user credentials before writing the operating system to reduce first-boot access issues.
Computer, Raspberry Pi model, and internet requirements
Computer, Raspberry Pi model, and internet requirements are compatible with Raspberry Pi Imager when you run the application on a host computer using Windows, macOS, or Linux and select the correct Raspberry Pi model for the operating system you intend to install. The host computer and Raspberry Pi model determine the operating system options and installation path available in Imager.
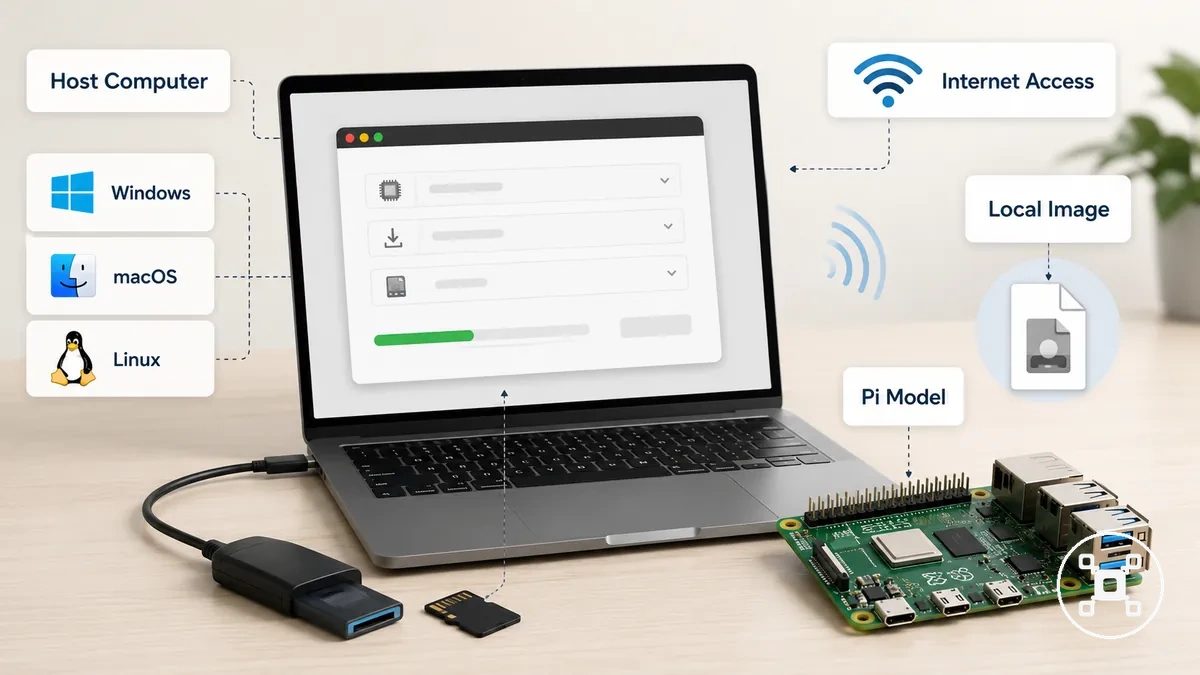
If Raspberry Pi Imager downloads Raspberry Pi OS, the host computer requires internet access during image selection. If you already have a local image, manual image selection replaces the download step, although Imager permissions are still required so the application can access and write the selected removable storage.
- Windows, macOS, or Linux: Run Raspberry Pi Imager on a supported host computer to prepare the installation media.
- Raspberry Pi model: Select the matching Raspberry Pi model or operating system option in Imager so the installation is prepared for the intended device.
- Internet access: Keep the host computer online when Raspberry Pi Imager needs to download a Raspberry Pi OS image.
- Local image: Use a previously downloaded image with manual selection when an internet download is not required.
- Imager permissions: Allow Raspberry Pi Imager to access the selected removable storage so it can write the operating system.
microSD card, card reader, USB, and SSD installation storage
microSD card, card reader, USB, and SSD installation storage are suitable when the selected storage matches the Raspberry Pi board's supported boot method and Raspberry Pi Imager can write to it. The selected installation storage becomes the write target for Raspberry Pi OS.
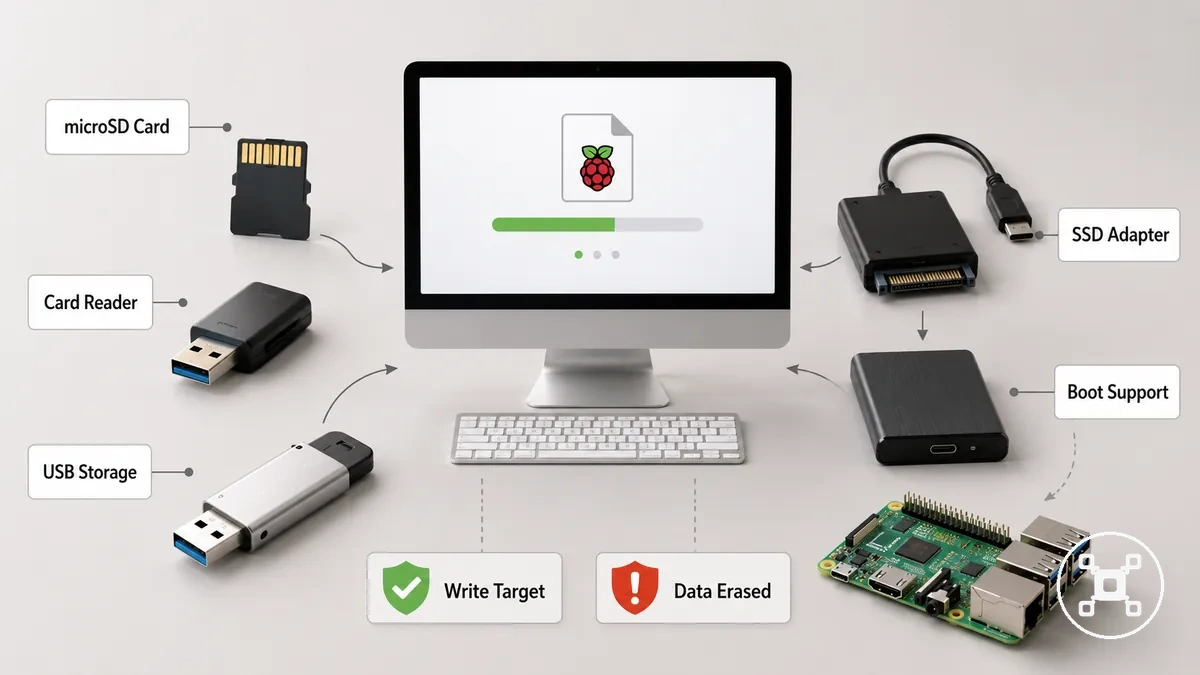
If you use a microSD card, connect it through a compatible card reader so Raspberry Pi Imager can detect and write the storage. USB storage requires a compatible USB drive, while an SSD adapter is suitable only when the Raspberry Pi model and its bootloader support booting from that storage. These conditions distinguish the microSD, USB storage, and SSD adapter installation paths.
| Storage option | Needed adapter | Installation condition | Main risk |
|---|---|---|---|
| microSD card | SD card reader or USB card reader | Compatible card is detected and written by Raspberry Pi Imager | Wrong card selection or interruption during writing |
| USB drive | USB connection | USB storage is supported for the intended installation and boot configuration | Unsupported boot configuration |
| SSD adapter | Compatible SSD adapter | Boot support requires a compatible Raspberry Pi model and bootloader configuration | Unsupported boot configuration |
If you need more guidance when comparing storage media, see Raspberry Pi storage options. Before writing Raspberry Pi OS, confirm the correct installation storage because the selected storage device will be erased during the write process.
Raspberry Pi Imager setup before writing the OS
Raspberry Pi Imager setup before writing the OS prepares the installation before any data is written to storage. The setup is completed by choosing the Raspberry Pi device, the operating system, and the storage target in the Imager interface.
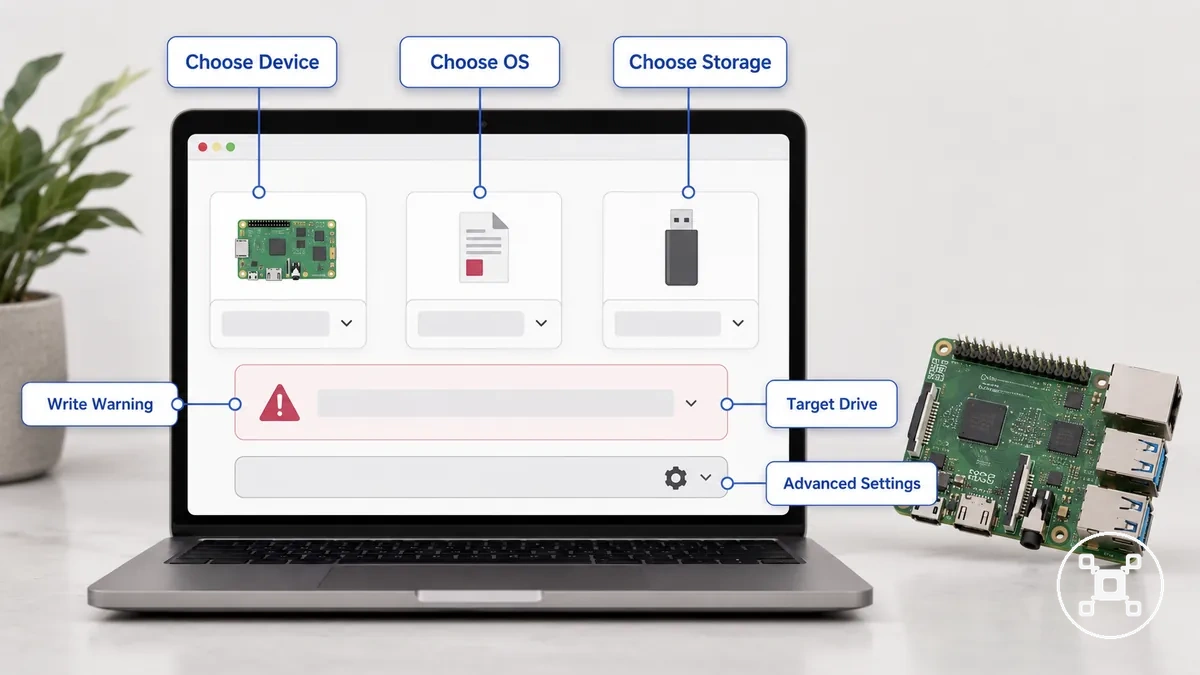
If Raspberry Pi Imager is configured with the wrong target drive, the selected storage can be erased during the write process. Open Raspberry Pi Imager first, then follow the interface sequence and confirm the correct storage selection before continuing.
- Select the device that matches your Raspberry Pi model so Raspberry Pi Imager prepares the installation for the intended hardware.
- Choose the operating system by selecting the Raspberry Pi OS image you want to install.
- Choose the storage target and verify that the selected target drive is the removable storage intended for Raspberry Pi OS.
- Review the write warning and confirm that the selected storage is correct because the write process erases the chosen target.
- Open advanced settings, when available, to review optional configuration before writing. Menu names and placement may differ between Raspberry Pi Imager versions and operating systems.
If you accidentally select the wrong storage device, cancel the write confirmation and choose the correct target drive before proceeding. After confirming the device, operating system, and storage selections, advanced settings are the next local decision before Raspberry Pi Imager starts writing the operating system.
Download and open Raspberry Pi Imager on your computer
Download and open Raspberry Pi Imager on your computer before choosing the Raspberry Pi OS image or storage device. Install Raspberry Pi Imager, launch the application, and confirm any operating system permissions needed to access removable storage.
- Download Raspberry Pi Imager for your host computer and complete the installation so the application is ready to write a Raspberry Pi OS image.
- Open Raspberry Pi Imager after installation and verify that the application starts without setup errors.
- If you use Windows or macOS, approve any permission prompts that allow Raspberry Pi Imager to detect and access removable storage.
- If you use Linux, open Raspberry Pi Imager using the installation method provided for your system and confirm that removable storage is accessible before continuing.
- Check that Raspberry Pi Imager detects the removable storage device before choosing the operating system and write image options.
If Raspberry Pi Imager does not show the removable storage device, verify that the storage is connected and that any required operating system permissions have been granted. Once Raspberry Pi Imager opens correctly and detects the storage, you are ready to choose the Raspberry Pi OS image and continue with the installation.
Once Raspberry Pi Imager opens correctly and detects the storage, you are ready to choose the Raspberry Pi OS image and continue with the installation.
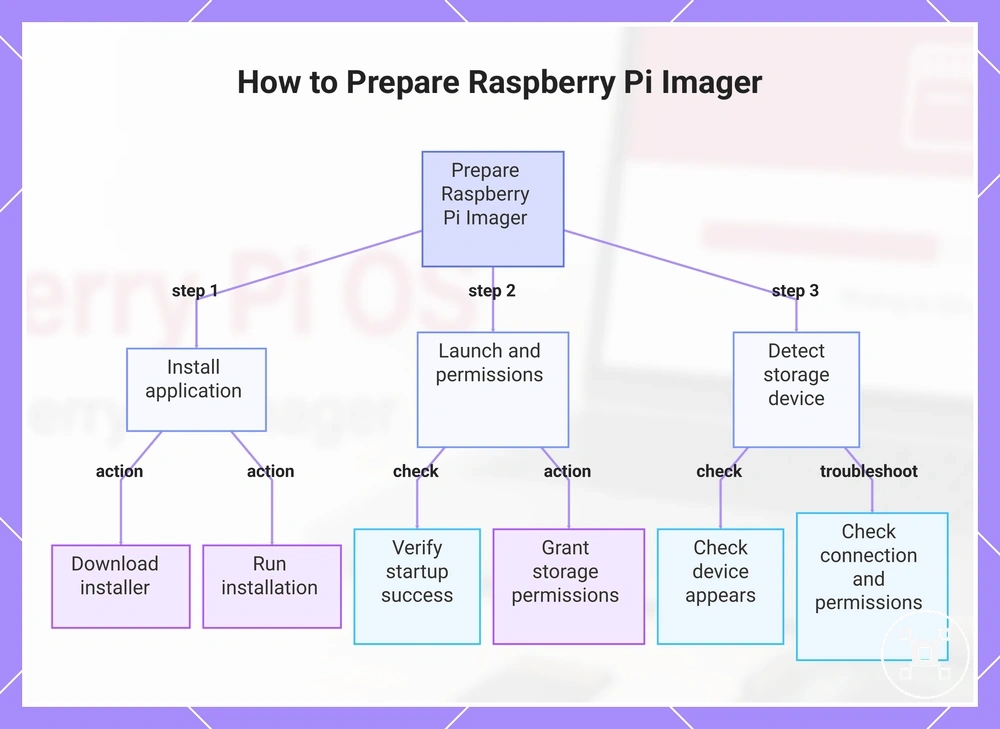
This flowchart shows the three main steps to prepare Raspberry Pi Imager: installing the application, launching with permissions, and detecting the storage device.
Select the Raspberry Pi device, operating system, and storage
Select the Raspberry Pi device, operating system, and storage in Raspberry Pi Imager before starting the write process. These three choices determine which Raspberry Pi OS image is written and which target drive receives it.
- Raspberry Pi device: Choose the Raspberry Pi model that matches your hardware so Imager prepares the appropriate installation.
- Operating system: Select the Raspberry Pi OS option you want to install. If you need operating systems beyond Raspberry Pi OS, see Raspberry Pi OS options for broader operating system guidance.
- Storage: Select the removable storage device intended for the installation because the selected target drive is the location where the OS image will be written.
- Target drive check: Verify the selected storage before writing to reduce the risk of overwriting the wrong drive.
Before confirming the write process, compare the selected Raspberry Pi device, Raspberry Pi OS option, and target storage with the hardware you intend to use. If any selection is incorrect, update it in Imager before writing the image to avoid installing the operating system on the wrong storage device.
If any selection is incorrect, update it in Imager before writing the image to avoid installing the operating system on the wrong storage device.
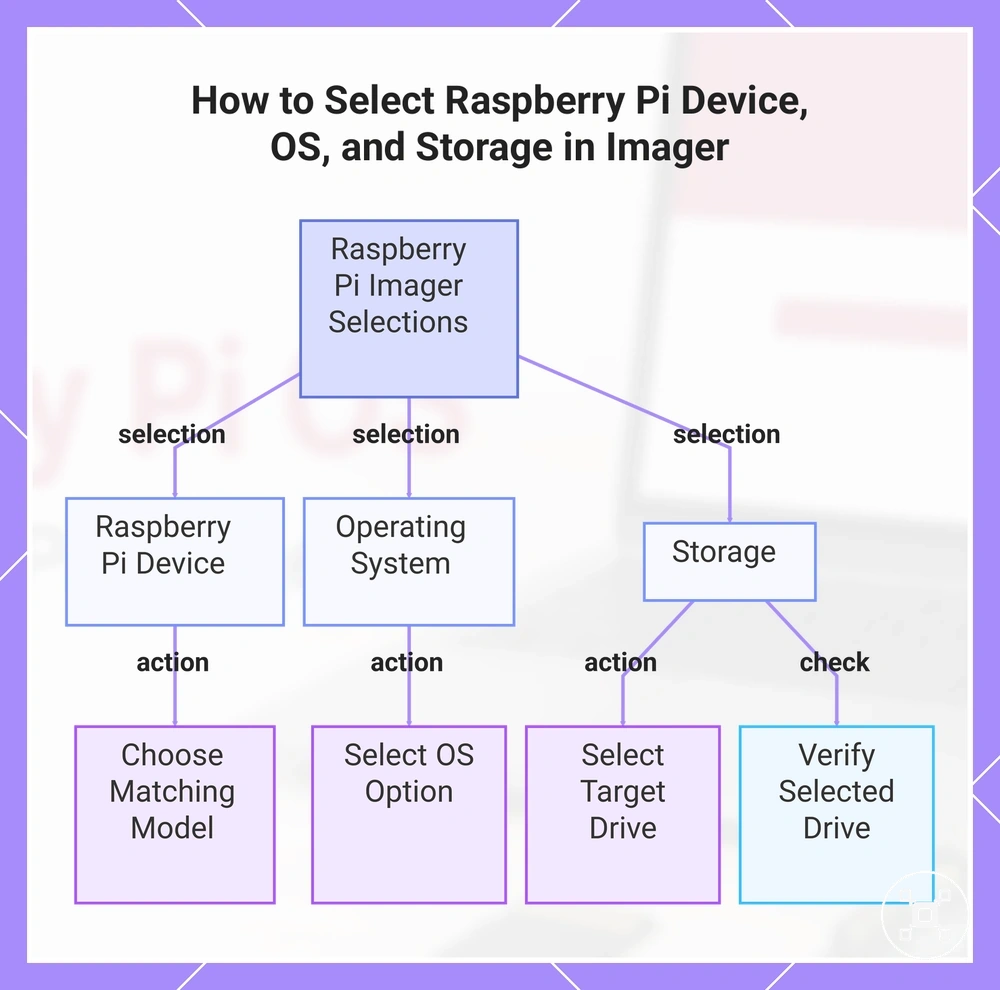
This chart shows the three selections required in Raspberry Pi Imager before writing the OS image, plus the verification step for the target drive.
Raspberry Pi Imager customization settings
Raspberry Pi Imager customization settings let you apply selected preferences before writing Raspberry Pi OS, but the required options depend on how the system will be used. Configure only the settings that match your installation so the first boot reflects your intended login, network, and access method.
| Customization setting | Configure when | First-boot effect |
|---|---|---|
| Hostname | Useful when identifying the Raspberry Pi on a network, especially if multiple devices are present. | The system uses the chosen network name after first boot. |
| Username and password | Configure when you want login credentials available immediately. | The specified account can be used at first boot. |
| Locale and keyboard layout | Configure when regional language, time zone, or keyboard preferences should be applied automatically. | The operating system starts with the selected localization settings. |
| Wi-Fi credentials | Configure for wireless installations; leave blank for wired-only installations. | The Raspberry Pi attempts to connect to the specified wireless network during first boot. |
| SSH | Enable for headless or remote administration; leave disabled when remote access is not required. | SSH access is available after first boot when network connectivity is established. |
| First-run configuration | Configure when you want selected customization settings applied automatically. | The stored settings are applied during the initial startup process. |
For desktop installations with a monitor and keyboard, localization and login details are usually convenience settings. For headless installations, review the hostname, username, password, Wi-Fi credentials, and SSH before writing the image, then verify the selected customization settings to reduce the risk of inaccessible remote access or incorrect first-boot configuration.
Hostname, username, password, locale, and Wi-Fi settings
Hostname, username, password, locale, and Wi-Fi settings determine how Raspberry Pi OS identifies the device, accepts login credentials, applies regional preferences, and connects to a wireless network at first boot. Configure each value to match the intended user, country, keyboard, and network before writing the image.
| Setting | Expected value | First-boot effect |
|---|---|---|
| Hostname | A distinct device name used to identify the Raspberry Pi on the local network. | Raspberry Pi OS uses the selected hostname when the device joins the network. |
| Username and password | The intended account name and its matching login password. | The selected credentials control local login after first boot; an incorrect username or password prevents access with those details. |
| Locale and timezone | The country, language, and timezone that match the installation location. | Raspberry Pi OS applies the selected regional and time settings during initial setup. |
| Keyboard layout | The layout that matches the connected keyboard. | Key input follows the selected keyboard layout, including characters entered in usernames and passwords. |
| SSID and Wi-Fi password | The wireless network name and its corresponding password. | The Raspberry Pi attempts to connect to that network at first boot; an incorrect SSID or password prevents the expected Wi-Fi connection. |
| Wi-Fi country | The wireless country that matches the device location. | The wireless configuration applies the selected country setting when establishing the connection. |
For a wired or locally configured installation, Wi-Fi values can be omitted, while a wireless or headless setup requires the correct SSID, Wi-Fi password, and Wi-Fi country for the intended connection. Check the login details, keyboard layout, and network values together because an incorrect layout can change typed characters, while incorrect wireless credentials prevent the expected connection.
SSH settings for headless Raspberry Pi OS installation
SSH enables a headless Raspberry Pi OS installation to be accessed without a display or keyboard, provided SSH is enabled before the image is written and valid credentials are configured. Set the intended username with either a password or a public key, then ensure the Raspberry Pi has a Wi-Fi or Ethernet connection at first boot.
- Enable SSH in Raspberry Pi Imager so the SSH service is available after the operating system starts.
- Configure the required username for the first remote login.
- Select either a password or a public key for authentication, depending on the intended access method.
- Configure Wi-Fi for wireless networking or connect Ethernet so the Raspberry Pi can join the local network.
- Locate the Raspberry Pi by its configured hostname; if the hostname cannot be resolved on the network, use the assigned IP address for the first connection.
- Connect with the configured username and authenticate using the selected password or the private key that matches the stored public key.
If the first SSH connection is unsuccessful, verify that SSH is enabled, the network connection is active, the hostname or IP address is correct, and the configured credentials match the authentication method. Use a unique password or a dedicated public key for devices on exposed networks because weak or reused credentials increase the risk of unauthorised access.
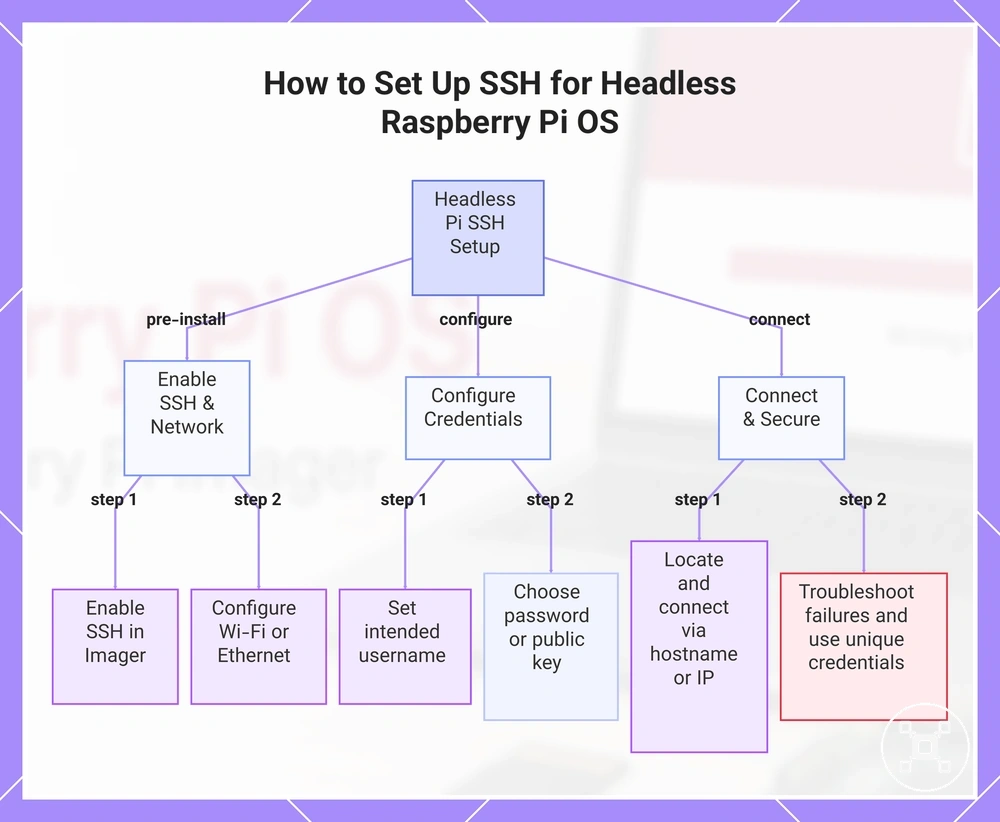
This chart shows the main steps and security considerations for enabling SSH access on a headless Raspberry Pi before its first boot.
This chart shows the main steps and security considerations for enabling SSH access on a headless Raspberry Pi before its first boot.
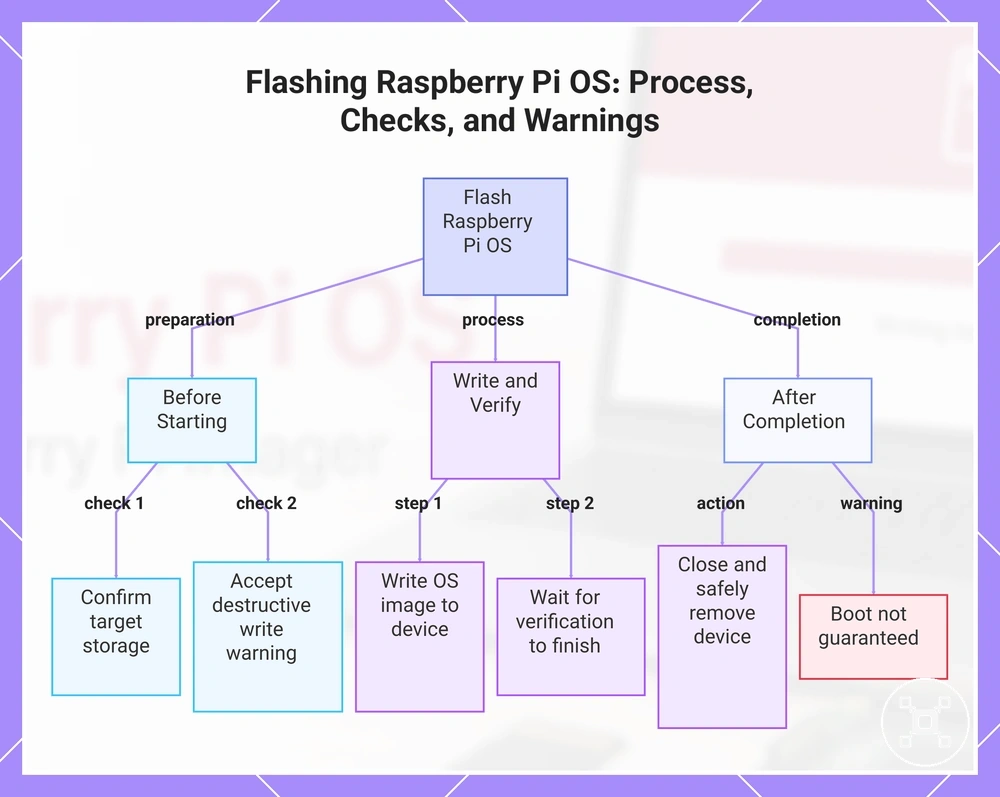
Flash Raspberry Pi OS to the installation storage
Flashing Raspberry Pi OS writes the selected operating system image to the chosen storage device. Confirm the correct target before starting because the write process replaces the existing data on that storage device.
- Review the selected storage device and confirm that it is the intended installation media before starting the write operation.
- Accept the destructive write warning only after checking that the selected device does not contain data you need to keep.
- Start the flash process and allow Raspberry Pi Imager to write the Raspberry Pi OS image to the selected storage device.
- Wait for verification to finish so Raspberry Pi Imager can check the written image against the data on the storage device.
- After the completion message appears, close the write process and perform safe removal before disconnecting the storage device.
If the wrong removable drive is selected, the write operation replaces the existing contents of that drive. A completed verification indicates that the written data passed the Imager check, but it does not confirm that the Raspberry Pi will boot when power, hardware compatibility, storage condition, or configuration problems remain.
If the wrong removable drive is selected, the write operation replaces the existing contents of that drive.
This chart shows the main steps to flash Raspberry Pi OS, including necessary checks and post-flash warnings.
Write, verify, and safely remove the storage device
After Raspberry Pi Imager finishes the write process, confirm that writing and verification have completed before handling the storage device. Do not remove the storage device or card reader while the write or verify process is still in progress.
- Check that the write process reports completion rather than a write failure, because an incomplete image is not ready for use.
- Confirm that Raspberry Pi Imager has finished the verify stage and reports a successful verification result for the written Raspberry Pi OS image.
- If the operating system displays an eject prompt, eject the correct storage device before disconnecting it.
- Wait until the operating system indicates that the storage device is no longer in use before removing the card reader or storage device.
- Complete safe removal only after the eject process has finished to reduce the risk of interrupting pending storage operations.
A successful verification confirms that the written image matches the data stored on the storage device, but it does not guarantee a successful first boot because power, Raspberry Pi model compatibility, storage condition, and configuration can still affect startup. If verification reports a write failure, leave the storage device connected and repeat the write process only after checking the selected image, target storage device, and card reader connection.
First boot after installing Raspberry Pi OS
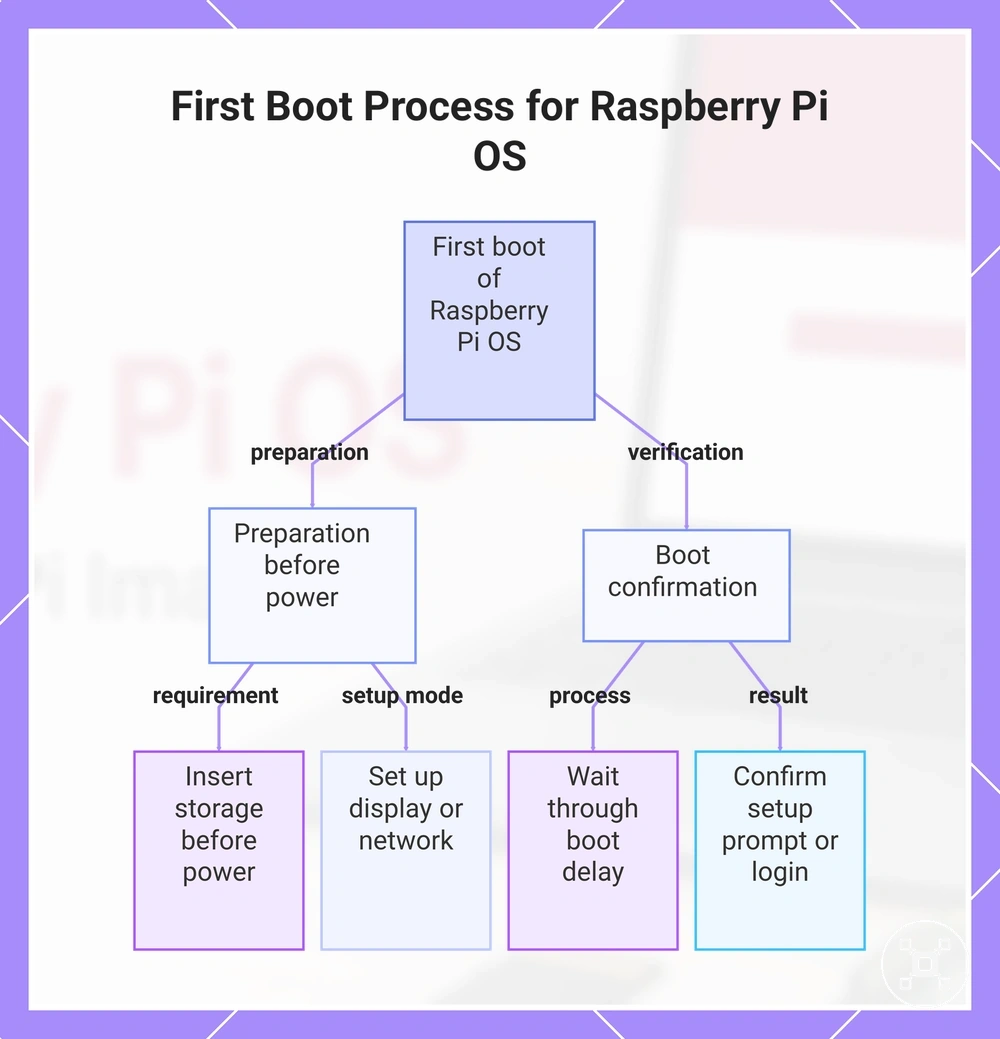
The first boot starts after you insert the storage device into the Raspberry Pi, connect a display for local setup or ensure the configured network is available for headless setup, and apply power. Confirm that Raspberry Pi OS reaches its initial startup state before continuing.
- Insert storage into the Raspberry Pi before connecting power.
- For a display-based installation, connect the display, keyboard, and required peripherals. For a headless installation, ensure the configured network connection is available.
- Apply power and allow Raspberry Pi OS to complete its initial startup without interrupting the process.
- Wait through the normal boot delay, because the first boot can take longer than later startups while initial system tasks are completed.
- Confirm that a setup prompt or login screen appears, according to the installation method and saved configuration.
An expected setup prompt or login screen indicates that the written Raspberry Pi OS installation has started correctly. This result confirms the installation outcome, but further configuration may still be required before normal use. After confirming the installation, continue with Raspberry Pi first setup for the broader configuration process.
This chart shows the main steps and verification for the first boot of Raspberry Pi OS after installation.
This chart shows the main steps and verification for the first boot of Raspberry Pi OS after installation.
Boot with display, keyboard, mouse, and network
A display-based first boot is confirmed when the Raspberry Pi outputs video through HDMI, responds to the connected keyboard and mouse, and starts Raspberry Pi OS after power is applied. Connect the required devices before powering on so the installation path can be verified from the first visible screen.
- Connect the HDMI cable to the display and select the correct display input.
- Connect the keyboard and mouse so you can respond to the initial setup prompts.
- Connect the intended network connection according to the saved installation configuration before applying power.
- Apply power and allow Raspberry Pi OS to complete its initial startup without interrupting the boot process.
- Confirm that the system reaches the desktop or a login screen, depending on the installed image and saved configuration.
The desktop or login screen can appear after a longer first-boot wait because the initial startup is influenced by the Raspberry Pi model, storage speed, and first-run setup tasks. Visible HDMI output together with working keyboard and mouse input confirms the display-based installation path, while an active network connection confirms the configured network is available after Raspberry Pi OS has finished starting.
Boot headless and connect over the network
A headless first boot is confirmed when the Raspberry Pi joins the configured Wi-Fi or Ethernet network and accepts an SSH connection through its hostname or IP address. Apply power after the storage device and network connection are ready, then wait for the initial startup to finish before testing access.
- Connect the Raspberry Pi to the intended Wi-Fi or Ethernet network, because SSH requires the device to be reachable over the network.
- Apply power and allow Raspberry Pi OS to complete its first boot before attempting to connect.
- Use the configured hostname to connect. If the hostname is not resolved, check the connected-device list in the router to identify the assigned IP address.
- Open an SSH session with the hostname or IP address and enter the saved login credentials.
- Confirm the installation when the SSH session reaches a command prompt, showing that Raspberry Pi OS has started and is accessible over the network.
If the first headless connection fails, the cause may be the Wi-Fi or Ethernet connection, hostname resolution, router discovery, SSH availability, or incorrect credentials rather than a failed Raspberry Pi OS write. Check those conditions before writing the storage device again.
Common Raspberry Pi OS installation problems
Most Raspberry Pi OS installation problems occur either while writing the operating system to the storage device or during the first boot after the write has completed. Identify whether the failure happens before or after the first boot so you can check the correct stage instead of repeating the entire installation.
| Symptom | Likely attribute issue | Check | What it means |
|---|---|---|---|
| Storage is not detected | Storage detection | Reconnect the storage device, reseat the card reader, or try another compatible adapter. | The Raspberry Pi OS image cannot be written until the storage device is detected. |
| Write failure | Write process | Repeat the write process and confirm the selected storage device remains available throughout imaging. | The operating system image was not written successfully. |
| Verification failure | Image verification | Run the verification step again without removing the storage device early. | The written data does not fully match the Raspberry Pi OS image. |
| Storage becomes unreadable | Card corruption | Test the storage device or replace it with another compatible card if corruption is suspected. | Storage corruption can prevent a successful installation or later startup. |
| No network connection after first boot | Wi-Fi configuration | Check the saved Wi-Fi settings or connect with Ethernet. | Raspberry Pi OS may have booted even though network access is unavailable. |
| SSH connection fails | SSH availability | Confirm the Raspberry Pi is reachable by hostname or IP address on the local network. | The issue can be related to network discovery or SSH configuration rather than the installation write. |
| Login fails | Login credentials | Use the username and password configured during Raspberry Pi Imager setup. | Incorrect credentials prevent access even when Raspberry Pi OS has started. |
| Unexpected first boot behaviour | First boot processing | Allow the initial startup to complete before assuming the installation failed. | Initial startup time is influenced by the Raspberry Pi model, storage performance, and first-run configuration tasks. |
Installation problems do not always have a single cause because storage quality, adapter behaviour, power conditions, the selected Raspberry Pi OS image, and the Raspberry Pi model can each affect the result. If Raspberry Pi OS has already been written successfully but the board still does not start correctly, continue with Raspberry Pi boot problems for broader boot diagnostics.
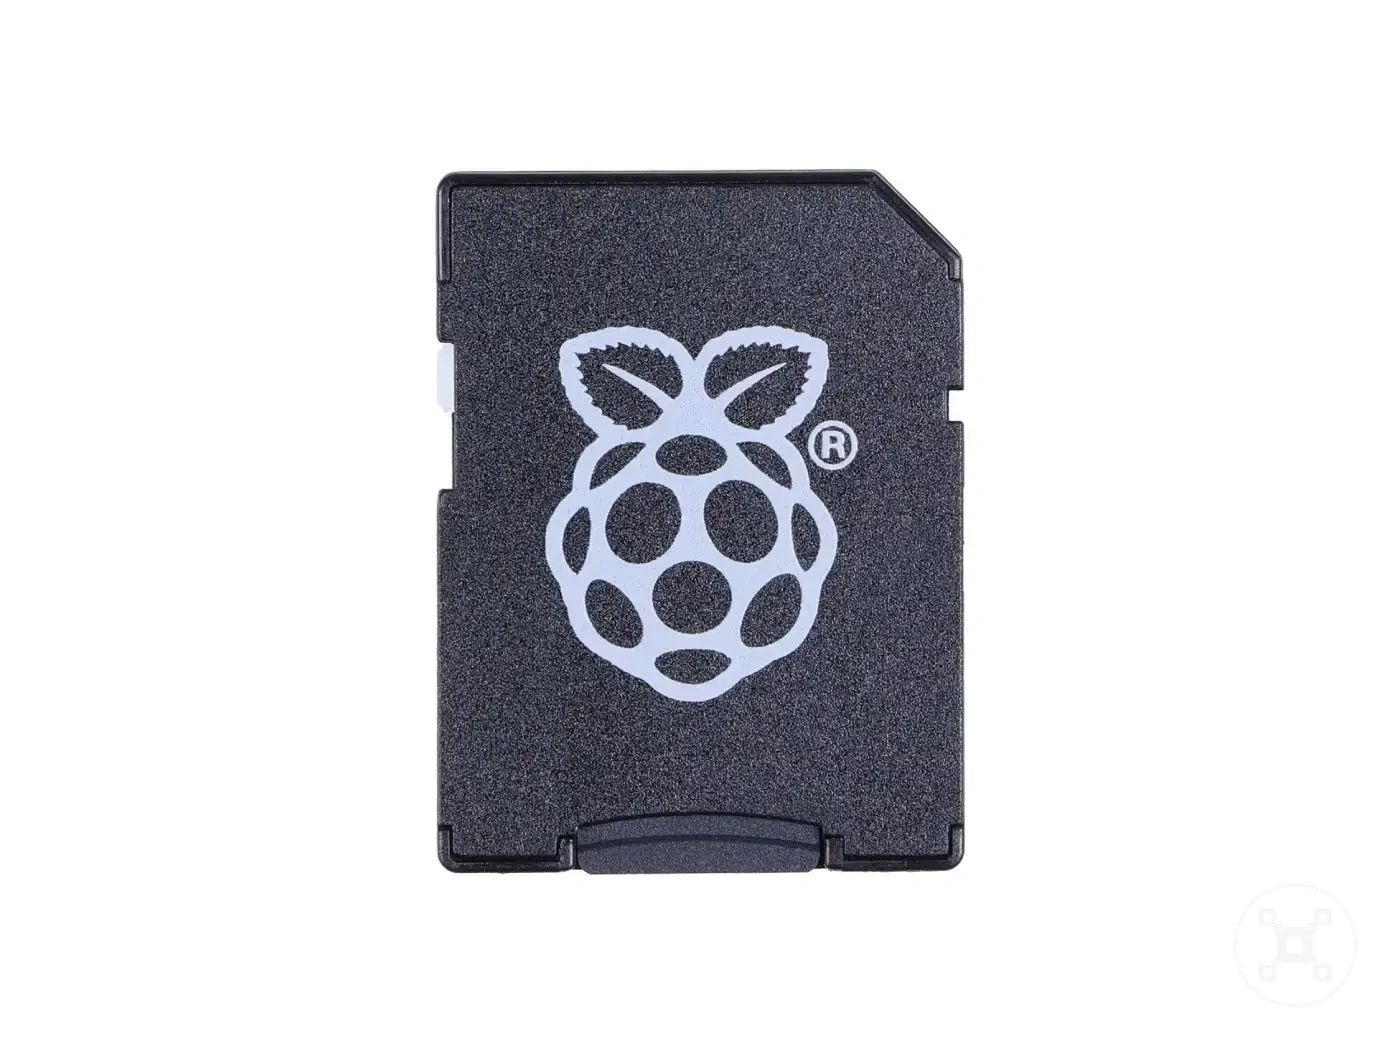
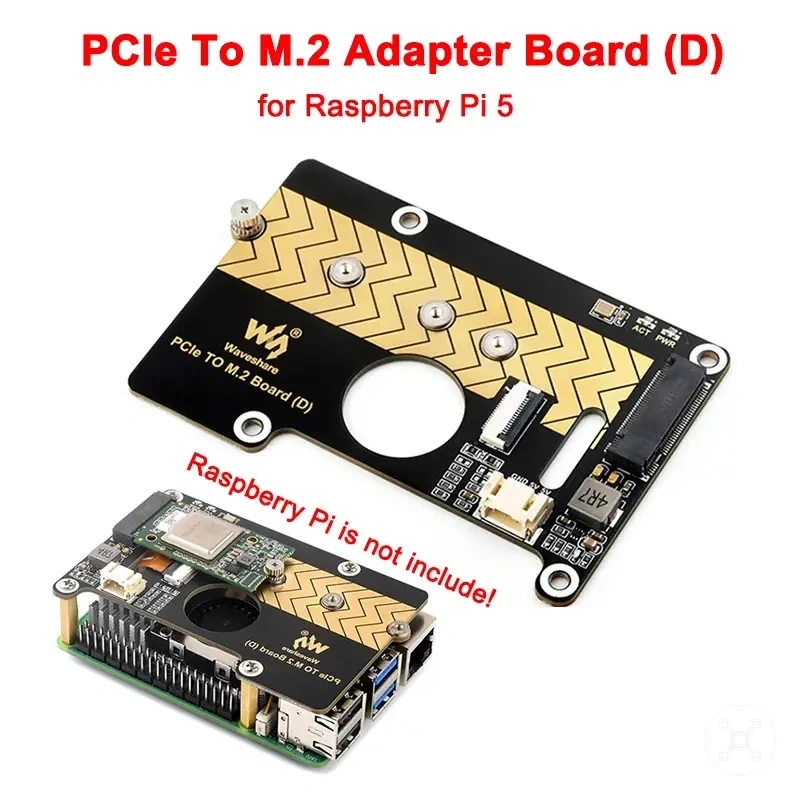
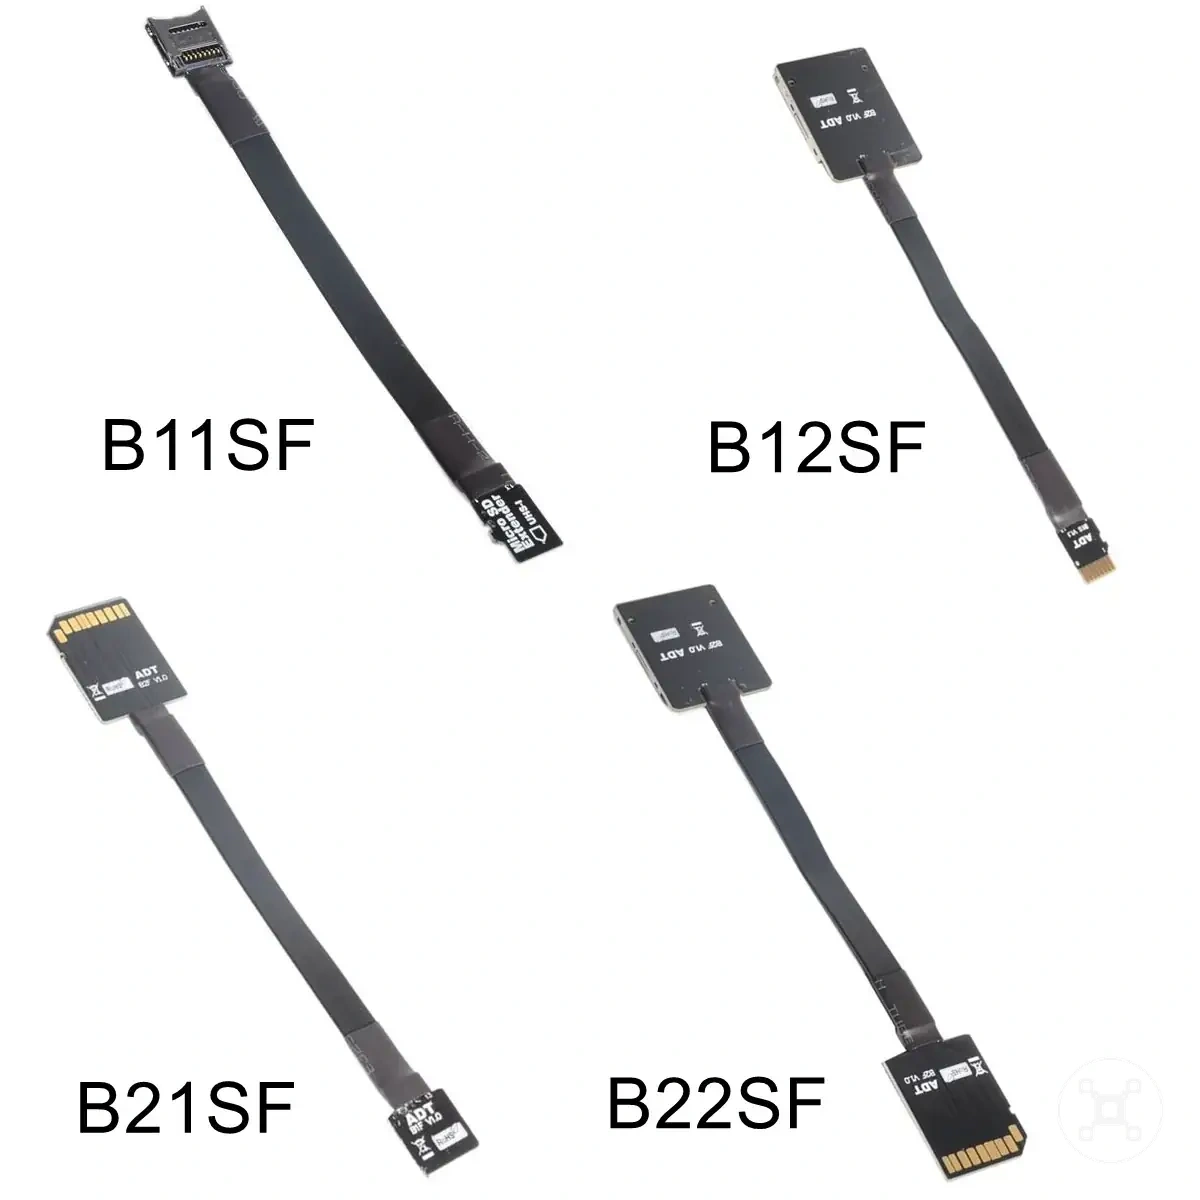
The products below are useful examples for comparing available options.
The products below are useful examples for comparing available options. Before buying, check that the compatibility criteria, key features, and product details match your needs.
Storage not detected, write failures, and card corruption
Storage not detected, write failure, verification error, and card corruption are storage-stage problems that occur before Raspberry Pi OS can boot from the installation media. Check whether the failure comes from storage recognition, the write process, the card reader, the USB adapter, or the image data before changing the installation setup.
| Symptom | Likely attribute issue | Check | What it means |
|---|---|---|---|
| Storage not detected in Raspberry Pi Imager | Storage connection | Reconnect the storage device, check the card reader connection, and try another USB port. | The host computer cannot access the installation storage, so Raspberry Pi OS cannot be written. |
| Write failure during image writing | Write process or storage path | Retry the write image process after checking the selected storage device, card reader, and USB adapter. | The Raspberry Pi OS image was not successfully written to the boot media. |
| Verification error after writing | Image validation | Retry the write and verification process without disconnecting the storage device. | The written data does not match the expected image content. |
| Card corruption symptoms | Storage integrity | Reformat the storage device and retry the installation write process. | Corrupted storage data can prevent reliable boot media preparation. |
| Repeated failures with the same storage path | Card reader, USB adapter, or host computer | Test with another reader, adapter, USB port, or host computer before replacing the storage device. | The failure pattern may point to the connection hardware or computer rather than Raspberry Pi OS itself. |
If reconnecting, changing ports, reformatting, and retrying do not resolve the issue, the next check is whether the card, card reader, USB adapter, or host computer is causing the failure. Avoid treating a storage error as an operating system problem until the complete write path has been checked.
Wi-Fi, SSH, login, and first-boot configuration issues
Wi-Fi, SSH, login, and first-boot configuration issues usually occur after Raspberry Pi OS has been written successfully, so check connection and credential settings before treating the installation as a storage problem. Separate a configuration failure from a boot failure by confirming whether the Raspberry Pi has started and is only failing to connect or authenticate.
- Wi-Fi does not join: Check the configured SSID, password, and Wi-Fi country settings. If wireless setup fails, use an Ethernet connection to check whether the Raspberry Pi is running and the issue is limited to Wi-Fi configuration.
- SSH does not respond: Check that SSH is enabled and confirm the Raspberry Pi is reachable on the network before checking connection details.
- Hostname cannot be found: Use IP discovery through the local network or router to locate the Raspberry Pi when the configured hostname does not resolve.
- Login fails: Check the configured username and password because incorrect credentials prevent access even when Raspberry Pi OS has started.
- First boot appears delayed: Allow the first-boot delay to complete before changing settings, as initial startup tasks can affect when network and login access becomes available.
For a headless installation, a failed connection does not always mean Raspberry Pi OS failed to boot. A working boot with failed access can point to Wi-Fi, Ethernet, SSH enablement, hostname resolution, IP discovery, or credentials, so check each condition before rewriting the storage device.