
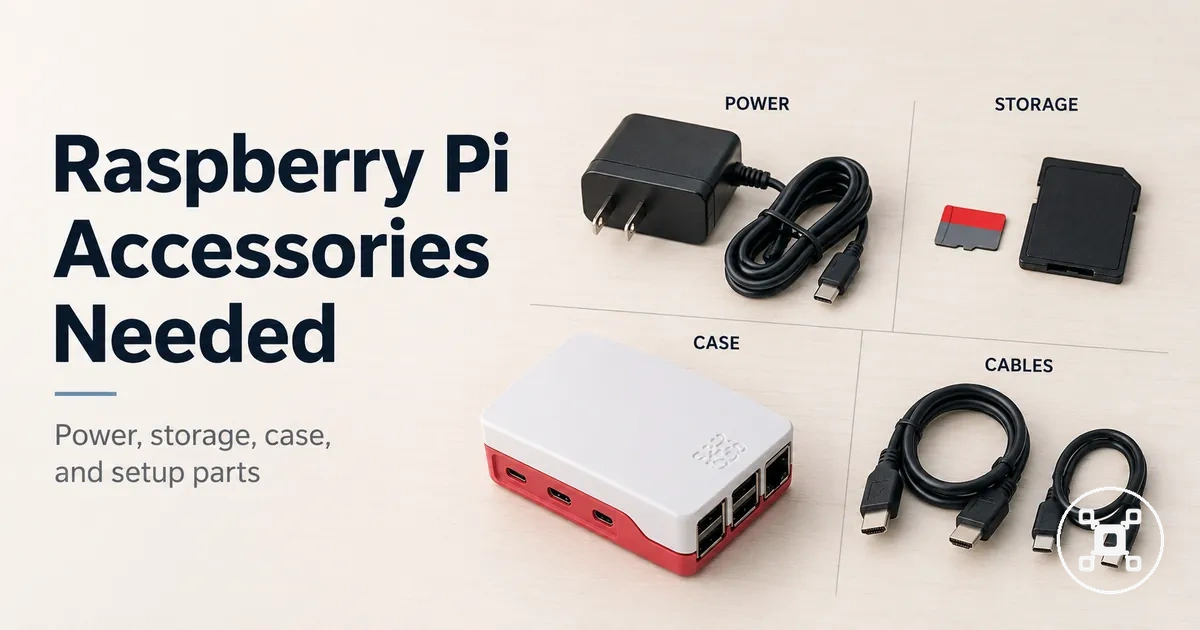
Raspberry Pi accessories needed for setup and starter parts
Raspberry Pi accessories are the setup parts that help a board become usable, stable, compatible, and expandable for a chosen purpose. Essential parts support basic operation, while optional parts support protection, cooling, connection, or project expansion based on the board model, setup method, and intended use.

Raspberry Pi accessories are selected by their setup role: power parts provide the electrical connection, storage parts provide the operating system location, connection parts link external devices, and protective parts support physical handling conditions. The Raspberry Pi hub provides broader category context, while this page focuses on the starter accessories needed around the board.
The Raspberry Pi hub provides broader category context, while this page focuses on the starter accessories needed around the board.
Essential parts are the accessories required for a functional setup, such as power and storage components, while optional parts are chosen according to the use case. A desktop-style setup may require display and input connection parts, while a project-focused or remote setup may use a different combination of accessories.
A desktop-style setup may require display and input connection parts, while a project-focused or remote setup may use a different combination of accessories.
The main Raspberry Pi accessory categories can be grouped by their setup function:
- Essential parts: Power and storage parts support startup requirements and operating system access.
- Optional parts: Cases, cooling accessories, and expansion parts support protection, heat control, or additional project capabilities when those functions are needed.
- Compatibility parts: Cables, adapters, and connection accessories must match the Raspberry Pi board connections, connected devices, and intended setup conditions.
Table of Contents
Raspberry Pi accessory scope: essential, conditional, and optional parts
Raspberry Pi accessories are external or add-on parts that complete, protect, connect, cool, or extend a Raspberry Pi board. The accessory scope separates essential parts, conditional parts, and optional parts so users can match setup parts with their Raspberry Pi configuration, compatibility needs, and intended use.

Essential parts support core setup functions, while conditional and optional parts support specific requirements. Power and storage accessories relate to basic operation, cases and cooling accessories relate to protection or heat control conditions, and display input, cables, adapters, and GPIO expansion parts relate to connection or project requirements.
Essential parts support core setup functions, while conditional and optional parts support specific requirements.
Raspberry Pi accessory categories can be classified by their setup role:
- Essential parts: Power and storage accessories support startup requirements and operating system access for a usable Raspberry Pi setup.
- Conditional parts: Cases and cooling accessories are selected when protection, airflow, workload conditions, board generation, or mounting needs make them relevant.
- Optional parts: Display input accessories, cables, adapters, and GPIO expansion parts support specific connection needs or project extensions rather than every Raspberry Pi setup.
Operating system installation, deep power troubleshooting, and storage boot strategies are related contexts, but they are separate topics unless they directly influence the choice of Raspberry Pi accessories.
Core Raspberry Pi parts needed to boot and connect
Core Raspberry Pi parts needed to boot and connect are the board, power supply, storage media, and connection parts required for a usable setup. These essential parts support startup and operating system access, while display and input accessories depend on whether the Raspberry Pi is used as a desktop-style system, headless setup, or project-focused device.

Each Raspberry Pi setup part has a specific role. The Raspberry Pi board provides the main hardware platform, the power supply provides electrical input, and storage media provides the location for the operating system and boot files. Display cables, keyboards, and mice support direct interaction when local control is needed.
Each Raspberry Pi setup part has a specific role.
The core setup parts can be grouped by their function:
- Raspberry Pi board: The main component that connects accessories and runs the selected operating system.
- Power supply and cable: These essential parts provide the power connection required for startup and normal operation.
- Storage media: A microSD card or another compatible storage option provides the operating system location and boot data.
- Display and input parts: A display cable, keyboard, and mouse support a direct desktop-style setup, while a headless setup can reduce the need for local display and input accessories.
Choosing the right combination of accessories depends on the intended setup method and connected hardware. The Raspberry Pi setup process provides the next context for connecting these parts into a working system.
Power supply and cable for stable startup
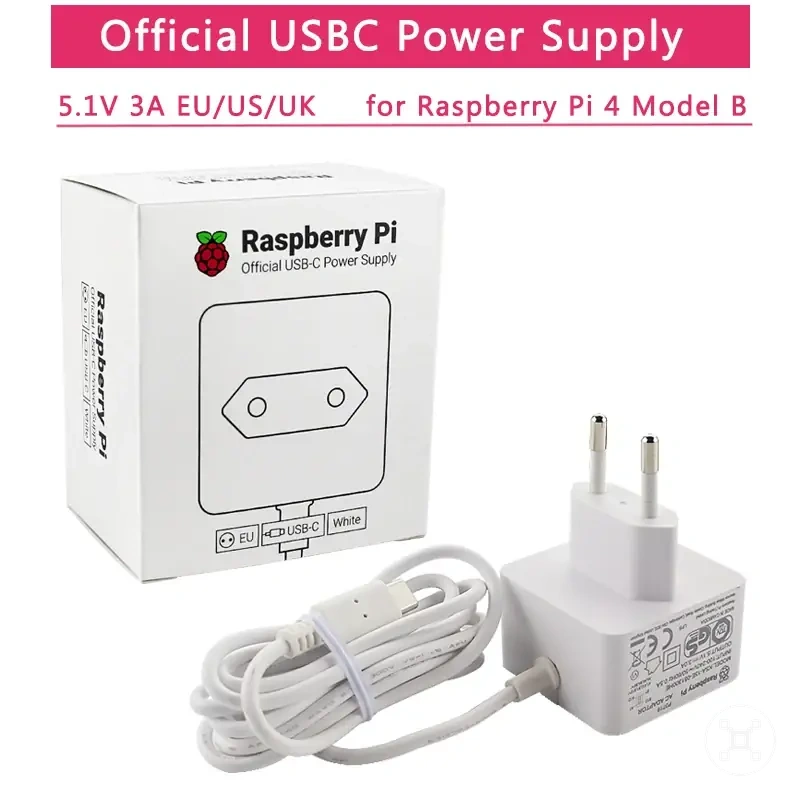
Power supply and cable for stable startup provide the electrical connection that allows a Raspberry Pi to begin operation reliably. The connector type, power delivery, and cable condition are key setup factors because an unsuitable connection can contribute to startup issues such as a low-voltage warning or failed boot attempt.
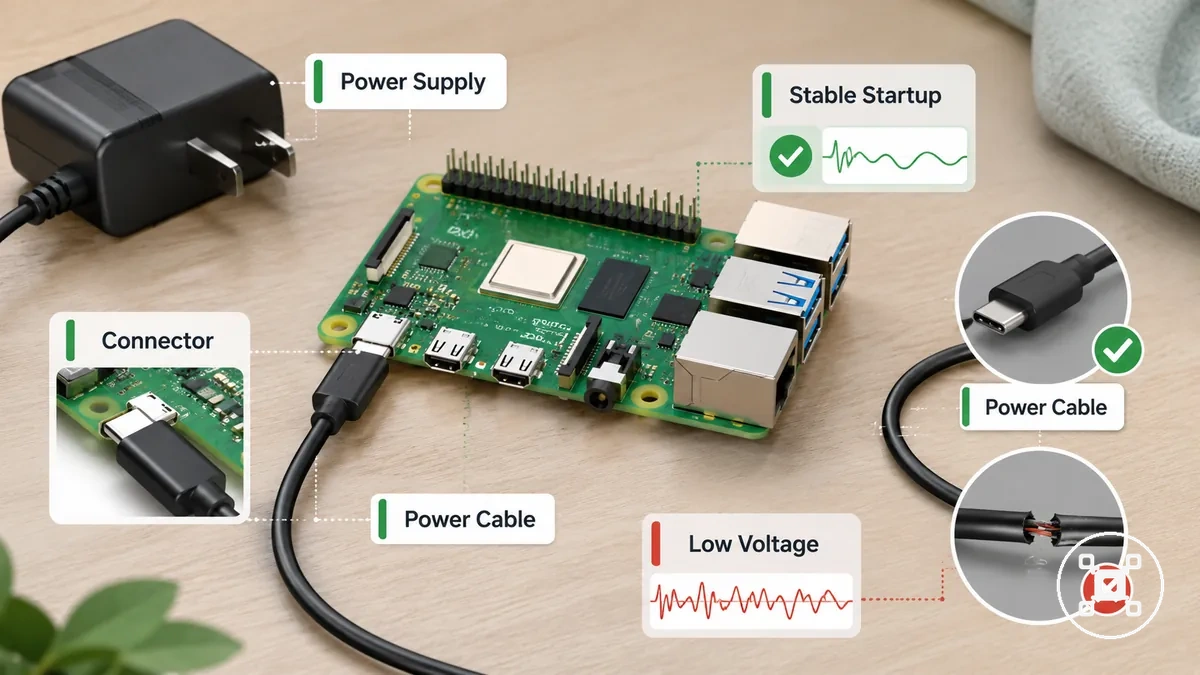
The power supply should match the Raspberry Pi connection requirements, while the power cable should provide a suitable link between the supply and the board. Weak chargers, long cables with poor power delivery, or underpowered adapters can become a concern when the Raspberry Pi configuration includes additional peripherals that increase power demand.
The power supply should match the Raspberry Pi connection requirements, while the power cable should provide a suitable link between the supply and the board.
Important power supply and cable considerations include:
- Connector type: The power cable connector must match the Raspberry Pi board connection used by the setup.
- Power delivery: The power supply must provide suitable electrical input for the Raspberry Pi configuration and connected accessories.
- Cable quality: A suitable power cable helps maintain a stable connection, while cable limitations can contribute to unreliable startup conditions.
For deeper compatibility details, Raspberry Pi power requirements explains how power needs relate to different setup conditions.
MicroSD card or storage media for the operating system
MicroSD card or storage media for the operating system gives the Raspberry Pi a location for storing the operating system and boot files required for startup. The storage choice affects setup reliability because capacity, speed, endurance, and compatibility influence how the Raspberry Pi stores and accesses system data.
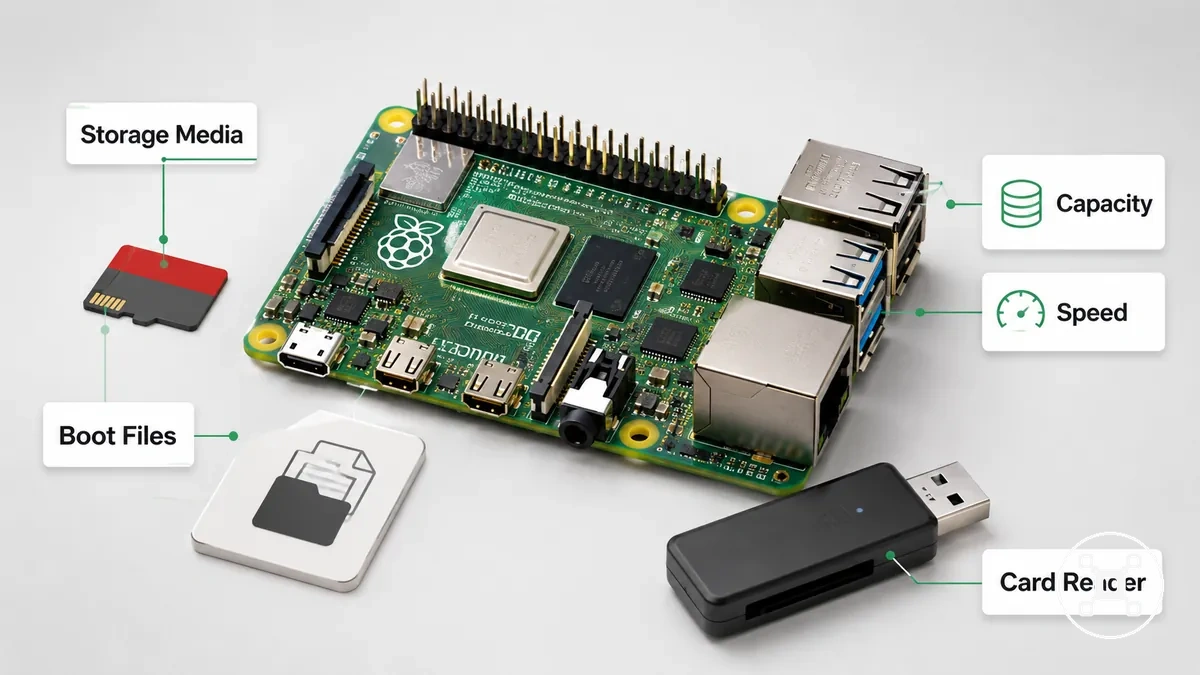
The microSD card or storage media should match the Raspberry Pi setup method and intended use. Storage capacity determines available space for operating system files and user data, speed affects data access performance, and endurance describes how suitable the storage option is for repeated use conditions. A card reader can help beginners prepare storage media before connecting it to the Raspberry Pi.
The microSD card or storage media should match the Raspberry Pi setup method and intended use.
Important storage considerations include:
- Boot files: Storage media provides the location where Raspberry Pi operating system files and startup data are stored.
- Capacity: Storage capacity defines how much system data, applications, and user files the storage media can contain.
- Speed and reliability: Storage speed characteristics can influence setup responsiveness and reliability during regular operation.
- Compatibility: The storage option should match the Raspberry Pi model, boot method, and intended setup requirements.
For broader storage choices and related methods, Raspberry Pi storage options provides deeper context beyond the accessory role covered in this section.
Display cable, keyboard, and mouse for first setup
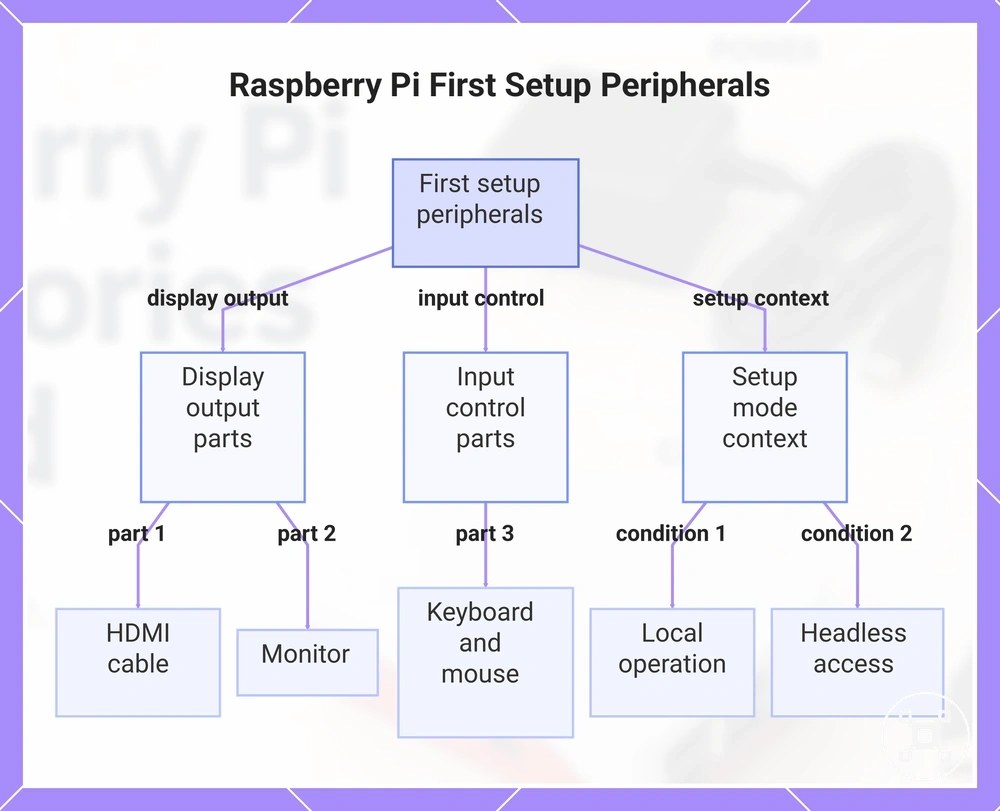
Display cable, keyboard, and mouse for first setup are connection parts used when a Raspberry Pi needs direct local interaction. These accessories support a desktop-style setup by providing display output through a monitor and input through a keyboard and mouse, while a headless setup may reduce the need for these local peripherals.
The HDMI cable, monitor, keyboard, and mouse each support a specific first-use function.
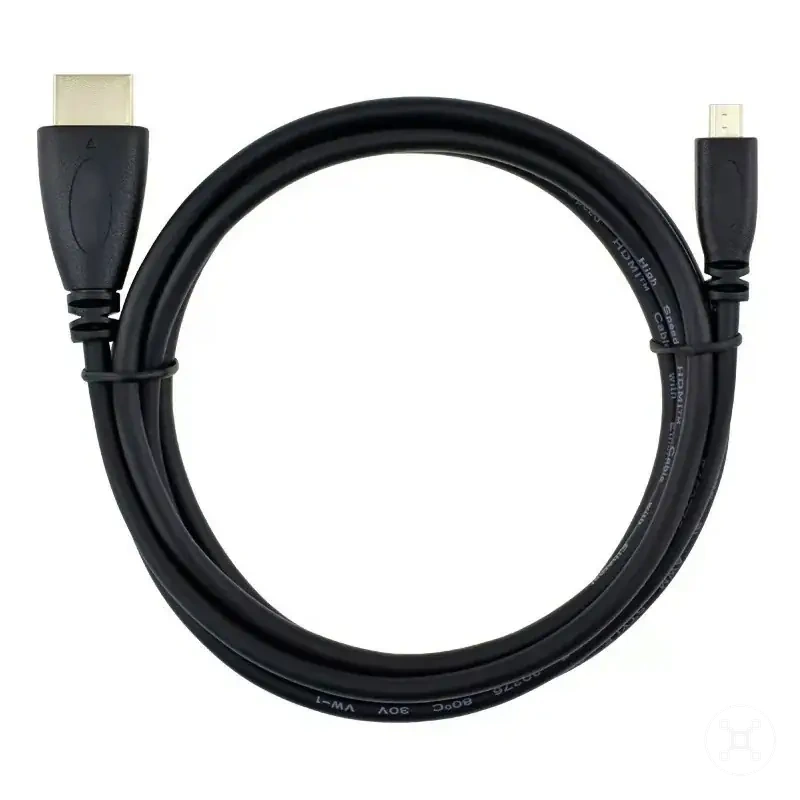
The HDMI cable, monitor, keyboard, and mouse each support a specific first-use function. The HDMI cable connects the Raspberry Pi display output to a compatible monitor, while the keyboard and mouse provide direct control during interactive use. The required combination depends on whether the Raspberry Pi is operated locally or accessed remotely.
- HDMI cable: A display connection part that transfers the Raspberry Pi display output to a compatible monitor.
- Monitor: A local display device used when visual output is needed during a desktop-style setup.
- Keyboard and mouse: Input accessories used for direct interaction during first setup and local control.
- Headless setup: A remote access approach where local display and input parts may be reduced because control happens through another device.
This chart shows the essential peripherals for Raspberry Pi first setup and how the setup mode affects the required components.
Case and cooling accessories that depend on use
Case and cooling accessories that depend on use help determine when a Raspberry Pi needs protection or additional heat management. A case, cooling fan, heatsink, or passive cooling solution is selected according to workload, enclosure conditions, airflow, and board model rather than being automatically required for every setup.
The choice of case and cooling accessories depends on the operating conditions of the Raspberry Pi.
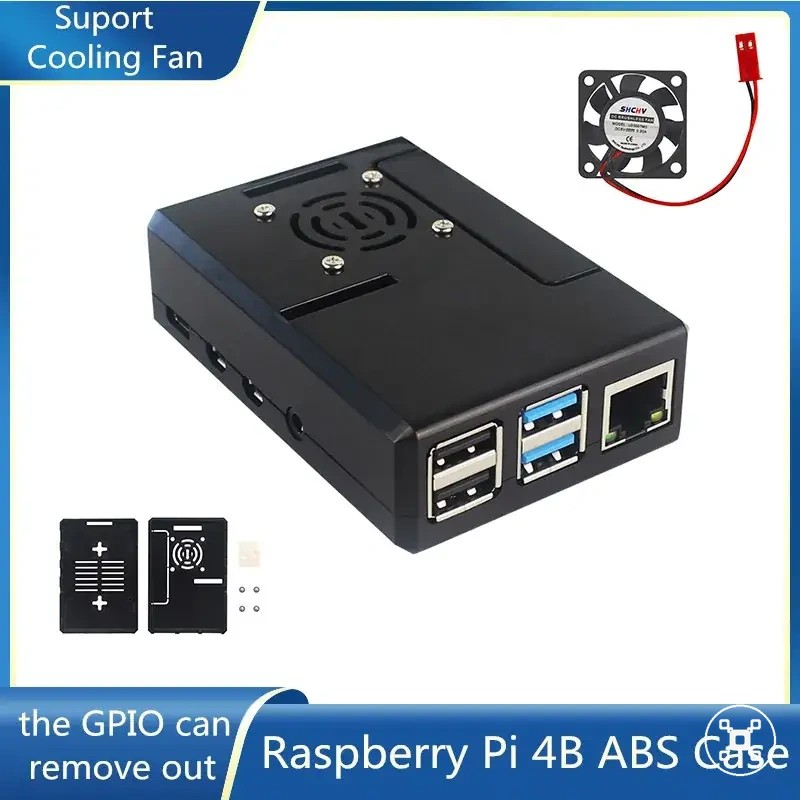
The choice of case and cooling accessories depends on the operating conditions of the Raspberry Pi. A case can support board protection, port access, and mounting needs, while a cooling fan, heatsink, or passive enclosure can support heat control when workload or enclosure design creates greater cooling demands.
A case can support board protection, port access, and mounting needs, while a cooling fan, heatsink, or passive enclosure can support heat control when workload or enclosure design creates greater cooling demands.
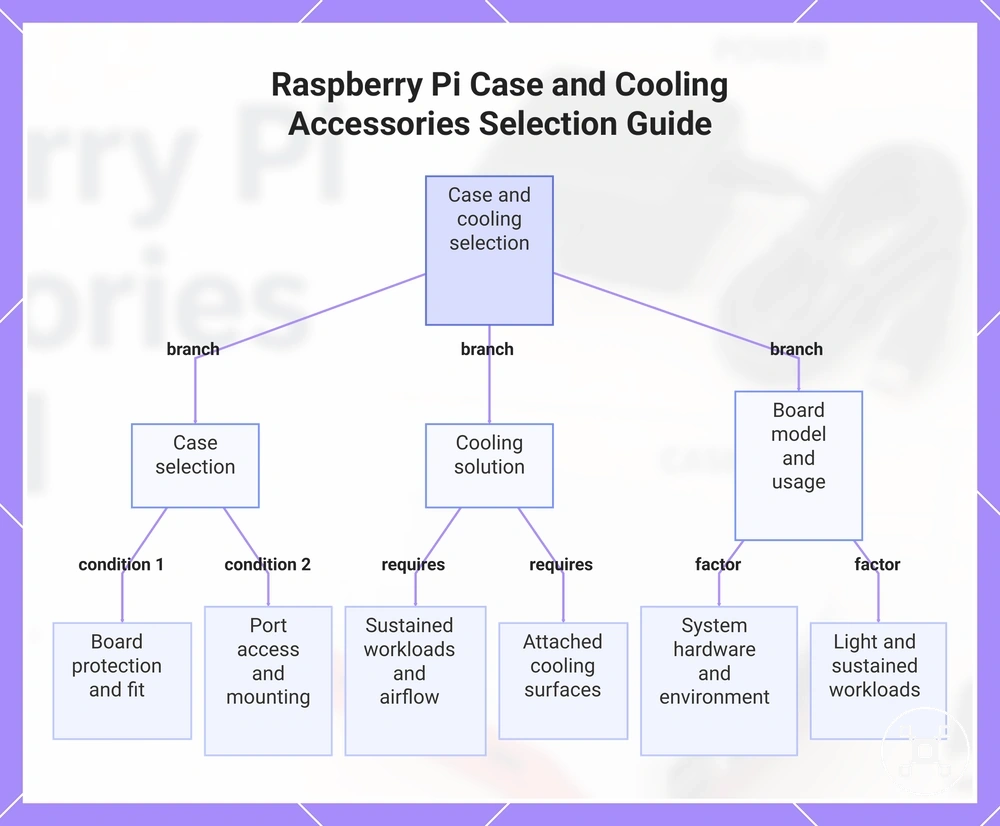
Selection factors can be grouped by the setup condition:
- Case: A case is useful when board protection, board fit, port access, exposure control, or mounting requirements are important for the setup.
- Cooling fan: A cooling fan is considered when sustained workloads and airflow conditions create a need for active heat control.
- Heatsink and passive cooling: Heatsinks or passive cooling parts support heat management through attached cooling surfaces without active airflow.
- Board model and usage: Cooling choices depend on the Raspberry Pi board model, enclosure design, airflow availability, and whether the workload is light, enclosed, or sustained.
For deeper thermal guidance and conditions that influence cooling choices, Raspberry Pi cooling requirements provides additional context beyond this selection overview.
This chart shows the main selection factors for Raspberry Pi cases, cooling fans, and heatsink/passive solutions, and the conditions that influence cooling choices.
This chart shows the main selection factors for Raspberry Pi cases, cooling fans, and heatsink/passive solutions, and the conditions that influence cooling choices.
Case protection for exposed boards
Case protection for exposed boards helps decide when a Raspberry Pi case is useful for protecting, mounting, and handling an open board. A case is selected when physical exposure, connection access, board fit, or placement conditions make protection and usability important.
A Raspberry Pi case changes how the board is used by adding a protective structure while keeping required connections accessible.
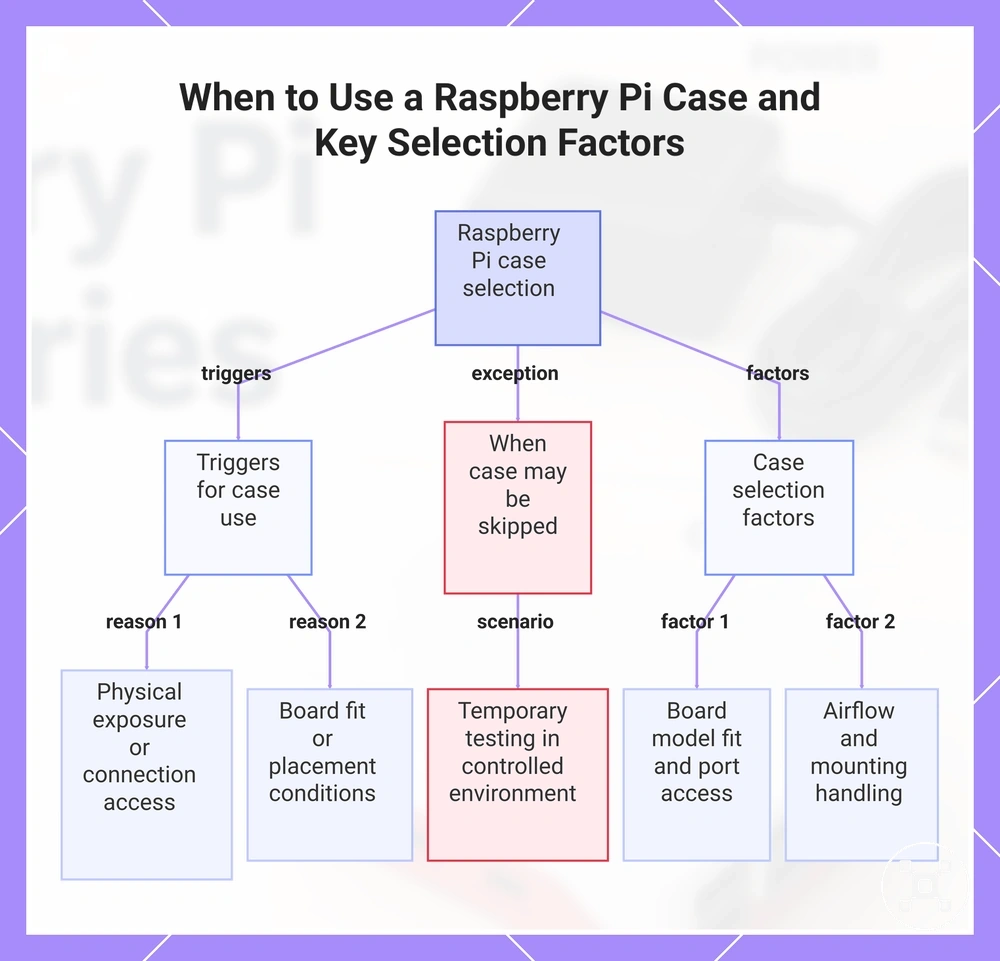
A Raspberry Pi case changes how the board is used by adding a protective structure while keeping required connections accessible. An exposed board may be acceptable for temporary testing in a controlled environment, but a case can make repeated handling, mounting, and everyday use more practical.
Case selection factors include:
- Board model fit: The case should match the Raspberry Pi board model so the enclosure aligns with the board layout and required connections.
- Port and GPIO access: A suitable case keeps required ports and GPIO connections available for the intended setup.
- Airflow: Case design affects airflow around the board, so enclosure structure should support the cooling approach used by the setup.
- Mounting and handling: A case is useful when the Raspberry Pi needs stable placement, physical protection, or frequent handling.
This chart shows when a Raspberry Pi case is needed, when it can be skipped, and the main factors to consider when selecting one.
Fan, heatsink, or passive cooling for heat control
Fan, heatsink, or passive cooling for heat control helps manage Raspberry Pi heat conditions when workload, case design, airflow, ambient temperature, or board model create a need for additional cooling support. Cooling accessories are chosen according to the setup condition rather than being automatically required for every Raspberry Pi.
The choice of cooling fan, heatsink, active cooler, or passive cooling path depends on how the Raspberry Pi is used.
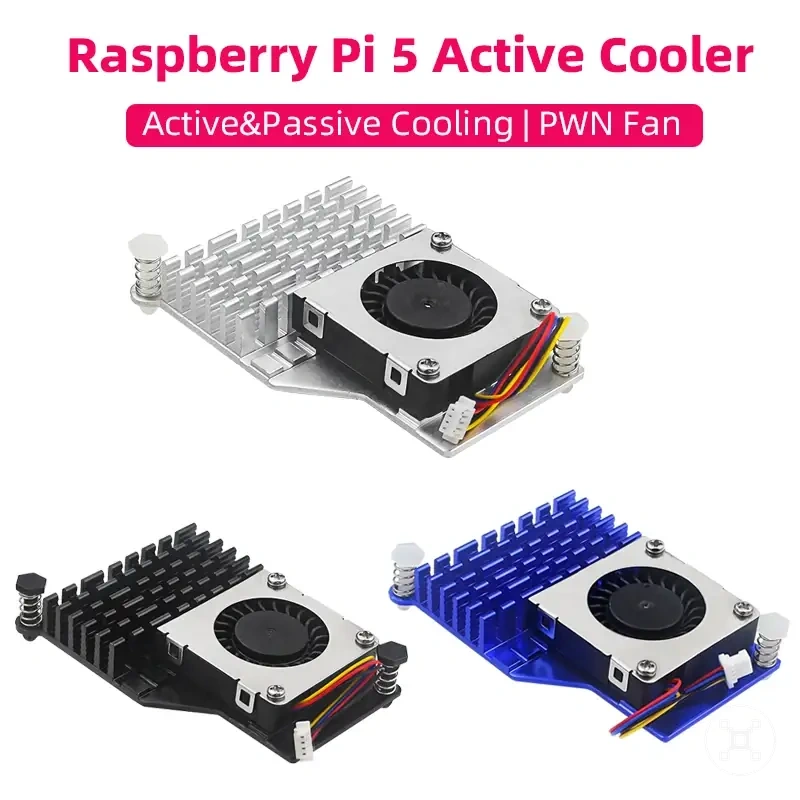
The choice of cooling fan, heatsink, active cooler, or passive cooling path depends on how the Raspberry Pi is used. A cooling fan provides active airflow when the workload and enclosure conditions require extra heat control, while a heatsink or passive cooling approach supports heat management without active airflow. These choices can influence factors such as throttling risk, noise, stability, and comfort depending on the operating environment.
These choices can influence factors such as throttling risk, noise, stability, and comfort depending on the operating environment.
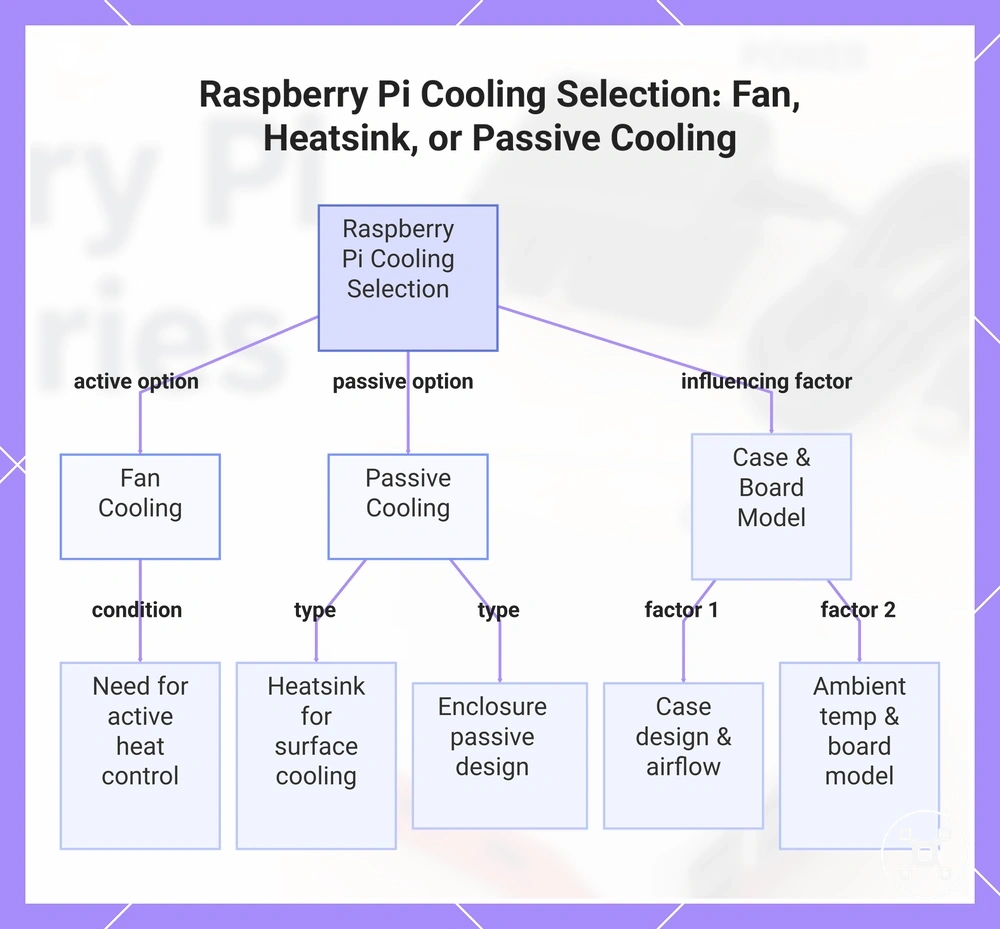
Cooling considerations can be grouped by condition:
- Cooling fan: A cooling fan is considered when sustained workload and airflow conditions create a need for active heat control.
- Heatsink: A heatsink supports passive heat transfer when the setup benefits from additional surface-based cooling.
- Passive cooling: A passive cooling path uses enclosure design, airflow, and heat dissipation conditions without an active fan.
- Case and board model: Cooling choices depend on case design, airflow availability, ambient temperature, and the Raspberry Pi board model used.
For deeper thermal limits and cooling comparisons, Raspberry Pi cooling requirements provides additional context beyond this accessory selection decision.
For deeper thermal limits and cooling comparisons, Raspberry Pi cooling requirements provides additional context beyond this accessory selection decision.
This chart shows the main cooling options for a Raspberry Pi and the conditions that determine each choice, including factors like workload, case design, and ambient temperature.
Model compatibility checks before buying accessories
Model compatibility checks before buying accessories help confirm that a Raspberry Pi accessory matches the intended Raspberry Pi model and setup conditions. Compatibility depends on the connector, board generation, physical fit, and use case, so each accessory choice should be checked before connecting it to a specific board.
A Raspberry Pi model can require different accessory conditions depending on its board layout and intended use.
A Raspberry Pi model can require different accessory conditions depending on its board layout and intended use. A connector mismatch can prevent a connection part from fitting correctly, while an unsuitable case footprint or cooler fit can affect access, placement, or compatibility with the board generation.
| Compatibility factor | What to check | Decision effect |
|---|---|---|
| Board generation | Confirm the Raspberry Pi model and board generation before selecting accessories. | Helps match the accessory choice to the correct hardware layout. |
| Power connector | Check that the power accessory uses the connector required by the Raspberry Pi model. | Reduces the risk of an unsuitable power connection. |
| HDMI type | Match the display cable connection with the board output and display input. | Helps ensure the display connection fits the intended setup. |
| Case footprint | Check that the case matches the board layout and required port access. | Supports physical fit and keeps important connections available. |
| Cooler fit | Confirm that cooling accessories align with the board model and setup conditions. | Helps select suitable cooling parts for the intended use. |
| Storage path | Check that the storage option matches the intended boot method and setup requirements. | Helps avoid storage compatibility issues during preparation. |
Checking compatibility before choosing accessories helps separate general parts from model-specific requirements. The correct accessory choice depends on the Raspberry Pi model, connector requirements, board fit, and the way the board will be used.
Power connector and wattage differences by Raspberry Pi model
Power connector and wattage differences by Raspberry Pi model require compatibility checks before selecting a power accessory. A Raspberry Pi model may use different connector requirements and power capacity conditions, so the correct accessory choice depends on the board generation, connector fit, and intended use.
The power accessory should match the Raspberry Pi model, connector type, and setup conditions.
The power accessory should match the Raspberry Pi model, connector type, and setup conditions. Cable condition, attached peripherals, and storage devices can affect power sensitivity because additional hardware can increase demand during operation and may influence boot stability.
| Compatibility check | Decision factor |
|---|---|
| Connector type | Match the power connector to the Raspberry Pi model and board generation. |
| Supply class | Select a power accessory that matches the board requirements and intended use conditions. |
| Cable condition | Check cable condition because unsuitable connections can affect power delivery and boot stability. |
| Attached peripherals | Consider USB peripherals and storage devices because additional hardware can increase power sensitivity. |
| Accessory fit | Confirm that the power accessory matches the intended Raspberry Pi model and setup configuration. |
Power connector compatibility should be checked alongside the intended use case because a suitable accessory for one Raspberry Pi model may not match another board generation or connected setup.
HDMI cable type differences by Raspberry Pi model
HDMI cable type differences by Raspberry Pi model require checking the display connection before selecting a cable or adapter. A Raspberry Pi model may use a different HDMI connector type, so compatibility depends on the board display output, the cable connection, and the monitor input.
The HDMI cable or adapter path should match the Raspberry Pi display output and the monitor connection.
The HDMI cable or adapter path should match the Raspberry Pi display output and the monitor connection. Choosing the wrong connector can prevent a direct display connection, while selecting a compatible adapter path can connect different connector types for the intended setup.
- Connector type: Check the Raspberry Pi model connector and select an HDMI cable or adapter that matches the display output.
- Standard or micro HDMI path: Choose the cable type or adapter path that fits the board connector and monitor input used by the setup.
- Monitor input: Confirm that the monitor accepts the selected connection path so the display connection can be established.
- Adapter choice: Use an adapter path when the Raspberry Pi connector and monitor input do not match directly.
Case and cooler fit by board generation
Case and cooler fit by board generation requires checking the Raspberry Pi board layout before selecting a case, cooling fan, or heatsink. A compatible accessory choice depends on the board model, footprint, ports, headers, and clearance conditions that affect physical fit and airflow.
The case and cooling accessory should match the Raspberry Pi board model and physical layout.
The case and cooling accessory should match the Raspberry Pi board model and physical layout. Board shape, port cutouts, and GPIO access affect whether a case provides the required connections, while fan or heatsink clearance affects whether cooling parts fit within the available space.
Fit checks include:
- Board footprint: Check that the case or cooling accessory matches the Raspberry Pi board model layout.
- Port cutouts: Confirm that the case keeps required connectors accessible and does not block intended connections.
- GPIO access: Check header clearance when the setup requires GPIO connections.
- Fan and heatsink clearance: Confirm that cooling parts fit the board layout and leave suitable space for airflow.
A case designed for one board generation may not match another board layout, which can result in blocked ports, unavailable headers, or unsuitable cooler clearance. Checking the board model before selecting accessories helps prevent fit issues.
Optional accessories for projects and expansion
Optional accessories for projects and expansion help Raspberry Pi users choose add-on parts based on a project goal rather than treating them as required setup parts. Essential parts support basic operation, while optional parts are selected when a specific use case requires extra capability, connection options, or convenience.
The accessory choice depends on the Raspberry Pi project type, existing equipment, and compatibility requirements.
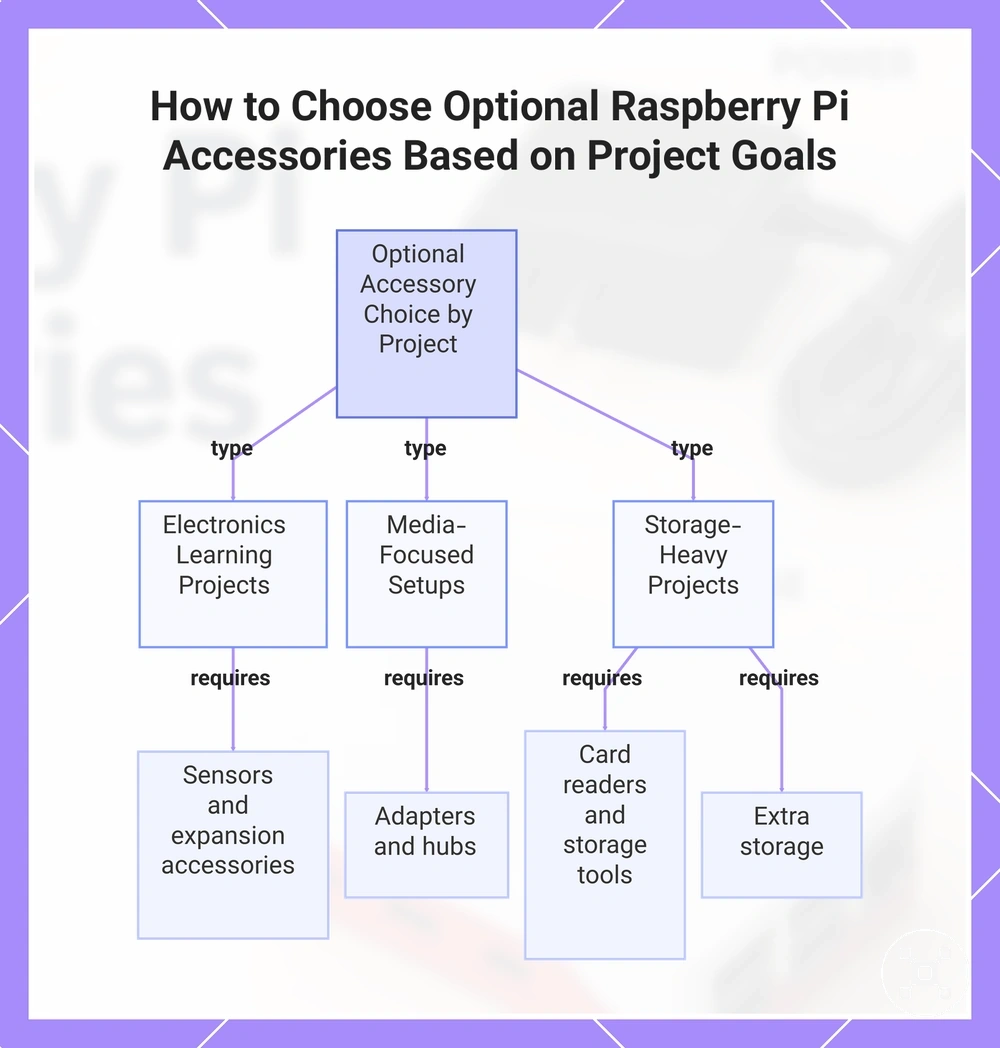
The accessory choice depends on the Raspberry Pi project type, existing equipment, and compatibility requirements. Electronics learning projects may need expansion accessories or sensors, media-focused setups may use adapters or hubs, and storage-heavy projects may need additional storage tools or card readers.
Optional accessory groups include:
- Electronics expansion: Sensors and expansion accessories are selected when a project requires additional hardware interaction or component connections.
- Adapters and hubs: Connection accessories support projects that need extra device connections or different connection paths.
- Card readers and storage tools: These accessories support storage preparation, management, or projects that require additional storage handling.
- Extra storage: Additional storage accessories are considered when a project needs more space than the existing setup provides.
A beginner using a Raspberry Pi for basic operation may only need essential parts, while electronics learning, media use, or storage-heavy projects may require different optional accessories. Selecting accessories by use case helps avoid treating every expansion part as a requirement.
Selecting accessories by use case helps avoid treating every expansion part as a requirement.
This chart shows the main project types that benefit from optional Raspberry Pi accessories and the specific accessory categories each project requires.
GPIO jumper wires, breadboards, and electronics add-ons
GPIO jumper wires, breadboards, and electronics add-ons are optional Raspberry Pi accessories used when a project requires electronics expansion. These accessories are relevant when a user plans to connect sensors, test components, or use the GPIO header instead of only using the Raspberry Pi for basic operation.
GPIO accessories support project expansion by providing connection and testing options for electronics work.
GPIO accessories support project expansion by providing connection and testing options for electronics work. GPIO jumper wires connect the Raspberry Pi with external components, while a breadboard supports temporary component arrangement during project development. Sensors and other electronics add-ons are selected according to the project requirement, compatibility, and connection conditions.
Project-readiness checklist:
- GPIO header access: Check that the Raspberry Pi setup provides access to the GPIO header when electronics expansion is required.
- GPIO jumper wires: Use jumper wires when a project needs connections between the Raspberry Pi and external components.
- Breadboard: Use a breadboard when components need temporary placement and testing during electronics projects.
- Sensors and add-ons: Select sensors or electronics accessories according to the project goal and compatibility conditions.
- Voltage caution: Apply care when wiring components because unsuitable connections or voltage conditions can create project risks.
Adapters, hubs, card readers, and extra storage tools
Adapters, hubs, card readers, and extra storage tools help Raspberry Pi users solve specific setup constraints by adding connection flexibility or simplifying preparation tasks. These accessories are selected according to the required workflow, available ports, and existing equipment rather than being required for every setup.
Each tool supports a different setup condition.
Each tool supports a different setup condition. A USB hub can help when multiple USB devices are needed, a card reader can support preparing a microSD card for the operating system and boot files, and storage adapters can help when a project requires a different storage connection path. HDMI adapters and cable helpers support connection changes when the Raspberry Pi setup and connected devices use different interfaces.
- USB hubs: A hub is selected when the Raspberry Pi setup needs additional USB connections for multiple devices.
- Card readers: A card reader supports first setup when a microSD card needs to be prepared on another computer before use.
- Storage adapters: Storage adapters support specific storage media connections when the existing setup does not match the required workflow.
- HDMI adapters: HDMI adapters support display connections when the Raspberry Pi output and monitor input require an adapter path.
- Network or cable helpers: Connection helpers are selected when a setup requires a compatible cable path between devices.
A practical example is using a card reader to prepare a microSD card on another computer before loading the Raspberry Pi operating system, or using a USB hub when a project needs multiple USB devices connected. For broader storage considerations, Raspberry Pi storage options provides additional context beyond these accessory tools.
Starter kit versus buying Raspberry Pi accessories separately
Starter kit versus buying Raspberry Pi accessories separately is a decision between bundled convenience and selecting individual parts. A Raspberry Pi starter kit can suit users who want grouped setup parts, while accessories separately can suit users who want more control over compatibility, part selection, and existing equipment use.
Starter kit versus buying Raspberry Pi accessories separately is a decision between bundled convenience and selecting individual parts.
The choice depends on the Raspberry Pi model, available accessories, setup goal, and preference for bundle contents or individual selection. A starter kit may reduce the need to identify each required part, while buying accessories separately can help users avoid duplicate parts and choose components based on their specific requirements.
| Decision factor | Raspberry Pi starter kit | Accessories separately |
|---|---|---|
| Bundle contents | Groups common setup parts together for a more complete starting configuration. | Allows each accessory to be selected according to the intended setup. |
| Compatibility | Can simplify checking whether included parts match the Raspberry Pi model. | Requires checking each accessory for model fit and intended use. |
| Missing accessories | May not include every part required for a specific project or preferred setup. | Allows users to add only the required connection parts or upgrades. |
| Upgrade flexibility | Provides a fixed starting combination that can be expanded later. | Provides more control over selecting future add-on parts. |
| Duplicate parts | Can include parts already owned, creating possible duplicates. | Reduces duplicate parts by using existing accessories where suitable. |
A Raspberry Pi kit or board comparison helps clarify whether bundled convenience or separate-part control better matches the user’s situation. Beginners starting without existing setup parts may prefer a kit approach, while upgraders or users who already own cables or storage may prefer accessories separately.
Comparing the full setup need rather than only the initial bundle helps users choose between convenience and flexibility.
The buying decision also depends on the Raspberry Pi total cost, including required parts, existing accessories, and possible duplicate purchases. Comparing the full setup need rather than only the initial bundle helps users choose between convenience and flexibility.
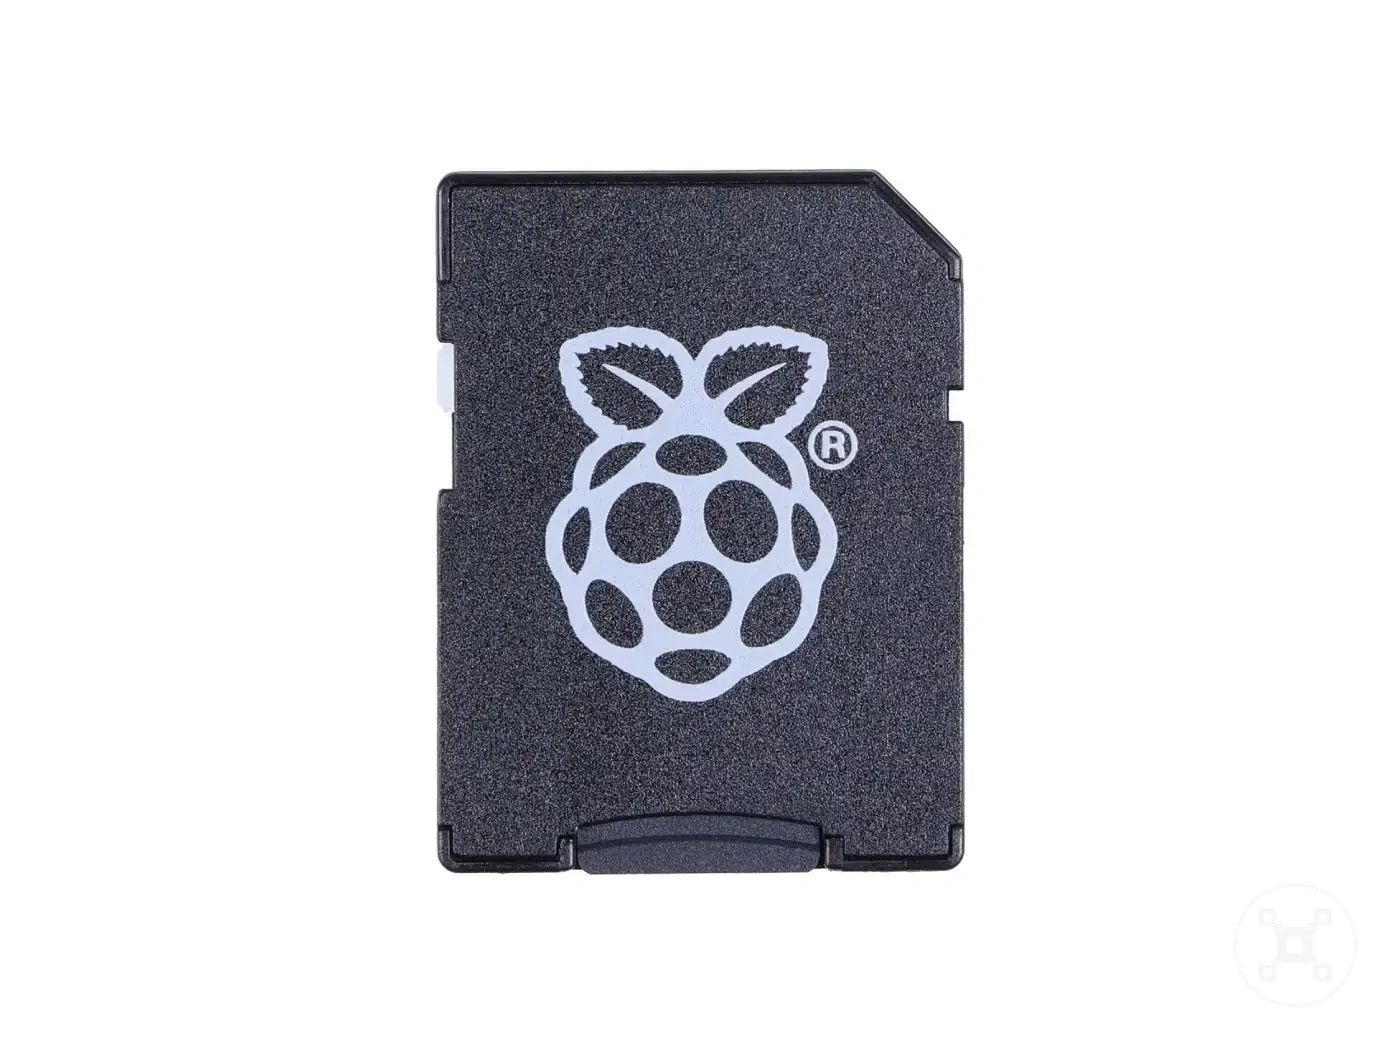
Here are product examples that may make comparison easier.
Here are product examples that may make comparison easier. Before buying, always review the compatibility criteria, essential features, and product details.
Accessory mistakes that cause setup and boot problems
Accessory mistakes that cause setup and boot problems can appear as boot problems, display problems, power issues, heat concerns, or missing input during a Raspberry Pi setup. Checking the related accessory first can help identify whether a setup part is unsuitable, unprepared, or mismatched with the intended configuration.
The diagnostic checks below connect common symptoms with likely accessory causes and the next condition to verify.
Accessory-related symptoms can have multiple causes because the Raspberry Pi model, operating system image, connected peripherals, and configuration affect the result. The diagnostic checks below connect common symptoms with likely accessory causes and the next condition to verify.
| Symptom | Likely accessory issue | Check |
|---|---|---|
| Failed boot or low-voltage warning | Weak power supply or unsuitable power connection | Check the power supply connection and consider whether attached peripherals increase power sensitivity. |
| No display or display problems | Wrong HDMI cable or connector mismatch | Check that the HDMI cable or adapter matches the Raspberry Pi display output and monitor input. |
| Boot problems after storage preparation | Unprepared storage or missing boot files | Check that the storage media contains the required operating system preparation before startup. |
| Blocked ports or reduced airflow | Incompatible case or cooler fit | Check that the case or cooling accessory matches the Raspberry Pi board layout and required access. |
| No local input during setup | Missing keyboard or mouse | Check whether local input devices are needed or whether the setup uses a headless access method. |
Some edge cases change the accessory check. A headless setup may not require a display or input devices, while a local setup with no display may require checking the HDMI connection path first. For broader guidance, Raspberry Pi setup provides additional context beyond accessory-related checks.