
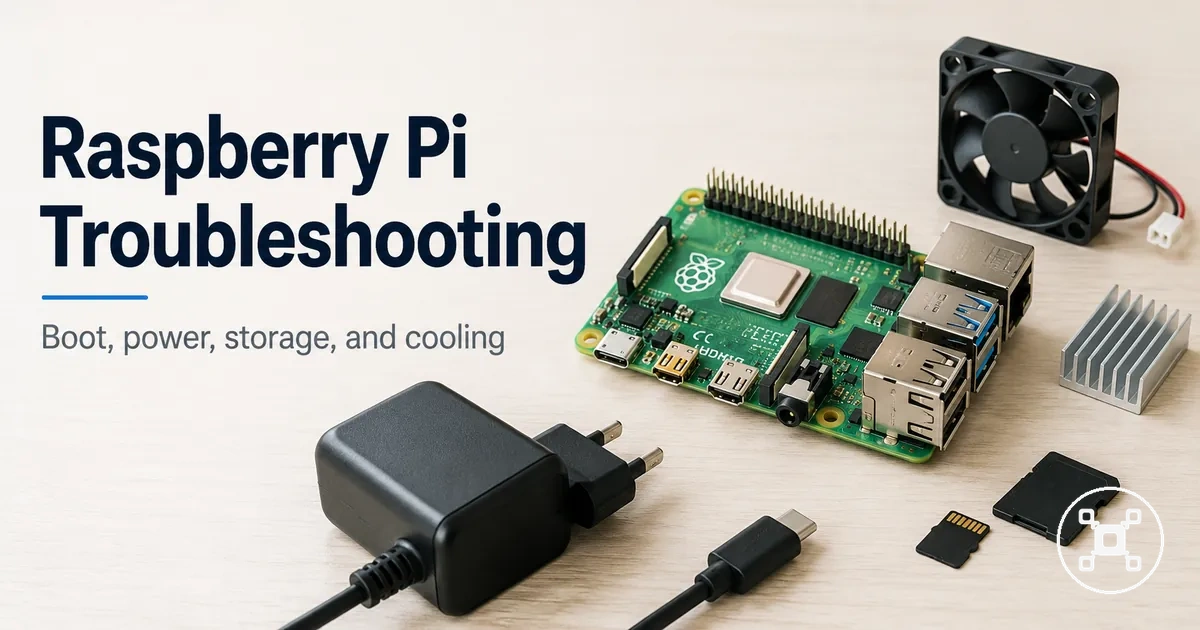
Raspberry Pi boot failure and overheating troubleshooting
Raspberry Pi boot failure and overheating are diagnostic problems where the visible symptom does not always identify the underlying cause. A Raspberry Pi that is not booting may show no display, undervoltage symptoms, boot media problems, or heat-related behaviour. Troubleshooting starts by separating symptoms from causes before changing components.
Troubleshooting starts by separating symptoms from causes before changing components.
When a Raspberry Pi shows no display, undervoltage signs, corrupted microSD card symptoms, or overheating behaviour, the same symptom can point toward different checks. The Raspberry Pi hub provides the wider context for understanding Raspberry Pi hub categories, while this page focuses on identifying boot and heat-related symptoms before replacement decisions. Verification of the power supply, cable connection, boot media, display signals, and cooling conditions helps narrow the diagnostic direction.
A safe diagnostic order begins with observing the symptom, checking visible signals, and then evaluating the related condition.
A safe diagnostic order begins with observing the symptom, checking visible signals, and then evaluating the related condition. Power supply stability, cable connection, microSD card or other boot media state, cooling airflow, workload, and throttling behaviour each provide different diagnostic clues. Separating no display from no boot and separating a heat problem from another startup issue creates a clearer path toward the correct check.
Table of Contents
Boot and heat symptoms before replacing parts
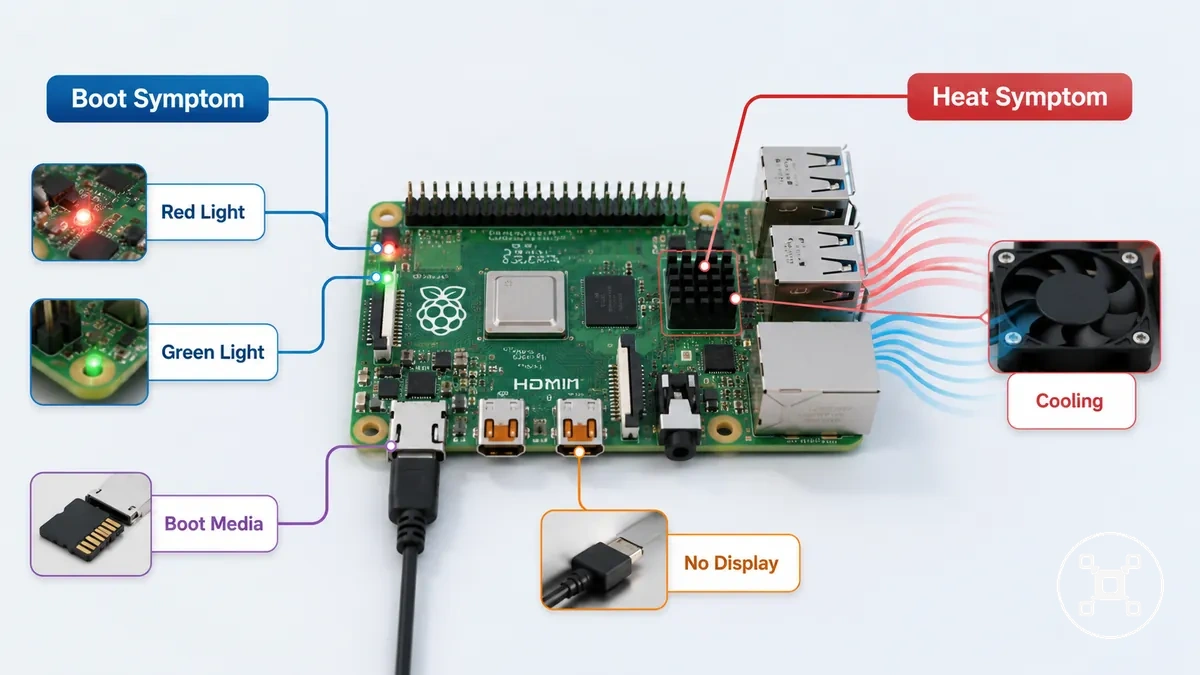
Raspberry Pi symptoms should be separated before any replacement decision because the same boot symptom or heat symptom can point toward different diagnostic directions. A boot symptom, such as a red light, green light, or no display condition, is a visible signal that requires further checking rather than a direct replacement decision. Identifying the symptom category first helps reduce replacement risk.
Identifying the symptom category first helps reduce replacement risk.
Boot and heat symptoms are classified through visible signals, startup behaviour, and thermal behaviour. A red light is a power-related signal, a green light is an activity signal, no display is a display-output symptom, and shutdown or throttling are heat-related signals that require checking workload and cooling conditions. Similar symptoms can have different diagnostic directions depending on the Raspberry Pi model, power supply, storage state, display connection, and cooling environment.
These categories help identify what to check before replacing parts.
The table below separates common Raspberry Pi boot and heat symptoms by visible signal, likely diagnostic direction, and replacement risk. These categories help identify what to check before replacing parts.
| Symptom | Visible signal | Likely diagnostic direction | Replacement risk |
|---|---|---|---|
| Boot symptom | Power light or activity light behaviour without expected startup output | Check startup signals, power conditions, and boot media status before identifying the cause | Replacing parts before verification may target the wrong diagnostic area |
| No display | Blank screen or missing display output | Check the display path and separate display symptoms from actual boot failure | Replacing the Raspberry Pi without confirming the boot state may not address the symptom |
| Power-light symptom | Red light or other power indicator behaviour | Check power supply conditions and related startup signals | A visible power signal alone does not identify a specific failed component |
| Heat symptom | Throttling, shutdown, or reduced stability during workload | Check workload, airflow, and cooling conditions related to thermal behaviour | Replacing cooling parts without confirming the heat condition may not address the underlying symptom |
No boot, no display, and red power light symptoms
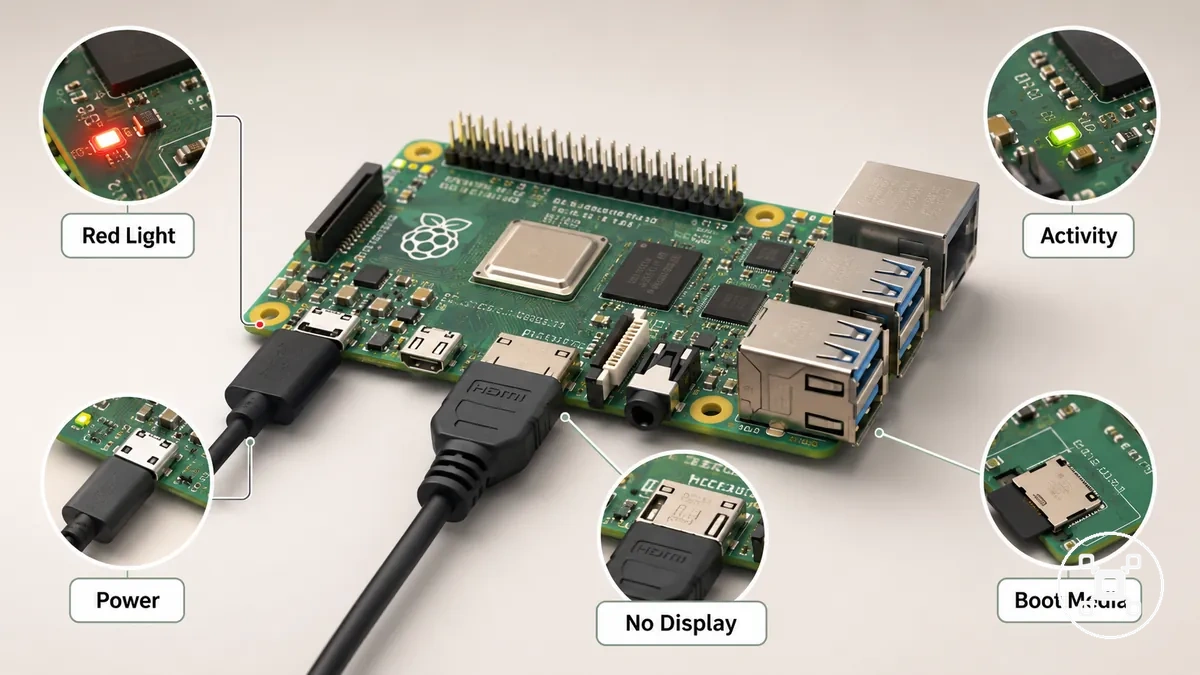
A red power light with no display or no boot symptoms is a visible signal, not a final diagnosis. The Raspberry Pi requires local checks of power LED behaviour, display output, boot media, and startup behaviour before identifying the likely direction.
A red power light with no display or no boot symptoms is a visible signal, not a final diagnosis.
A Raspberry Pi showing a red power light, blank screen, or missing startup activity provides different diagnostic signals. Check the power LED state, confirm the HDMI connection and display path, verify that boot media such as a microSD card is present, and observe activity during startup. These checks help separate a display symptom, power-related symptom, or boot media issue before further action is considered.
- Power LED: Check the red power light and power connection state during startup.
- Display connection: Check the HDMI cable and display output path when the Raspberry Pi shows no display.
- Boot media: Check that the microSD card or other boot media is present and that startup activity can be observed.
- Cable seating: Check power and display cable connections as part of the visible signal review.
- Activity response: Observe startup behaviour and activity signals before deciding what to check next.
Green activity light patterns and boot signals
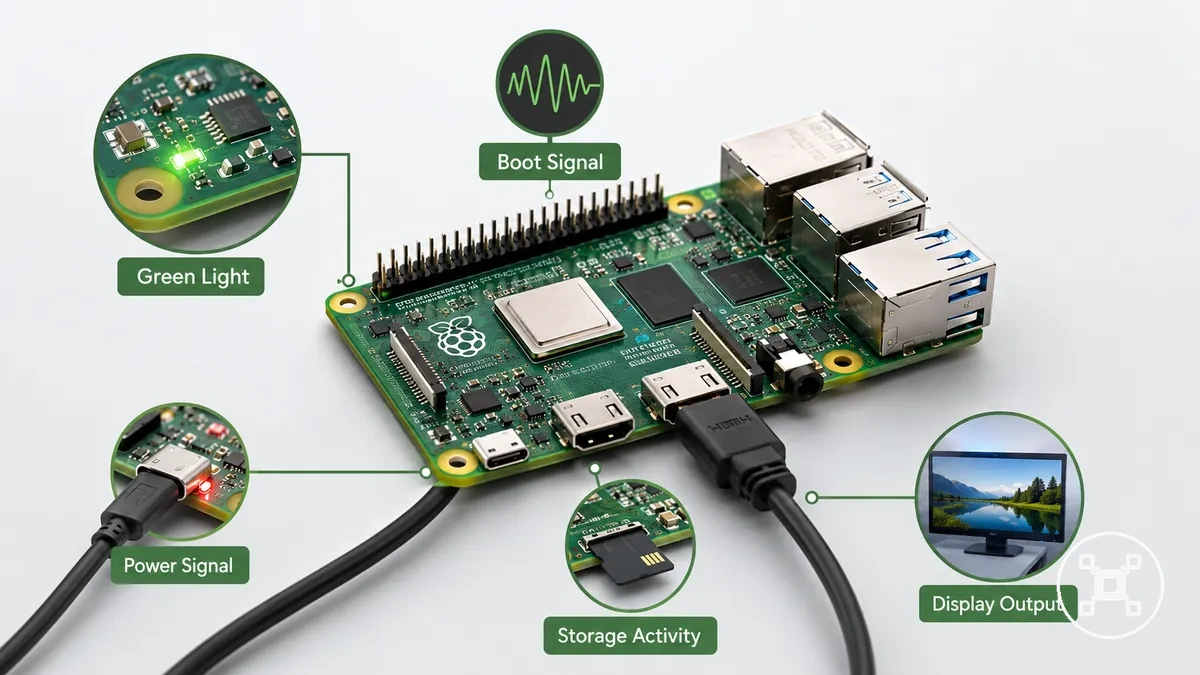
Green activity light behavior is a diagnostic signal that can show storage activity or startup progress, but it is not a universal code for a specific Raspberry Pi issue. The blink pattern should be interpreted with the power signal, display output, boot media condition, and boot stage.
A green activity light provides contextual evidence during startup rather than a final diagnosis.
A green activity light provides contextual evidence during startup rather than a final diagnosis. The meaning of a blink pattern can change with the Raspberry Pi model, firmware state, and boot condition, so activity light interpretation should be combined with power, display, and storage checks. No activity, irregular activity, and repeated activity patterns each provide different signals to review.
No activity, irregular activity, and repeated activity patterns each provide different signals to review.
Use the green activity light as one part of a local startup check:
- No activity: Check power signals and boot media presence when the green activity light does not show expected startup activity.
- Irregular activity: Review storage activity, boot stage, and read activity when the blink pattern does not follow expected behaviour.
- Repeated activity: Compare the activity pattern with boot media condition and startup behaviour before identifying a likely direction.
- Storage activity: Check the boot media and storage access signals alongside display output and power signals.
Overheating, throttling, and unexpected shutdown symptoms
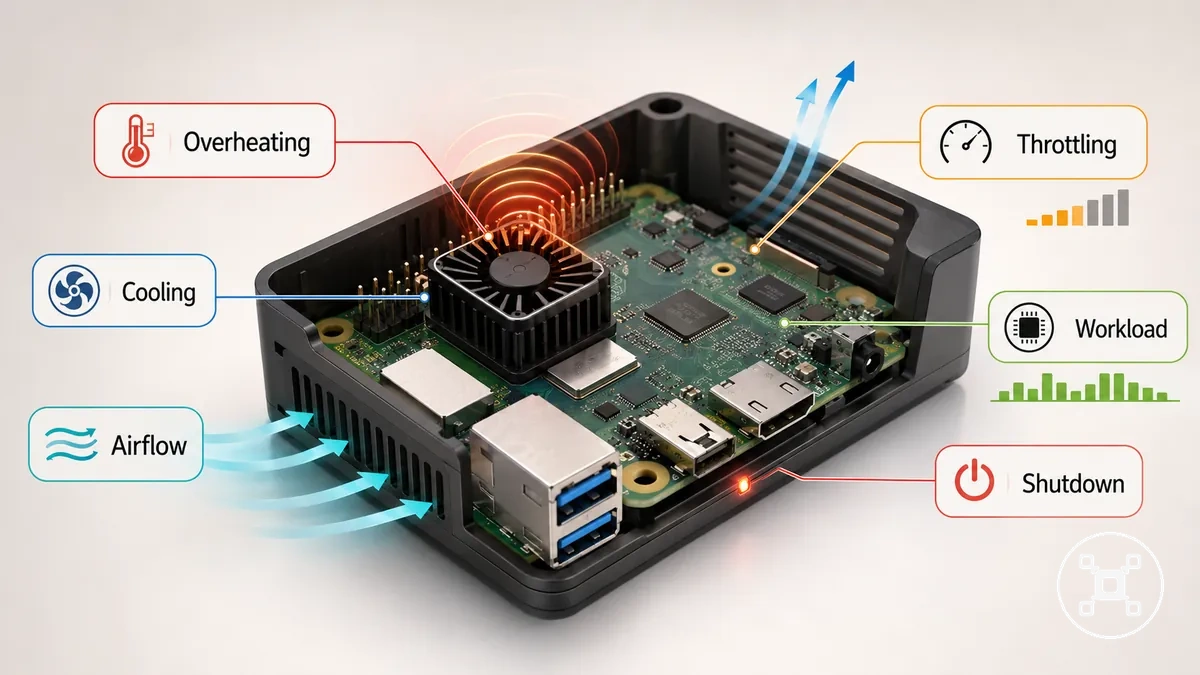
Overheating symptoms usually appear through throttling, instability, thermal warnings, or shutdown behaviour rather than one single universal sign. Raspberry Pi temperature behavior should be evaluated through workload, airflow, case condition, and cooling conditions before connecting a symptom to a heat-related cause.
Heat-related symptoms can change between sustained workload and startup conditions.
Heat-related symptoms can change between sustained workload and startup conditions. A Raspberry Pi under higher workload may show different temperature behavior from a system that becomes unstable during startup. Check temperature warnings, performance changes, shutdown timing, airflow around the case, and cooling conditions together to separate heat-related symptoms from other instability causes.
A Raspberry Pi under higher workload may show different temperature behavior from a system that becomes unstable during startup.
Use these symptom checks to identify possible thermal conditions:
- Throttling: Reduced performance during workload can indicate a thermal condition that should be reviewed with workload intensity and cooling conditions.
- Thermal warning: A temperature warning should be checked alongside airflow, case design, and cooling conditions to identify possible heat-related factors.
- Shutdown: Unexpected shutdown during workload can be associated with heat behaviour, but other causes should also be considered during diagnosis.
- Airflow and case: Case enclosure and airflow conditions influence heat behaviour and should be checked when overheating symptoms appear.
- Cooling condition: Cooling setup and surrounding conditions should be reviewed when thermal symptoms occur.
Power and undervoltage causes of boot failure
Unstable power is one of the first Raspberry Pi boot-failure causes to verify because inconsistent power conditions can affect startup behaviour. Undervoltage symptoms should be checked through the power supply, power cable, and connected load before considering replacement.
Testing with known-good power and reducing connected load helps separate power-related symptoms from other boot causes.
Power stability is influenced by the Raspberry Pi model, adapter output, cable condition, voltage drop, and peripheral load during startup. A power supply with unsuitable output conditions, a power cable with increased resistance, or connected peripherals increasing current demand can contribute to unstable boot behaviour. Testing with known-good power and reducing connected load helps separate power-related symptoms from other boot causes.
The following criteria help evaluate power conditions before replacement decisions.
The following criteria help evaluate power conditions before replacement decisions. For model-specific power criteria and related requirements, see Raspberry Pi power requirements.
- Adapter output: Check the power supply output against the Raspberry Pi model requirements and observe whether startup behaviour changes.
- Power cable: Check cable quality and connection condition because voltage drop through the cable can affect boot stability.
- Undervoltage signs: Review low-voltage indicators or unstable startup behaviour as signals that power conditions need further checking.
- Peripheral load: Reduce connected peripherals to check whether lower current demand changes startup behaviour.
- Known-good power: Test with a verified power setup and compare the observed boot behaviour before replacing parts.
This chart shows the main criteria to evaluate power and undervoltage as causes of boot failure on a Raspberry Pi, including checks on power supply, system behavior, and a verification test.
Weak power supplies, unstable cables, and low-voltage warnings
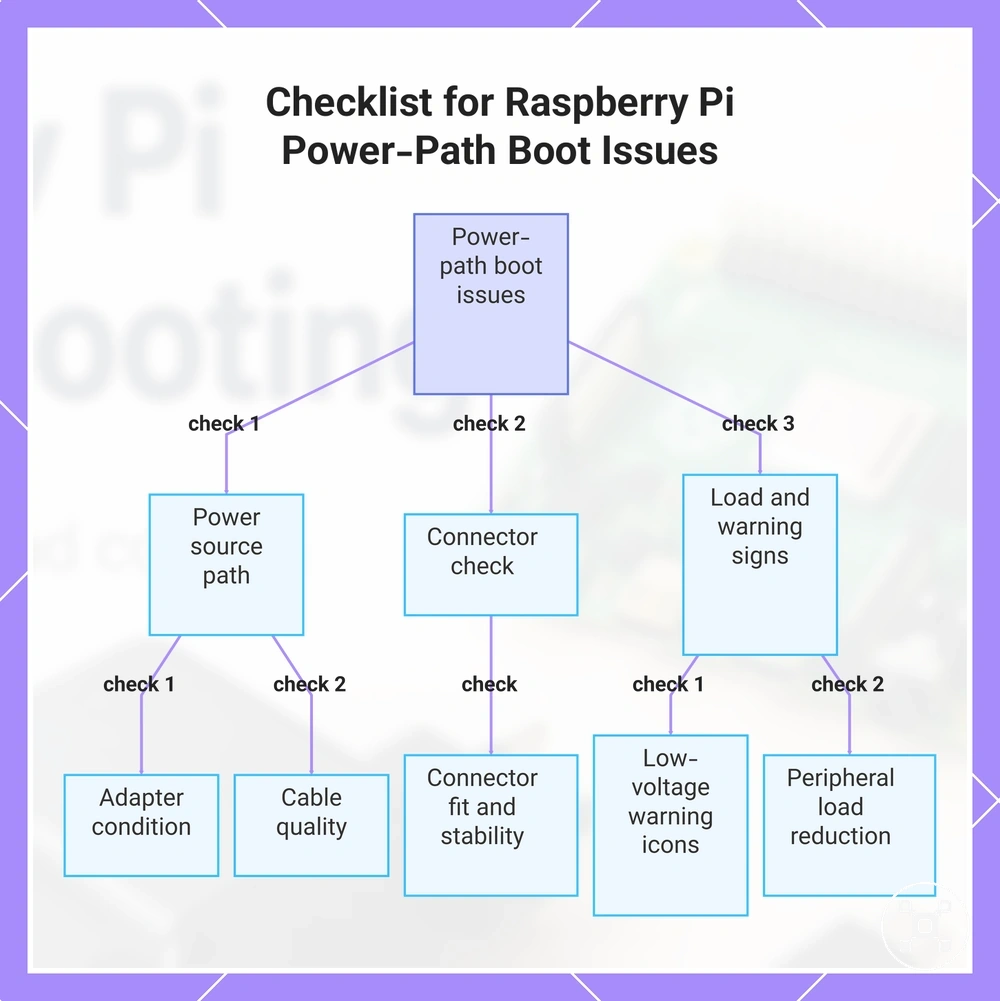
A weak power supply, unstable cable, or low-voltage warning can prevent reliable Raspberry Pi booting even when the device appears powered. These power-path symptoms should be checked through the adapter, cable, connector, and peripheral load before considering replacement.
These power-path symptoms should be checked through the adapter, cable, connector, and peripheral load before considering replacement.
The adapter, power cable, and connector should be reviewed together because voltage drop, connection quality, and peripheral load can influence boot stability. A low-voltage warning or unstable startup behaviour may indicate a power-path condition that requires verification, while the effect depends on the Raspberry Pi model and connected hardware. Check one variable at a time by reviewing the physical connection, reducing peripheral load, or comparing behaviour with a known-good power setup.
Check one variable at a time by reviewing the physical connection, reducing peripheral load, or comparing behaviour with a known-good power setup.
Use these local checks to identify weak power conditions:
- Adapter: Check the adapter condition and whether the Raspberry Pi startup behaviour changes with a suitable power source for the model.
- Power cable: Check cable quality and connection condition because voltage drop through the cable can contribute to unstable boot behaviour.
- Connector: Check connector fit and stability during startup to identify possible physical power-path issues.
- Low-voltage warning: Review warning icons or messages as signals that power conditions need further checking.
- Peripheral load: Reduce connected peripherals and observe whether lower load changes boot stability.
This chart outlines the key checks to identify and resolve power-path problems that cause unstable booting on Raspberry Pi.
Brownouts, power drops, and recovery after hard power loss
Brownouts and power drops can interrupt Raspberry Pi startup and create recovery issues after an unexpected power interruption. A hard power loss can affect restart behavior and may create filesystem risk when storage operations are interrupted.
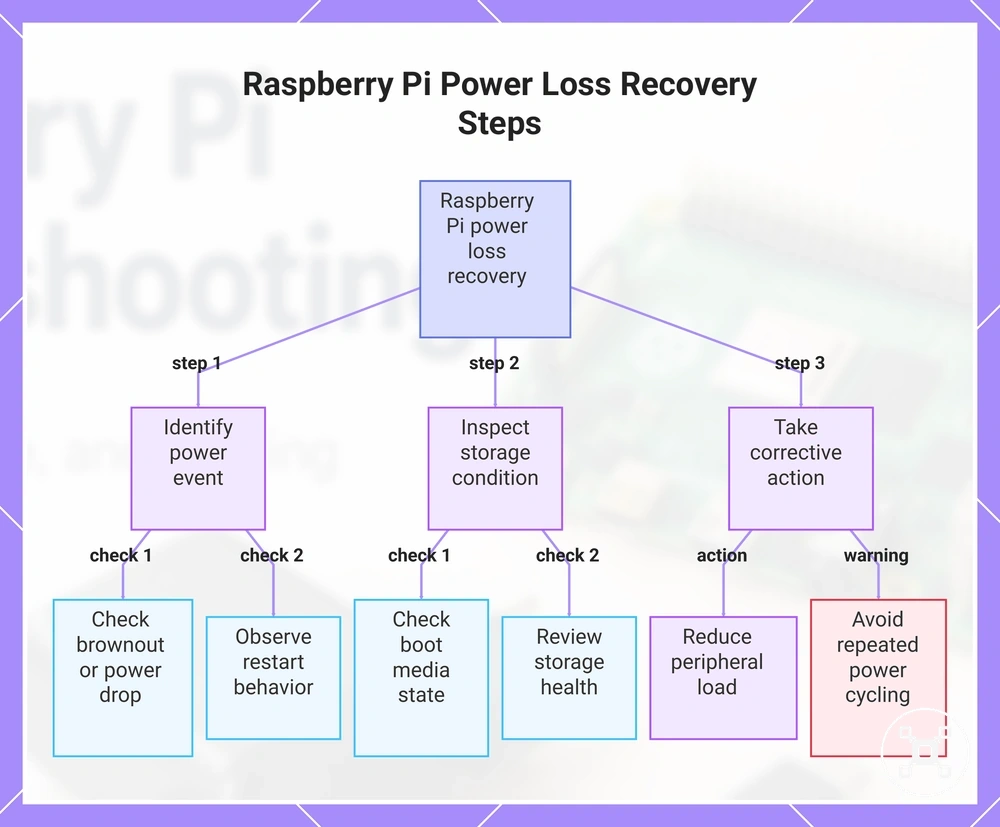
Recovery checks should focus on identifying the power event and observing the resulting boot condition.
Recovery checks should focus on identifying the power event and observing the resulting boot condition. Check the power connection, boot media state, storage health, and connected peripheral load before deciding on further action. Filesystem risk is conditional and depends on the state of storage activity when the interruption occurs. Avoid repeated hard power cycling as a routine test because it can introduce additional uncertainty during diagnosis.
- Power interruption: Check whether a brownout or power drop occurred before the boot issue and compare the startup behavior afterward.
- Restart behavior: Observe whether the Raspberry Pi restarts normally or repeatedly fails after the power event.
- Boot media: Check the boot media condition when a power loss is followed by unusual startup behavior.
- Storage health: Review storage condition when filesystem risk is possible after a hard power loss.
- Peripheral load: Reduce connected peripherals and compare boot stability to identify whether additional load affects recovery.
This chart shows the main diagnostic steps to recover a Raspberry Pi after a power loss event, including identifying the power event, inspecting storage, and taking corrective actions.
Boot media and operating system problems
Raspberry Pi boot failure can come from the boot medium or operating system image rather than the board itself. Boot media problems can affect startup when the storage device cannot be read correctly, the OS image lacks integrity, or the boot process cannot continue under the current boot conditions.
Raspberry Pi boot failure can come from the boot medium or operating system image rather than the board itself.
Boot media behaviour depends on card readability, image correctness, bootloader state, EEPROM condition, and storage adapter compatibility. A microSD card, SSD or USB boot media, or storage adapter can produce different boot outcomes when read failure, image integrity issues, or access conditions affect startup. Checking the storage device, OS image, bootloader, and EEPROM state helps separate media-related causes from board-level concerns.
Checking the storage device, OS image, bootloader, and EEPROM state helps separate media-related causes from board-level concerns.
The following table organizes common boot media and operating system problems before replacement decisions:
| Issue | Evidence | Check | What it means |
|---|---|---|---|
| Card corruption | Read failure or unexpected boot result from the microSD card | Check microSD card readability and compare startup behaviour with verified storage | The storage condition may affect boot results and should be verified before replacement |
| Wrong OS image | Boot failure after writing or changing the operating system image | Check OS image integrity and confirm the image matches the intended setup | The startup issue may relate to image data rather than the Raspberry Pi board |
| Storage adapter problem | SSD or USB boot media does not produce expected startup behaviour | Check storage adapter connection and compatibility conditions | The adapter path may affect access to the boot media |
| Bootloader or EEPROM condition | Boot behaviour does not match expected startup behaviour | Check bootloader and EEPROM state as part of verification | The boot process may require configuration verification before further action |
For broader storage categories and media choices, see Raspberry Pi storage options. Verification of corruption, compatibility, and image integrity should come before replacing storage or hardware.
Corrupted microSD cards and unreadable boot media
A corrupted microSD card can make a Raspberry Pi appear unresponsive even when power is stable. Unreadable boot media can prevent startup when the card condition, filesystem state, or image integrity affects the boot process.
A corrupted microSD card can make a Raspberry Pi appear unresponsive even when power is stable.
Check the microSD card condition, filesystem readability, and boot result before assuming the storage needs replacement. A read error, failed boot media state, or repeated boot failure may require checking image integrity, re-imaging the card, or comparing results with a test card. Re-imaging or reformatting should be approached with caution because the existing data state may not be preserved.
Re-imaging or reformatting should be approached with caution because the existing data state may not be preserved.
Use these checks to verify card-level boot media issues:
- Read the card: Check whether the microSD card is accessible and whether read errors appear during verification.
- Check filesystem: Review filesystem readability when boot failure follows storage access problems.
- Verify image integrity: Check the image integrity before testing the boot result again.
- Re-imaging: Use re-imaging as a verification step when the boot media condition requires testing, while considering possible data loss first.
- Compare a test card: Use a test card comparison to separate card-related symptoms from other Raspberry Pi boot causes.
Incorrect OS images, bootloader issues, and EEPROM recovery checks
An incorrect OS image, unsupported boot path, or bootloader issue can block Raspberry Pi startup even when power and storage appear functional. Verification of the image, boot path, and recovery state helps separate configuration problems from other boot failure causes.
Verification of the image, boot path, and recovery state helps separate configuration problems from other boot failure causes.
Check the startup path in order by reviewing model compatibility, OS image condition, boot media type, boot order, bootloader state, and EEPROM condition. These recovery checks can differ by Raspberry Pi model and boot configuration, so bootloader or EEPROM behaviour should be interpreted using the relevant model conditions rather than treated as a universal recovery process.
- OS image match: Check that the OS image matches the Raspberry Pi model and verify image integrity before evaluating the boot result.
- Boot media type: Check whether the selected boot media type matches the intended startup path and storage configuration.
- Boot order: Review the boot order when more than one supported boot path or media type is involved.
- Bootloader state: Check the bootloader condition when startup behaviour does not match the expected boot path.
- EEPROM recovery: Perform an EEPROM recovery check only with model-qualified guidance because recovery behaviour depends on the Raspberry Pi model and current condition.
Display problems that mimic a failed boot
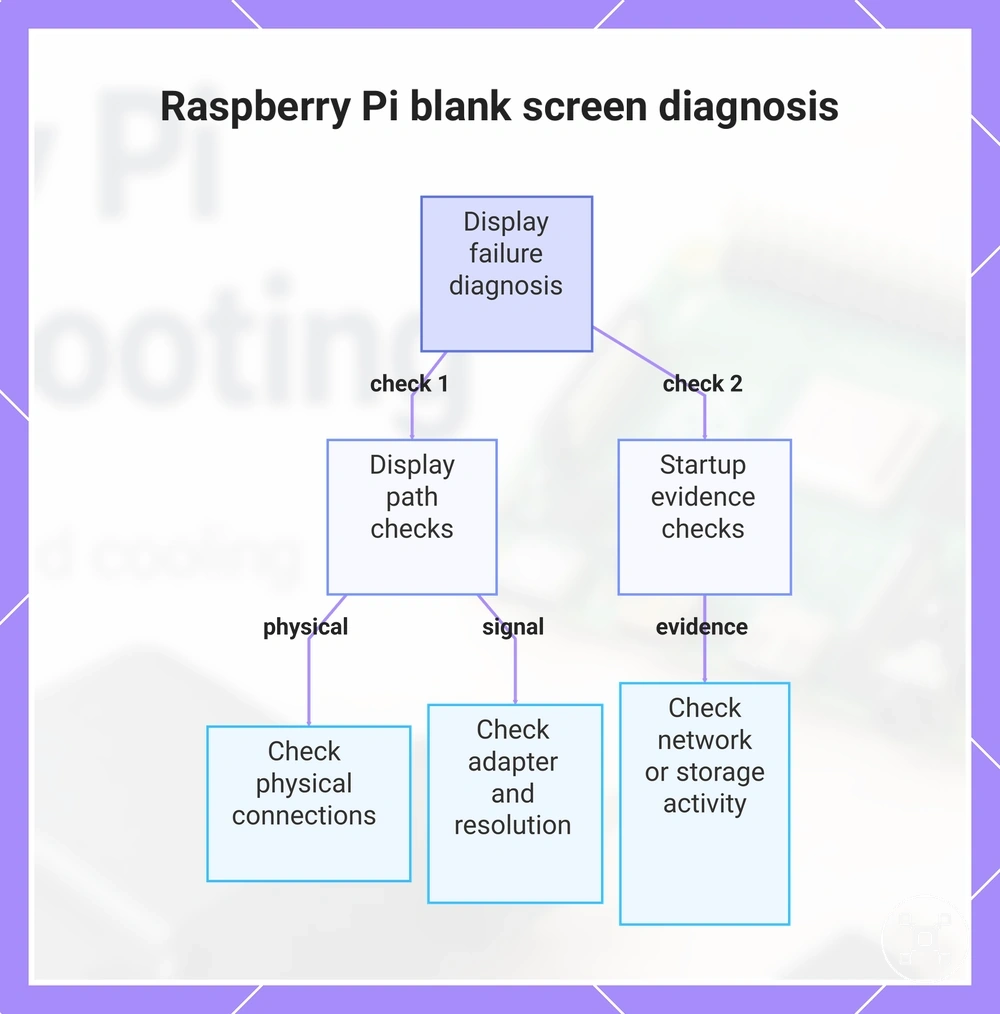
A Raspberry Pi can complete the boot process while showing no display output, so a blank screen does not automatically indicate a boot failure. No display symptoms should be separated from no boot symptoms by checking the display path and available startup evidence.
Checking the display path separately helps distinguish a screen issue from a wider boot problem.
No display diagnosis depends on the HDMI connection, cable condition, monitor input, adapter behaviour, resolution negotiation, and boot activity signals. A Raspberry Pi with boot activity, network response, or other startup evidence may be running even when the screen remains blank. Checking the display path separately helps distinguish a screen issue from a wider boot problem.
A Raspberry Pi with boot activity, network response, or other startup evidence may be running even when the screen remains blank.
Use these display checks before considering board replacement:
- HDMI port: Check the selected HDMI port and display path when no display output appears.
- Cable: Check the HDMI cable connection and condition because cable issues can affect the visible signal.
- Monitor input: Check that the monitor input matches the connected HDMI source when the screen shows a blank screen.
- Adapter: Check the display adapter path because adapter behaviour can affect signal detection and output.
- Resolution: Check resolution negotiation when boot activity is present but display output is missing.
- Boot activity: Check boot activity, network evidence, or storage activity before treating no display as no boot.
This chart shows the key checks to separate a display problem from a boot failure when a Raspberry Pi shows no display output.
HDMI port, cable, and monitor detection issues
HDMI output problems can prevent visible display output even when the Raspberry Pi is otherwise functioning. A no display condition should be checked through the display path, including the HDMI port, HDMI cable, adapter, and monitor input, before treating the issue as a hardware failure.
HDMI output problems can prevent visible display output even when the Raspberry Pi is otherwise functioning.
Display detection depends on the HDMI connection, cable seating, adapter quality, monitor input selection, and display negotiation. Check each display variable separately and retest one change at a time to identify whether the issue comes from the connection path, resolution behaviour, or signal detection.
- HDMI port: Check the selected HDMI port and connection path because the chosen output can affect display detection.
- HDMI cable: Check cable seating and condition because connection quality can influence display output.
- Adapter: Check adapter quality and compatibility when an adapter is used between the Raspberry Pi and monitor.
- Monitor input: Check that the monitor input matches the connected HDMI source before changing other display settings.
- Resolution: Check resolution behaviour when display negotiation does not produce visible output.
- Retest variable: Change one display variable at a time to compare the resulting output and narrow the display-path condition.
Raspberry Pi boots but shows no visible output
A Raspberry Pi can boot successfully while showing no visible output, so boot activity without a display should first be checked as a display-output issue rather than assumed to be a failed startup. The distinction between a headless boot and a true boot failure depends on the evidence available from the running system.
Check for signs that the Raspberry Pi is operating before focusing on display configuration.
Check for signs that the Raspberry Pi is operating before focusing on display configuration. Activity light behaviour, network presence, keyboard response, and storage activity can indicate startup progress even when no visible output appears. If these signals suggest the system is running, the blank display points toward the display path or display configuration rather than confirming a complete boot failure.
- Activity light: Check activity light behaviour to identify whether boot activity is occurring after power-on.
- Network presence: Check network availability when the Raspberry Pi may be running without visible display output.
- Keyboard response: Check keyboard response as a local signal that the system may be accepting input.
- Storage activity: Check storage activity as additional evidence of startup progress.
- Display configuration: Review display configuration when multiple boot signals exist but the screen remains blank.
Overheating causes and cooling fixes
Raspberry Pi overheating should be diagnosed through workload, environment, case airflow, and cooling hardware together before deciding on a cooling change. Heat behaviour depends on conditions such as Raspberry Pi model, processor load, ambient heat, enclosure design, and the cooling method being used.
For broader criteria on matching cooling approaches with Raspberry Pi conditions, see Raspberry Pi cooling requirements .
Workload, airflow, and cooling hardware influence temperature behaviour and throttling risk under different operating conditions. A heatsink, fan, or improved airflow may help when the observed thermal condition matches the cause, while passive cooling can be sufficient for lower thermal demand and active cooling can be considered when workload or environment creates ongoing heat issues. For broader criteria on matching cooling approaches with Raspberry Pi conditions, see Raspberry Pi cooling requirements.
Workload, airflow, and cooling hardware influence temperature behaviour and throttling risk under different operating conditions.
The following cooling factors connect observed heat behaviour with diagnostic decisions:
| Factor | Condition | Effect | Diagnostic decision |
|---|---|---|---|
| Workload | Higher processor workload increases heat generation during operation | Increased workload can contribute to temperature rise and throttling behaviour | Check whether workload changes affect heat behaviour before changing cooling hardware |
| Case airflow | Restricted airflow limits heat movement around components | Reduced airflow can increase heat retention inside the enclosure | Check case airflow conditions before deciding whether additional cooling is needed |
| Ambient heat | Higher surrounding temperature changes the thermal environment | Ambient heat can reduce available cooling effectiveness | Compare heat behaviour with environmental conditions before changing hardware |
| Heatsink | Passive heat transfer is used without active airflow | Cooling support depends on workload and airflow conditions | Consider passive cooling when thermal conditions remain controlled |
| Fan | Active airflow is added to increase heat movement | Additional airflow can support heat control under higher thermal demand | Consider active cooling when conditions require more airflow support |
| Throttling behavior | Performance changes appear during thermal conditions | Throttling indicates that heat behaviour requires further review | Use throttling evidence with workload and cooling conditions to guide the next check |
Temperature limits, throttling, workload, and ambient heat
Raspberry Pi temperature behaviour should be interpreted through workload, environment, model, and cooling condition rather than one universal number. Overheating-related behaviour depends on how temperature changes under specific operating conditions, including workload intensity and surrounding heat.
Use local temperature evidence and system behaviour instead of relying on an unsupported fixed limit.
Temperature readings should be considered alongside workload intensity, ambient heat, case enclosure, and cooling condition to understand stability outcomes. A model under higher workload may show different heat behaviour from the same model under lighter use, while airflow and cooling conditions influence throttling and shutdown risk. Use local temperature evidence and system behaviour instead of relying on an unsupported fixed limit.
Temperature readings should be considered alongside workload intensity, ambient heat, case enclosure, and cooling condition to understand stability outcomes.
Use these criteria to interpret temperature behaviour:
- Idle heat: Check temperature behaviour during low workload conditions to establish a baseline for the model and environment.
- Load heat: Check temperature changes during higher workload because processor demand can influence heat generation and stability.
- Throttling: Check throttling behaviour as a sign that temperature conditions may be affecting performance.
- Shutdown risk: Check whether instability or shutdown behaviour appears under specific workload and cooling conditions.
- Environmental condition: Check ambient heat, case conditions, and surrounding airflow because they influence cooling behaviour.
Case airflow, heatsinks, fans, and active cooling
Case airflow, heatsink, fan, and active cooling attributes affect heat dissipation by changing how heat moves away from Raspberry Pi components. Cooling parts should be compared through airflow path, contact quality, power draw, noise, and enclosure fit rather than treated as universal solutions.
Case airflow, obstruction, and enclosure fit influence how effectively a cooling setup manages heat behaviour.
Passive cooling and active cooling provide different approaches depending on workload, airflow conditions, and enclosure design. A heatsink relies on contact quality and available airflow for heat dissipation, while a fan adds active airflow that can support higher heat movement when the enclosure and workload conditions require it. Case airflow, obstruction, and enclosure fit influence how effectively a cooling setup manages heat behaviour.
- Airflow path: Check case airflow and ventilation because restricted paths or blocked openings can reduce heat movement through the enclosure.
- Heatsink contact: Check heatsink contact quality because heat transfer depends on the connection between the component and cooling surface.
- Fan airflow: Check fan airflow direction and operation because active airflow changes heat movement inside the case.
- Obstruction: Check for airflow obstructions because blocked ventilation can affect cooling behaviour under workload.
- Workload effect: Check workload conditions because higher heat generation may require different cooling support than lighter use.
- Enclosure fit: Check enclosure fit because case design affects available airflow space and cooling conditions.
Minimal boot troubleshooting sequence
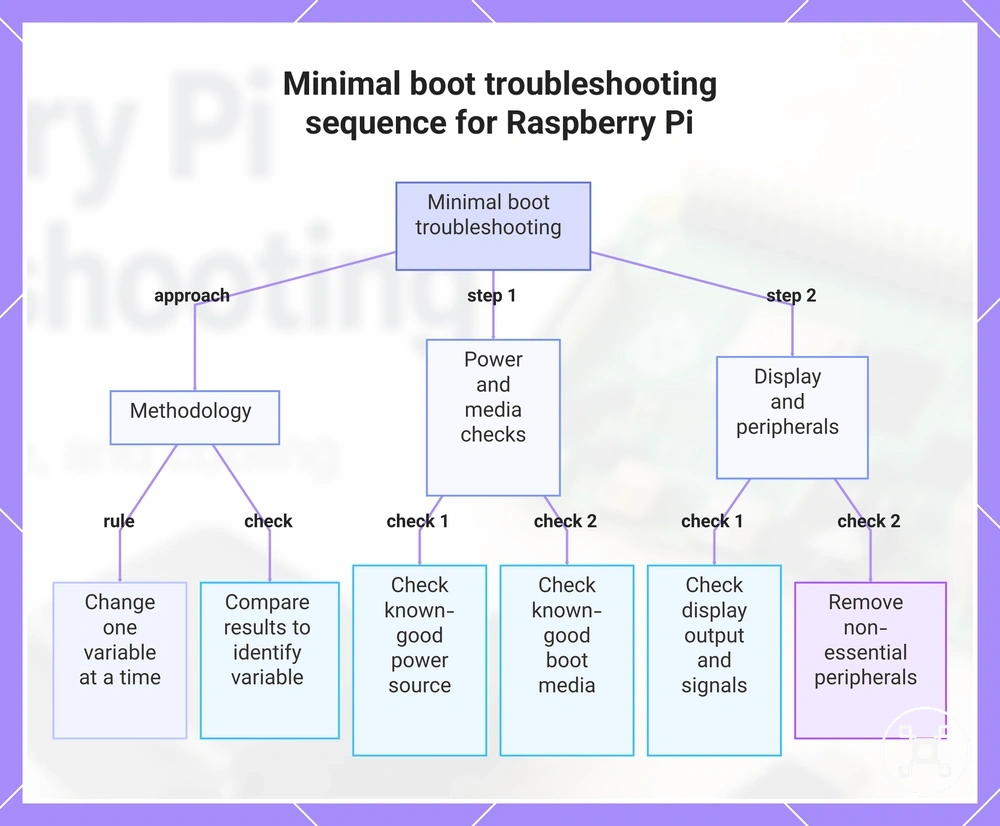
A minimal boot troubleshooting sequence removes variables before hardware replacement by checking the Raspberry Pi system through an ordered isolation process. Each check should focus on one condition at a time so the result remains useful for the next action.
Each check should focus on one condition at a time so the result remains useful for the next action.
The sequence organizes power, boot media, display, and peripheral checks by dependency rather than treating each symptom as a separate failure. For general preparation information, see Raspberry Pi setup, but this checklist focuses on diagnosing an existing boot issue. The one-variable rule means only one condition changes between checks, allowing the observed result to guide the next step.
- Known-good power: Check the power source with a known-good power setup. If startup behaviour changes, continue by comparing the result before changing another variable.
- Known-good boot media: Check the boot process with known-good boot media. If the result changes, review the storage condition as a possible factor rather than replacing hardware immediately.
- Display verification: Check display output and related signals. If the result changes, separate display conditions from other boot symptoms before further diagnosis.
- Peripheral removal: Perform peripheral removal by disconnecting non-essential devices. If the result changes, review the removed connection as a possible contributing variable.
- Result comparison: Compare each symptom, check, and result after a single change. If the symptom remains, continue with the next diagnostic condition instead of drawing a final conclusion from one step.
The checklist result helps determine the next action by showing which variable affects the symptom. No single step proves a component failure, but the pattern of results helps narrow whether further checks should focus on power, boot media, display output, or connected hardware.
The checklist result helps determine the next action by showing which variable affects the symptom.
This chart shows the ordered isolation process for diagnosing a Raspberry Pi boot issue, following the one-variable rule and key checks.
Strip-down boot test with only essential components
A strip-down boot test isolates the Raspberry Pi from accessories that can confuse power, boot, or display diagnosis. The test reduces variables by using only essential components before interpreting the result.
The test reduces variables by using only essential components before interpreting the result.
A minimal boot test uses the board, power supply, boot media, and display cable as the core test conditions while optional access methods and disconnected peripherals are reviewed separately. This isolation test is a diagnostic condition rather than a permanent setup, and a result can narrow possible causes without proving a single failed part.
- Connect essential components: Connect the board, power supply, boot media, and display cable only. Observe whether the Raspberry Pi shows a different boot result with fewer variables.
- Remove disconnected peripherals: Perform peripheral removal by disconnecting non-essential devices. Observe whether removing accessories changes the startup behaviour.
- Check optional access methods: Review optional keyboard or network access only as additional evidence. Observe whether available responses indicate that the system state has changed.
- Compare the simplified configuration: Use the stripped configuration to compare the previous symptom with the new result. If the symptom changes, continue checking the removed variable rather than identifying a failed component immediately.
Swap tests for power, storage, display, and cooling parts
A swap test compares a suspected cause by changing one Raspberry Pi-related variable at a time. Testing with a known-good part helps evaluate whether a specific condition influences the symptom without relying on random replacement.
A swap test compares a suspected cause by changing one Raspberry Pi-related variable at a time.
A swap test keeps the unchanged condition consistent while comparing the tested part against a known-good part. The observed result provides evidence for the next diagnostic step, but a single comparison does not prove an isolated component fault.
| Tested part | Known-good swap | Keep unchanged | What the result means |
|---|---|---|---|
| Power source | Compare the current power source with a known-good power source | Keep the Raspberry Pi, boot medium, and other conditions unchanged | If the observed result changes, the power source may be a contributing variable requiring further checks |
| Boot medium | Compare the current boot medium with a known-good boot medium | Keep the power source and display path unchanged | If startup behaviour changes, the boot medium may be related to the symptom |
| Display path | Compare the current display path with a known-good display path | Keep the boot condition and power source unchanged | If display output changes, the display path may require additional investigation |
| Cooling condition | Compare the current cooling condition with a known-good cooling condition | Keep workload and system configuration unchanged | If heat behaviour changes, the cooling condition may be a factor affecting the symptom |
When power, storage, or cooling parts need replacement
Raspberry Pi parts should be replaced only after symptoms, evidence, and swap tests indicate a specific component is inadequate or contributing to the issue. Replacement decisions should verify the suspected part before changing hardware because replacement is not always the first or fastest diagnostic step.
Consider the part, the evidence, the risk of ignoring the condition, and the safer next step before replacement.
Evidence for replacement becomes stronger when repeated symptoms remain after known-good comparisons and the affected part matches the observed condition. Consider the part, the evidence, the risk of ignoring the condition, and the safer next step before replacement. Storage changes require additional caution because a microSD card or storage device replacement can create data risk if important information is not protected.
Evidence for replacement becomes stronger when repeated symptoms remain after known-good comparisons and the affected part matches the observed condition.
The following table connects replacement decisions with evidence and safer next steps:
| Part | Evidence to replace | Risk if ignored | Safer next step |
|---|---|---|---|
| Power supply | Swap-test evidence indicates the power supply does not provide the expected operating condition | Power-related symptoms may continue during operation | Compare with a known-good power supply before replacement |
| Power cable | Evidence points to the power cable as a contributing variable in the power path | Unstable power delivery conditions may remain | Check the cable condition and compare with a known-good cable |
| microSD card | Storage evidence indicates the microSD card may contribute to boot or access issues | Data risk may increase if storage condition worsens | Review backup status before changing or re-imaging the card |
| Storage adapter | Evidence indicates the storage adapter affects the boot or storage path | Boot or storage access symptoms may continue | Compare the adapter path with a known-good condition |
| Fan | Cooling evidence indicates active airflow may be needed for the operating condition | Heat-related behaviour may continue under workload | Review workload and cooling conditions before changing the fan |
| Heatsink | Evidence indicates passive heat transfer may not match the workload condition | Thermal behaviour may remain unchanged | Check workload and airflow conditions before changing the heatsink |
| Cooling case | Evidence indicates the enclosure affects airflow or cooling conditions | Heat behaviour may continue under the same enclosure condition | Review enclosure airflow and fit before replacement |
For storage-sensitive changes, review Raspberry Pi backup basics before replacing storage components or making changes that may affect saved data.