
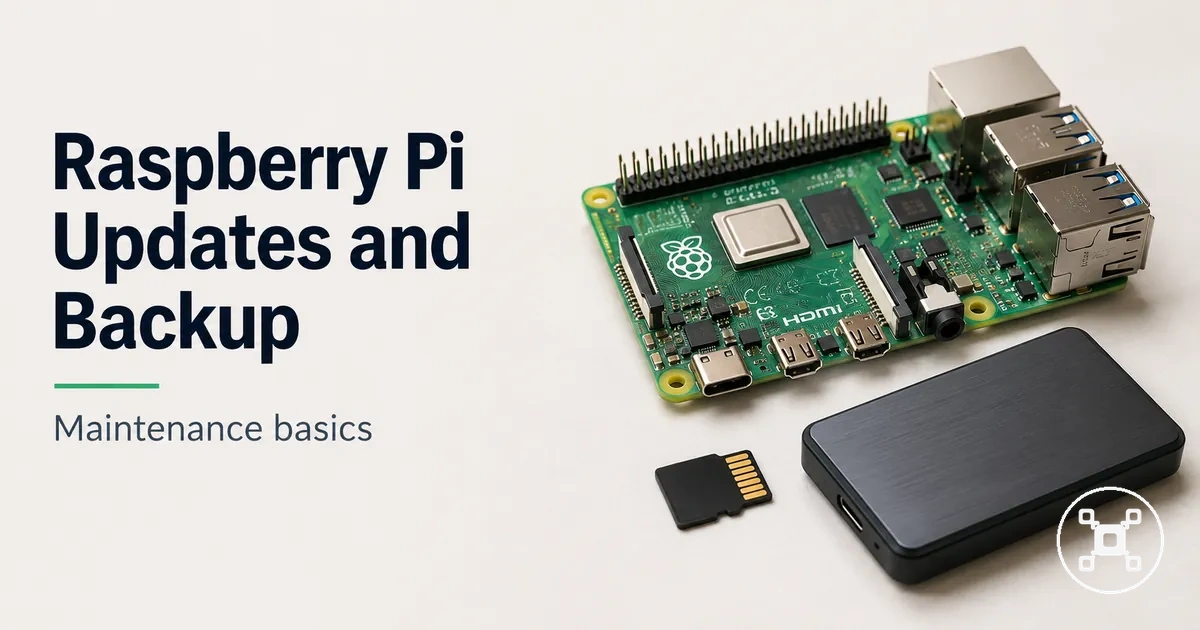
Raspberry Pi Maintenance Basics for Updates and Backups
Raspberry Pi maintenance keeps Raspberry Pi OS current and the system recoverable. Updates refresh installed packages, while backups preserve a restorable copy of the operating system, settings, and files. Together, updates and backups form one practical maintenance routine.
Together, updates and backups form one practical maintenance routine.
Backup readiness should come before a risky system update because an interrupted upgrade, damaged storage state, or unsuitable package change can leave the current installation difficult to use. A separate system image, clone, or recovery copy gives the restore process a known backup target instead of relying on the same SD card being changed.
The maintenance conditions are specific to the device and installation.
The maintenance conditions are specific to the device and installation. The Raspberry Pi model sets the supported Raspberry Pi OS release and available storage interfaces, the package state determines which updates are pending, the used storage size sets the minimum space required for a complete backup image, and an active network connection is required for online package downloads.
These checks establish whether the system is ready for an update and whether a restore copy exists before changes are made.
Begin by checking the Raspberry Pi OS condition, package status, SD card or other storage health, network connection, and available backup destination. These checks establish whether the system is ready for an update and whether a restore copy exists before changes are made.
Table of Contents
Raspberry Pi maintenance checks before updates and backups
Complete Raspberry Pi maintenance checks before starting any update or backup work. Raspberry Pi hub places this maintenance page within the broader Raspberry Pi topic while keeping the focus on readiness before system changes.
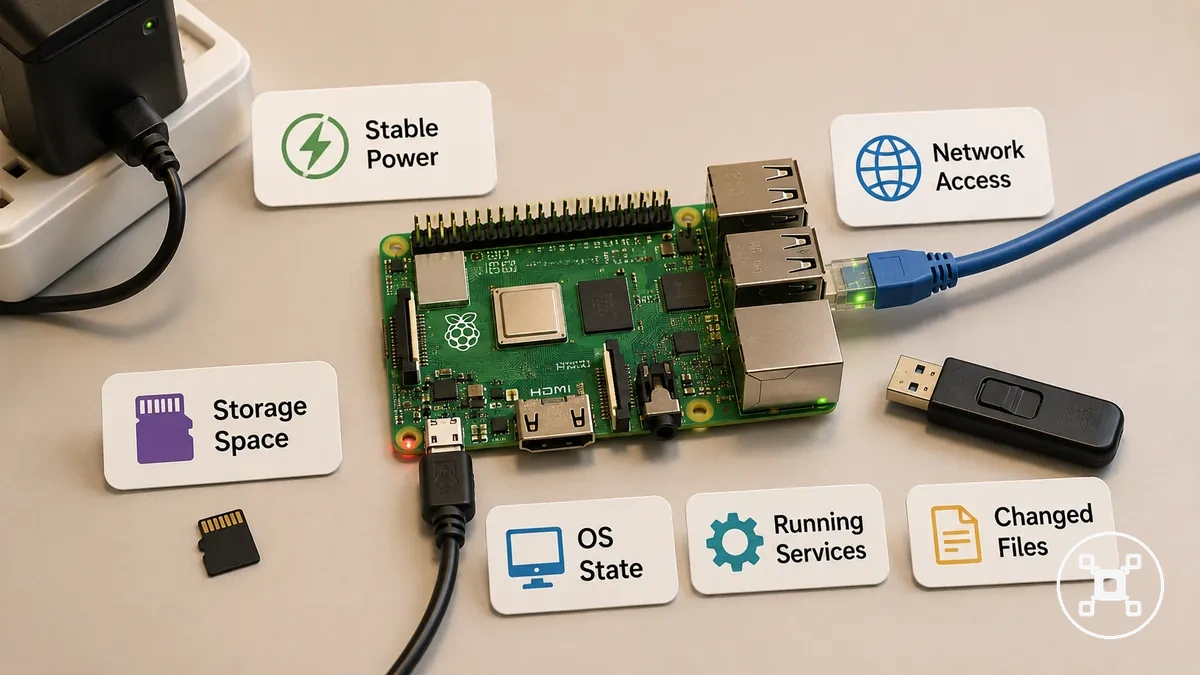
These pre-checks reduce avoidable update, storage, and restore failures. Unstable power can interrupt write operations, limited storage space can prevent a complete backup image, unavailable package repositories can stop package downloads, and active services can continue changing project data while a backup is being created. The level of risk depends on the current workload, storage activity, network condition, and running services.
Use the checklist below before making system changes.
Use the checklist below before making system changes. Prioritize the conditions that directly affect update downloads, storage writes, backup creation, and restore readiness.
- Power stability: Verify that the Raspberry Pi has a stable power source because unexpected shutdowns can interrupt write operations.
- Network access: Confirm that the network connection can reach package repositories so update checks and package downloads can complete.
- Storage space: Check that the SD card and backup target have enough available capacity for package downloads and the intended backup image.
- Current OS state: Review the Raspberry Pi OS state for incomplete updates or pending package changes before starting another maintenance task.
- Running services: Identify services that continue writing data because active file changes can reduce backup consistency.
- Changed files: Verify whether important files have changed since the last backup so recent work is included in the next backup.
- User scenario: For headless systems, confirm remote access is available; for project servers, schedule maintenance during lower activity; for beginner desktop setups, save open work before continuing.
Raspberry Pi update scope and backup boundaries
Raspberry Pi updates change the software state of the system, while backups protect a separate copy of selected data and system information. Updates apply changes to packages and related system components, while backups create a recovery source with a defined restore limit based on what was included and where it is stored.
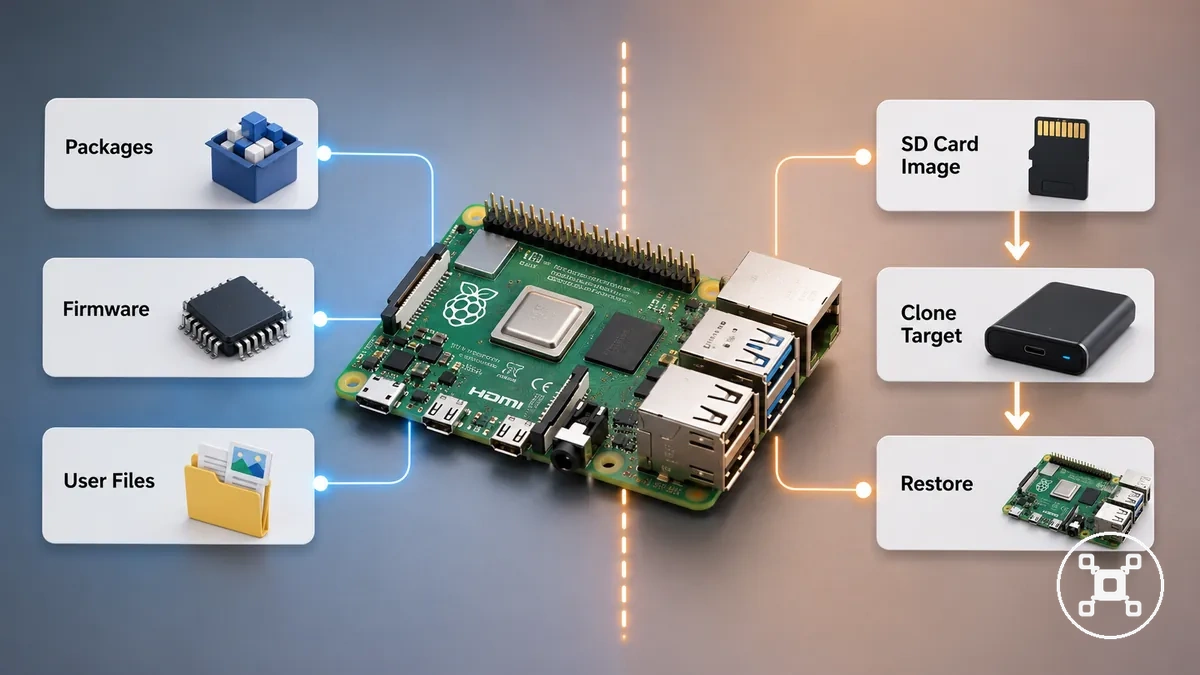
Raspberry Pi updates and backups have different scopes. Package updates change installed software components managed by Raspberry Pi OS, firmware changes require additional caution because rollback options depend on the update method and system condition, and file backups protect selected user files according to the backup scope rather than replacing every maintenance action.
Raspberry Pi updates and backups have different scopes.
The comparison below separates what each maintenance action changes or protects.
| Action or item | What it changes or protects |
|---|---|
| Package updates | Changes installed packages and the software state managed by Raspberry Pi OS. |
| Firmware changes | Can change lower-level system components, with rollback limits determined by the update method and available recovery state. |
| User files | Backups protect selected files created or changed by the user, based on the chosen backup scope. |
| SD card image | Stores a copy of the SD card image state that can be used as a restore source when the image and target conditions are suitable. |
| Clone target | Stores a cloned card or storage copy, with restore results depending on the storage device and clone condition. |
| Restore target | Defines where the recovered image or files are applied, with limits determined by the target storage device and restore process. |
Updates, backups, and restore processes address maintenance boundaries rather than complete system protection. For connected projects, Raspberry Pi security basics covers security hardening practices that are separate from routine update and backup decisions.
Updating Raspberry Pi OS and installed packages
Updating Raspberry Pi OS installed packages follows a package refresh and upgrade process that changes the current software state based on the available package information. The package update path should be used with backup readiness in place because the final result depends on the existing OS state, installed packages, network state, and available disk space.
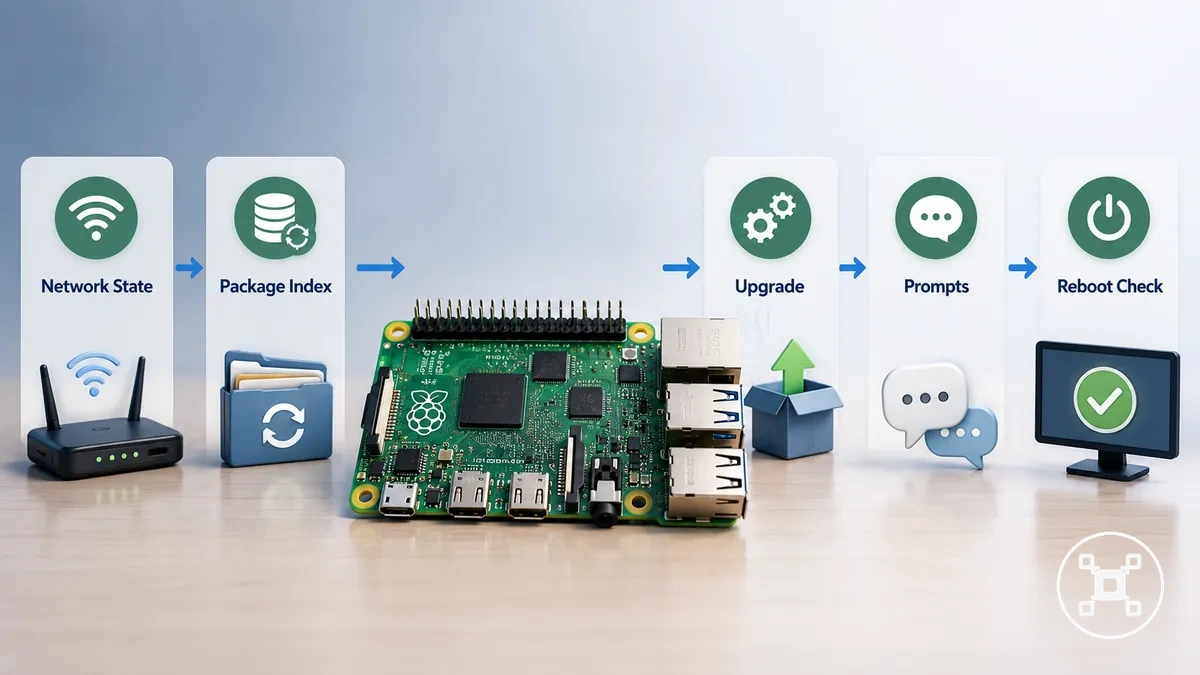
Before running upgrade commands, confirm that the Raspberry Pi has enough disk space, an active network connection, and a suitable backup state. Package operations can introduce changes to installed software, and prompts about package actions, removals, or restart requirements should be reviewed before accepting changes.
Use the following sequence for package maintenance and read each prompt carefully before continuing.
Use the following sequence for package maintenance and read each prompt carefully before continuing.
- Check network state: Confirm that the Raspberry Pi can connect to package repositories because the package index refresh requires access to updated package information.
- Refresh the package index: Run the package refresh process before upgrading installed packages so the system can check the available package state.
- Review upgrade details: Check the proposed package changes and read prompts about upgrades, removals, or additional actions before confirming the operation.
- Run upgrade commands: Apply the package upgrade process while considering that results depend on the Raspberry Pi OS version, installed packages, and current system condition.
- Check disk space: Verify available storage capacity because package downloads and upgrade operations require sufficient space on the storage device.
- Review reboot conditions: Restart the Raspberry Pi when the completed update process indicates that a reboot is needed for the changed system state.
- Treat firmware tools separately: Consider firmware tools such as rpi-update as a separate maintenance decision rather than a normal package update step because firmware changes require additional caution.
Package list refresh and full system upgrade commands
The Raspberry Pi package update sequence uses apt update to refresh the package list from configured repositories and apt full-upgrade to apply available package changes. These commands affect installed packages based on the current Raspberry Pi OS state, repository information, and available system resources.
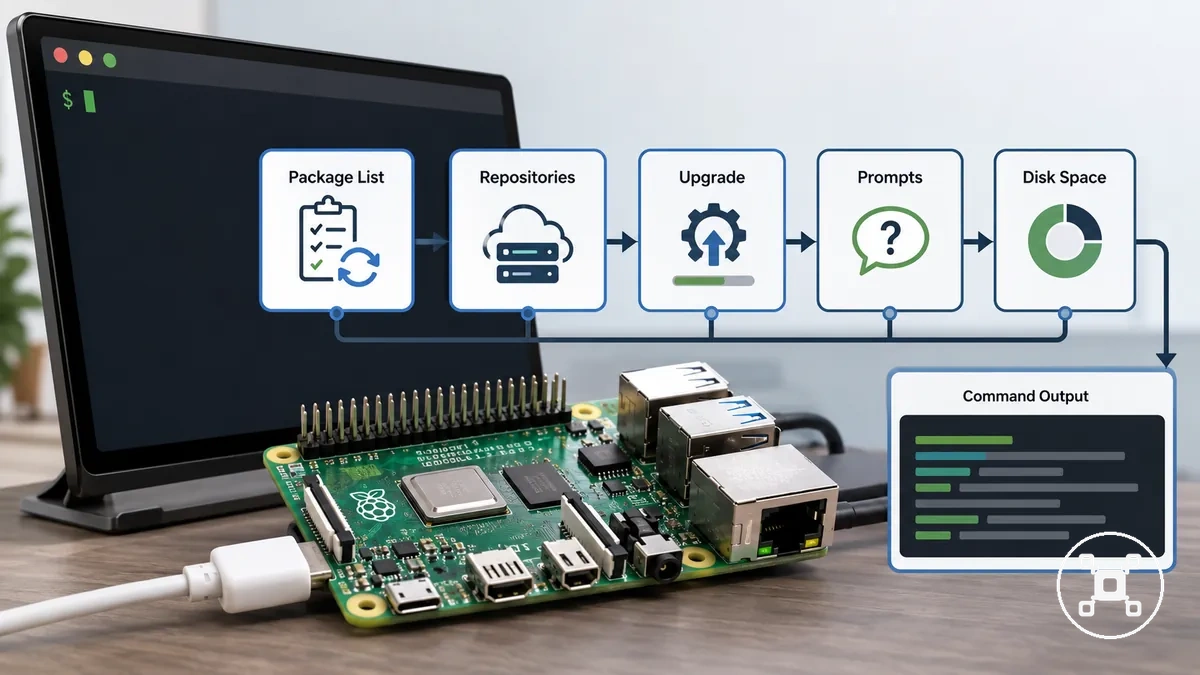
The package refresh stage updates package metadata so the system can identify available changes. The full upgrade stage applies package updates while considering prompts, removals, disk space, and command output. Review each message before confirming changes because package results depend on the current installation condition.
sudo apt update
sudo apt full-upgrade
Review the command output before accepting changes:
- Prompts: Read confirmation requests carefully before approving package actions or major changes.
- Removals: Check listed removals because removing packages changes the installed software state.
- Disk space: Confirm available storage because downloads and package installation require sufficient capacity.
- Warnings: Review errors or warnings in the command output before deciding the next maintenance action.
Firmware update limits and rpi-update caution
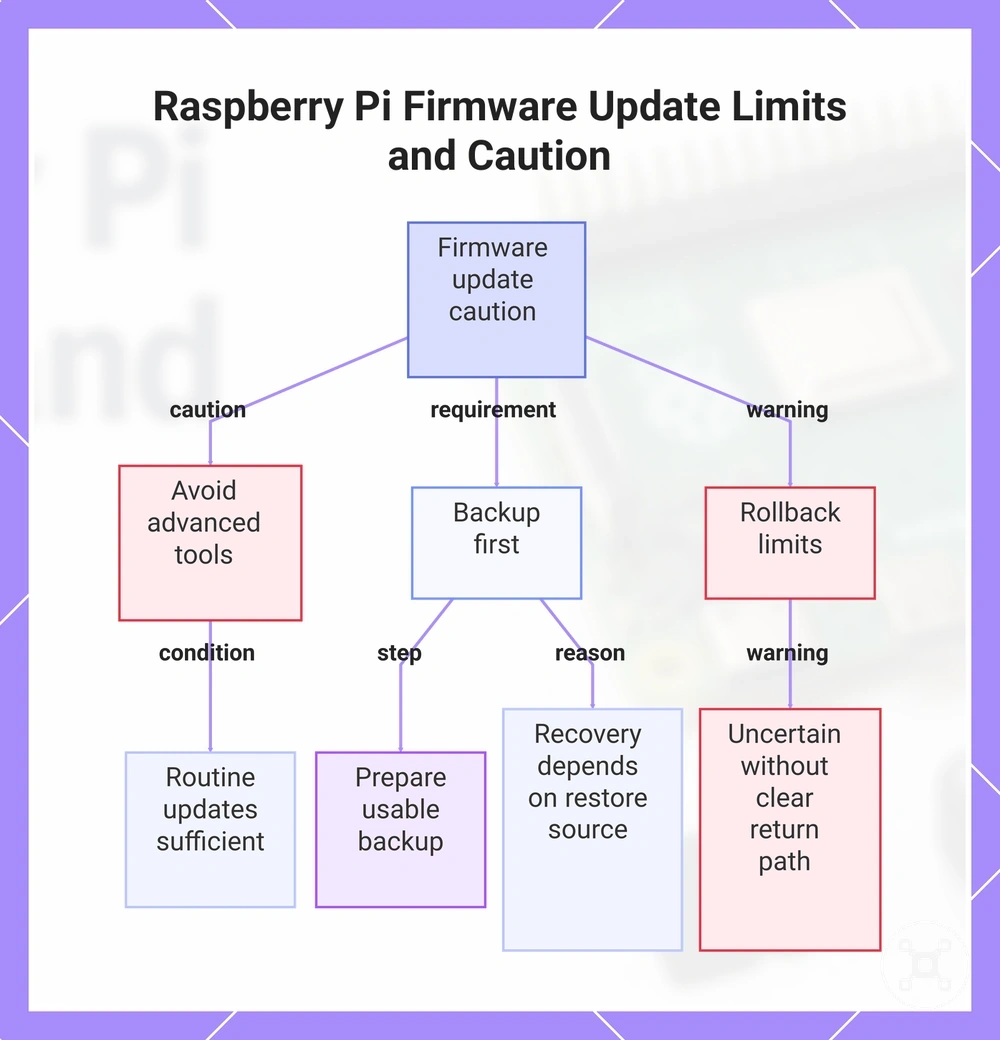
Routine updates do not mean that every firmware path should be used on a Raspberry Pi. Stable packages in Raspberry Pi OS follow normal package maintenance, while firmware tools such as rpi-update represent a different update path with additional risk considerations.
Routine updates do not mean that every firmware path should be used on a Raspberry Pi.
Firmware changes affect lower-level system components, and the rollback outcome depends on the available backup, restore option, and resulting system condition. A usable backup should be prepared before risky changes because recovery depends on having a suitable restore source.
Caution:
- When not to use: Avoid advanced firmware tools when routine updates with stable packages are sufficient for the maintenance goal.
- Backup first: Keep a usable backup before firmware changes because the recovery path depends on the available restore state.
- Rollback limits: Treat rollback as uncertain when the firmware path or system condition does not provide a clear return process.
For example, a beginner maintaining Raspberry Pi OS may only need routine updates for stable package maintenance, while experimental firmware work may be inappropriate without a specific reason, backup readiness, and understanding of the possible recovery limits.
This chart shows the main caution points for Raspberry Pi firmware updates: when to avoid advanced tools, why backup is required, and the limits of rollback.
This chart shows the main caution points for Raspberry Pi firmware updates: when to avoid advanced tools, why backup is required, and the limits of rollback.
Reboot and post-update checks
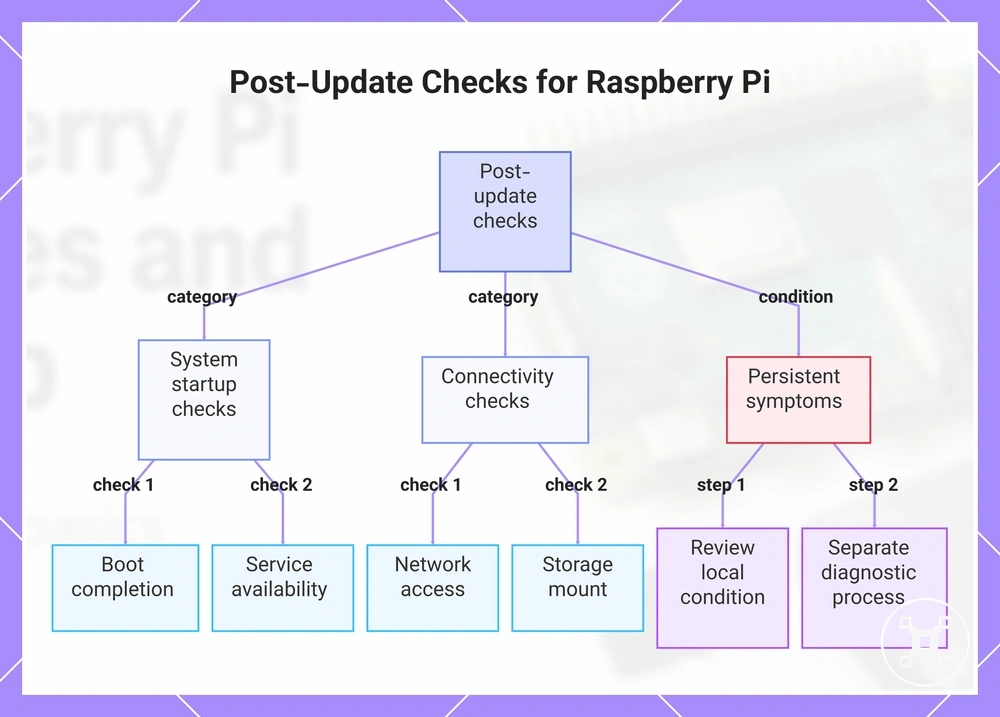
Post-update checks verify that the Raspberry Pi remains usable after a reboot. A restart check confirms the boot result, service availability, network access, storage mount state, application behavior, and visible warning messages after an update.
Post-update checks verify that the Raspberry Pi remains usable after a reboot.
If persistent symptoms remain after these checks, review the local condition before escalating. Boot problems, power-related symptoms, or overheating signs can have causes outside normal update verification and may require a separate diagnostic process.
- Boot: Confirm that the Raspberry Pi completes startup because a successful boot shows that the updated system can load.
- Services: Check service status because background services should remain available after system changes.
- Network access: Verify the connection because network-dependent functions require an available network state.
- Storage mount: Check the mount state because applications may rely on attached storage availability.
- Application behavior: Open important applications and confirm expected behavior because updates can affect software operation differently across systems.
- Warning messages: Review visible warnings because they can indicate conditions that need further attention.
If repeated boot failures, power interruptions, or overheating symptoms continue, move to a separate troubleshooting process rather than treating them as a normal post-update check.
This chart shows the main verification checks after a Raspberry Pi update and the escalation steps if persistent symptoms remain.
This chart shows the main verification checks after a Raspberry Pi update and the escalation steps if persistent symptoms remain.
Choosing a Raspberry Pi backup method
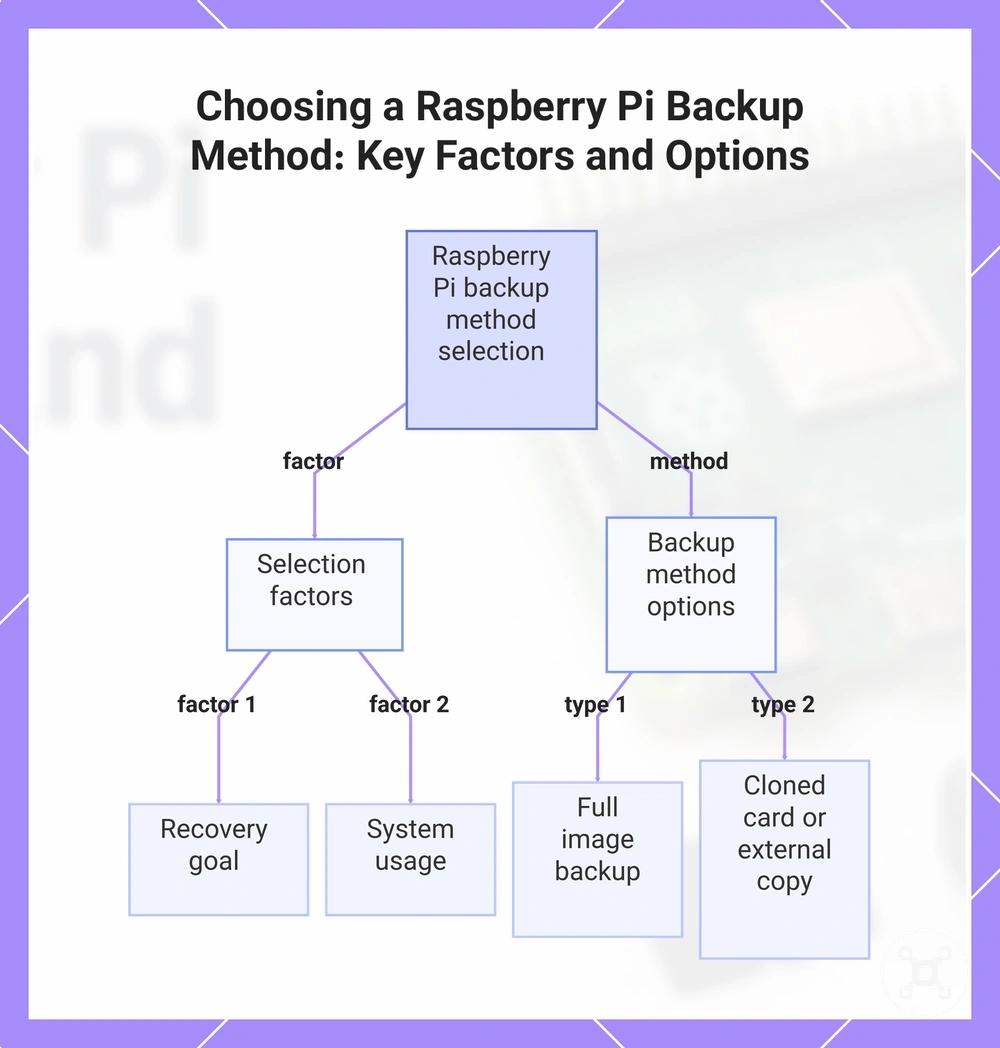
The right Raspberry Pi backup method depends on the recovery goal and the way the system is used. A full image backup, cloned card, USB storage or external storage copy, and
This chart shows the main factors that influence the choice of a Raspberry Pi backup method and the common backup options available.
Full SD card image backups
A full SD card image backup fits when the recovery goal is to capture the complete storage state of a Raspberry Pi rather than only selected files. An image backup creates a full image file from the SD card source, making it useful before major updates or configuration changes where preserving the current system state is important.
A full SD card image backup fits when the recovery goal is to capture the complete storage state of a Raspberry Pi rather than only selected files.
The storage requirements and restore process depend on the captured SD card contents, available storage capacity, compression choice, and the restore target. A full image is not always the smallest or most convenient option for systems with frequent file changes because the backup represents the captured card state rather than only recently changed data.
- SD card source: Select the SD card containing the Raspberry Pi system state that needs to be captured in the image backup.
- Card reader: Use a card reader that can access the SD card contents so the storage state can be converted into an image file.
- Image file: Store the generated image file as a complete card copy that represents the captured SD card state.
- Storage capacity: Check available capacity because image size depends on the SD card contents and the selected backup storage location.
- Compression: Consider compression because the resulting image file size depends on the compression method and the data stored on the card.
- Restore dependency: Verify the restore target and process because recovery depends on having a usable image file and a suitable target storage device.
A full image backup is particularly useful before a major update or configuration change because it provides a copy of the existing storage state before significant system changes are made.
Clone backups to another SD card or USB drive
A clone backup fits when the recovery goal is to transfer the Raspberry Pi system state to a target device that can carry the copied state. Cloning transfers data from a source card to a target SD card or USB drive, with the result depending on target capacity, device condition, and the intended boot expectation.
The source card, target device, and write direction must be identified before starting a clone backup.
The source card, target device, and write direction must be identified before starting a clone backup. Check the target size before writing because a capacity mismatch can prevent a usable copy, and selecting the wrong write direction can overwrite the wrong storage device.
- Identify the source card: Confirm the SD card that contains the Raspberry Pi system state to copy.
- Select the target device: Choose the target SD card or USB drive and complete a capacity check to confirm it can hold the copied system state.
- Confirm write direction: Verify that the source card is the read source and the target device is the write destination before starting the clone process.
- Write the clone backup: Copy the source card data to the target device while monitoring the process for completion messages or warnings.
- Verify the result: Check the copied system state and perform a suitable verification step because a clone backup still depends on the target device and configuration for boot expectation.
For example, selecting the wrong target device during a clone backup can overwrite existing data on that device. A successful copy also does not mean every target will boot in every configuration, so verify the cloned system according to the intended recovery use.
File-level backups for changed data
A file-level backup protects selected changed data without creating a complete system image. This method focuses on copying specific files such as project data, user files, and configuration files when the recovery goal is protecting important data changes.
File-level backup protects selected files rather than the full Raspberry Pi system state.
File-level backup protects selected files rather than the full Raspberry Pi system state. Restore limits depend on which files were included, the backup schedule, and whether data such as database files or service data was captured consistently.
- Home directory: Back up selected home directory files when user data and personal settings need protection.
- Project folders: Include project folders when frequently changing project data needs a regular file copy schedule.
- Configuration files: Protect configuration files when custom settings are required after restoring selected data.
- Database files: Consider backup timing and consistency when copying database files because active data may change during normal operation.
- Service data: Include service data when applications depend on stored information that changes during use.
- Schedule and restore limits: Set the schedule based on how often changed data is created or modified, while recognizing that file-level backups do not provide complete system-state recovery.
For a Raspberry Pi system where project data changes frequently but the base operating system changes rarely, file-level backup can focus on protecting new and modified files. If the full system state is required after a failure, a different recovery method may be needed.
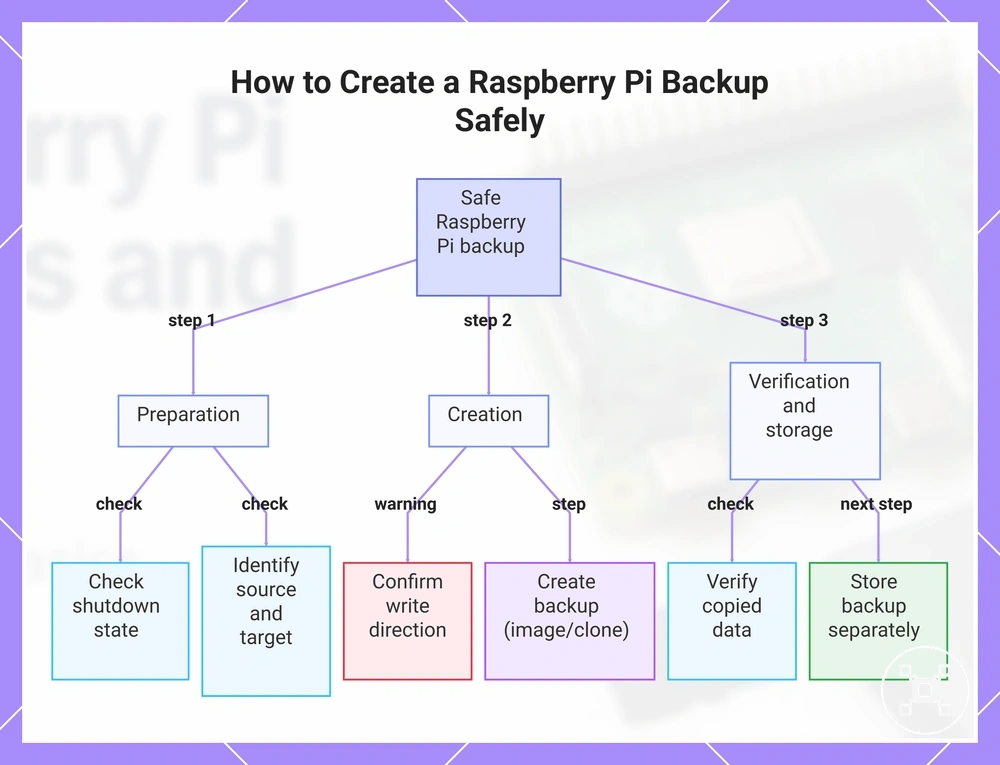
Creating a Raspberry Pi backup safely
Create a Raspberry Pi backup safely by confirming the source, target, and verification process before writing or copying data. A safe backup creation process depends on identifying the correct source device, selecting a suitable target, and checking the copied result after image creation or clone creation.
The source and target must remain clearly separated throughout backup creation.
The source and target must remain clearly separated throughout backup creation. A card reader, storage selection, shutdown state, and verification step all affect backup consistency because a running system or incorrect device selection can change what data is captured or where it is written.
Follow these steps to create a backup while maintaining clear source-target control.
Follow these steps to create a backup while maintaining clear source-target control. A source-target reversal can overwrite the only working copy, so always confirm the write direction before starting the operation.
- Prepare the system state: Check the shutdown state when needed because reducing active writes can help create a more consistent Raspberry Pi backup.
- Identify the source: Confirm the source SD card or source device that contains the system or data you intend to back up.
- Select the target: Choose the backup target storage and confirm that its capacity matches the selected backup method requirements.
- Confirm the write direction: Verify that data moves from the source device to the target device because reversing this direction can overwrite existing data.
- Create the backup: Use the selected image creation or clone creation process while keeping the source and target roles clear.
- Verify the copy: Check the created backup after completion because verification confirms that the expected data was captured.
- Label the backup: Record the backup type, source, and creation details so the correct copy can be identified later.
- Store the backup safely: Keep the backup copy separate from the active Raspberry Pi system to preserve a usable recovery option.
This chart shows the main stages and critical checks for creating a safe Raspberry Pi backup, from preparation through verification and storage.
Card reader and external storage requirements
Reliable Raspberry Pi backup creation requires verifying the card reader, backup target, capacity, and connection conditions before copying data. The hardware requirement principle is that the reader must access the source correctly and the target storage must support the backup data being created.
The card reader, external storage, and file system each affect backup integrity in different ways.
The card reader, external storage, and file system each affect backup integrity in different ways. A compatible card reader supports SD card read and write operations, the USB drive or external storage requires enough capacity for the selected backup data, and the file system can affect whether large backup files are stored successfully. Power stability and safe removal also influence backup integrity because interrupted writes can affect copied data.
- Card reader: Check card reader compatibility because reliable SD card access is required for reading or writing backup data.
- External storage: Verify the external storage or USB drive capacity because the backup target needs enough available space for the selected data.
- File system: Confirm file system support because storage limits or compatibility conditions can affect backup file creation.
- Target identity: Confirm the selected backup target before writing because the wrong storage device can affect existing data and backup integrity.
- Power stability: Maintain stable power during backup creation because interrupted writes can affect the integrity of the copied backup.
- Safe removal: Use safe removal after backup completion because removing storage during active writes can affect stored backup data.
Backup image size and target storage checks
Target fit for a Raspberry Pi backup depends on source size, used space, backup image size, and target storage conditions. A backup target can be suitable when its available capacity, file system support, and storage format match the requirements of the image file or cloned data.
Nominal card size does not always represent the real capacity available for backup work.
Nominal card size does not always represent the real capacity available for backup work. Image file size, compression, file system limits, and the amount of stored data can change whether a target device can hold the backup data successfully.
| Check | What to compare | Why it matters | Safe wording |
|---|---|---|---|
| Source size | Compare the source storage size with the data included in the backup. | The backup image size is affected by the captured storage state and backup format. | Source size provides a reference, but the final image size depends on what is captured. |
| Used space | Compare used space with the available target capacity. | Stored data affects how much space the backup image or cloned data requires. | Used space can influence image size depending on the backup method. |
| Compression | Check whether compression is used and how it affects the image file. | Compression can change the resulting backup image size. | Compressed and uncompressed image files may require different storage space. |
| File system limit | Compare the file system capability with the backup image requirements. | A file system limit can affect whether an image file is stored successfully. | The target file system should support the backup files being created. |
| Target capacity | Compare target capacity with the backup image or cloned data size. | The target device needs enough usable space for the selected backup data. | Nominal card size does not guarantee the same real capacity across devices. |
A card with the same nominal size as the source can still create a mismatch if its real capacity is slightly smaller. Check target capacity before restore or cloning because a small capacity difference can prevent the target from accepting the backup data.
Restoring a Raspberry Pi backup
Restore a Raspberry Pi backup by confirming the target device before writing because the restore operation replaces the data on the target card or target drive. A restore backup uses a backup image and a selected target device, so an incorrect target selection can cause data loss through a destructive write.
Before starting recovery, verify the backup image and target card or target drive conditions.
Before starting recovery, verify the backup image and target card or target drive conditions. The restore result can depend on capacity, hardware context, and boot mode, so a restored image may require additional checks before it becomes a usable system.
A boot test checks whether the restored system starts correctly in the current hardware context.
Follow the restore process below to keep the write direction clear and verify the recovery result. A boot test checks whether the restored system starts correctly in the current hardware context.
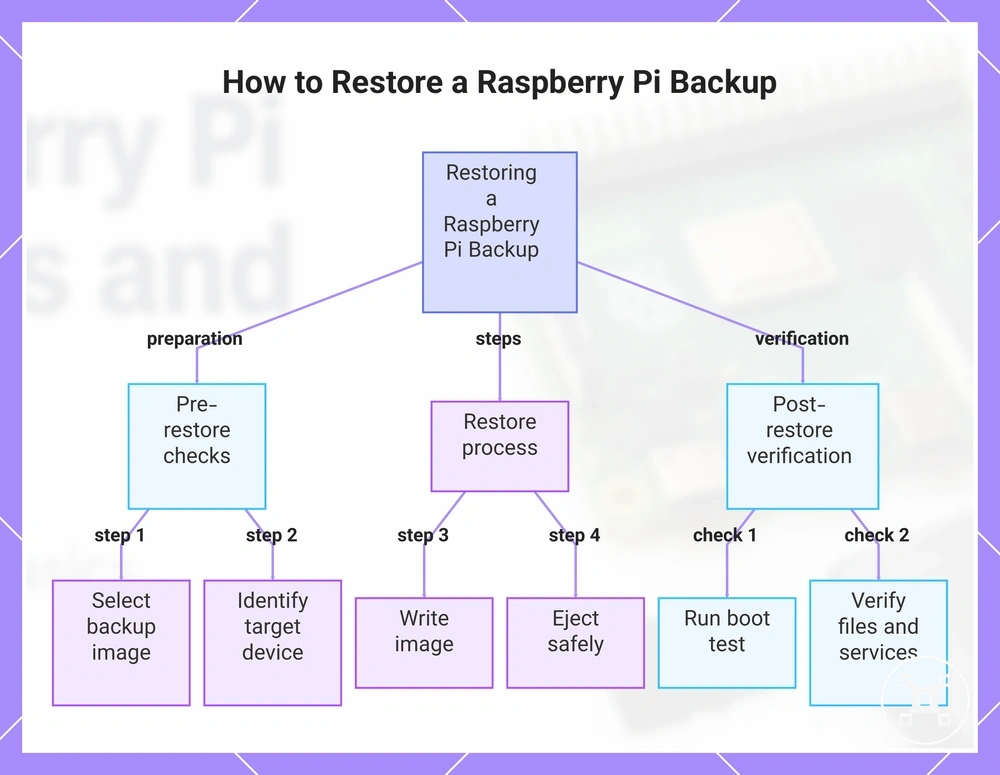
- Select the backup image: Confirm that the chosen backup image is the intended recovery copy before starting the restore operation.
- Identify the target device: Confirm the target card or target drive that will receive the restored image before beginning the write process.
- Confirm the destructive write: Check the write direction because restoring replaces existing data on the selected target device.
- Write the image: Apply the backup image to the confirmed target and monitor the write image process until completion.
- Eject safely: Eject the target storage safely after writing completes to reduce the risk of incomplete data handling.
- Run a boot test: Test the restored system because boot results can depend on boot mode, hardware context, and target device conditions.
- Verify recovered files and services: Check recovered files and important services to confirm the restored image matches the intended recovery state.
Restored images do not have a universal boot outcome because changes in hardware context, boot mode, or target device conditions can affect startup behavior. Verify the recovery condition after restore and confirm that required files and services operate as expected.
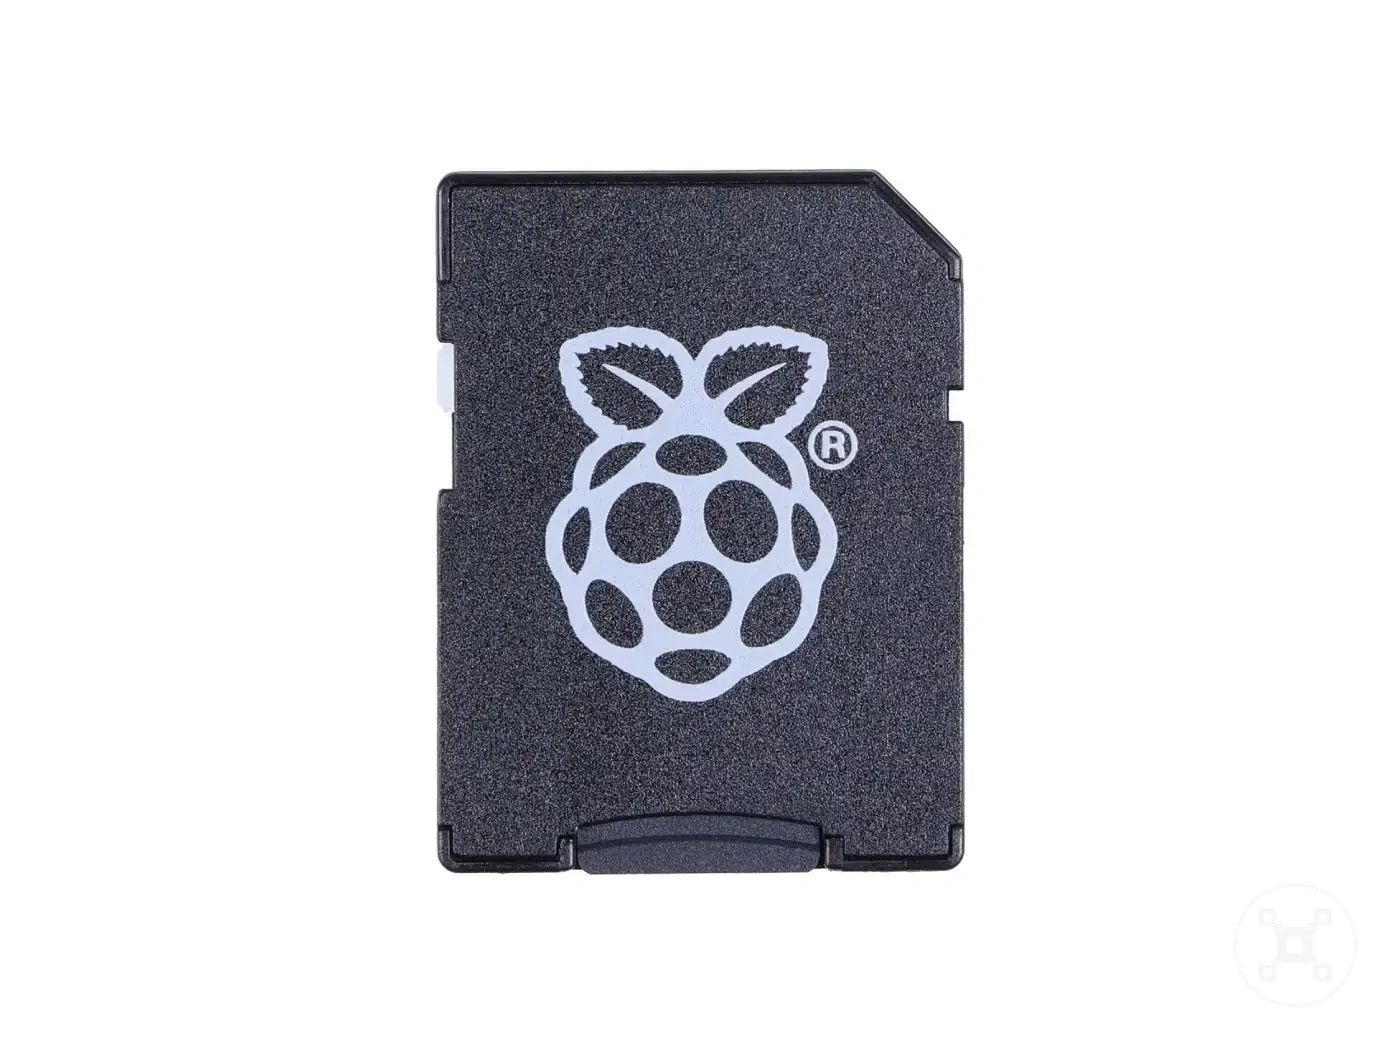
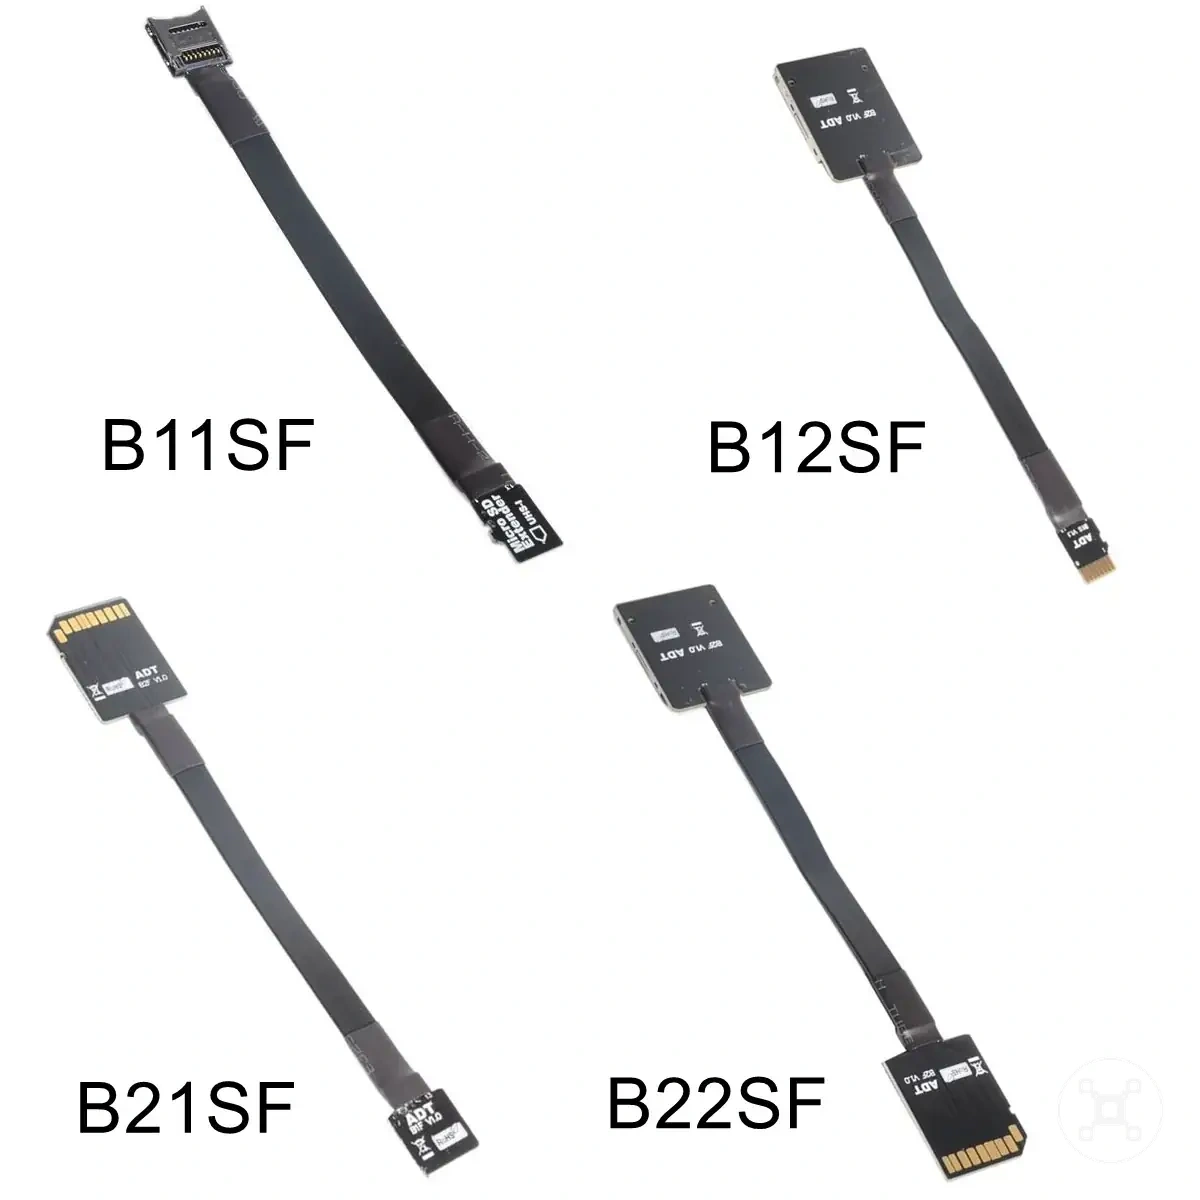
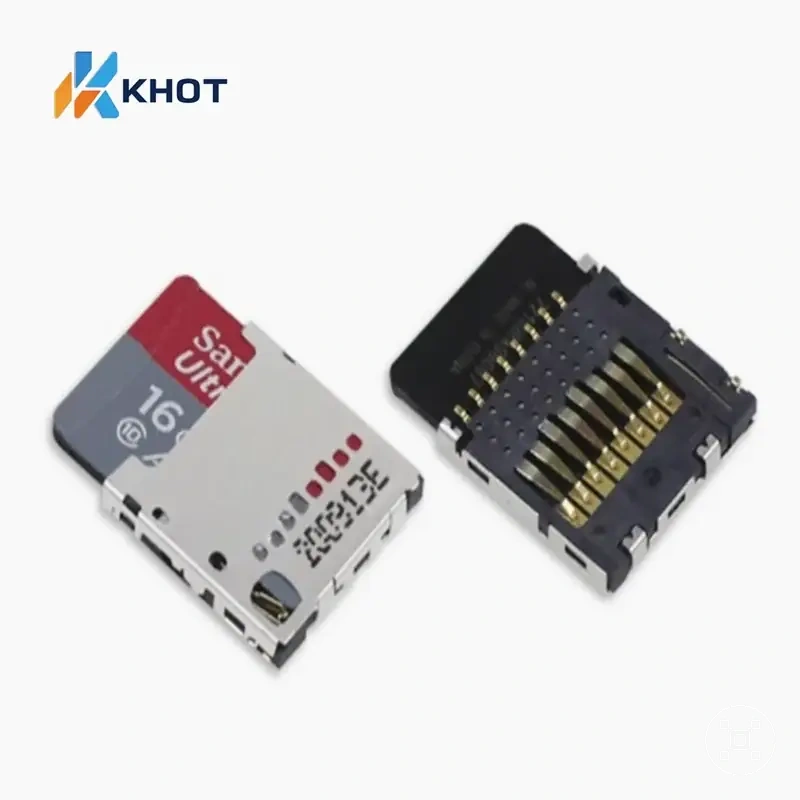
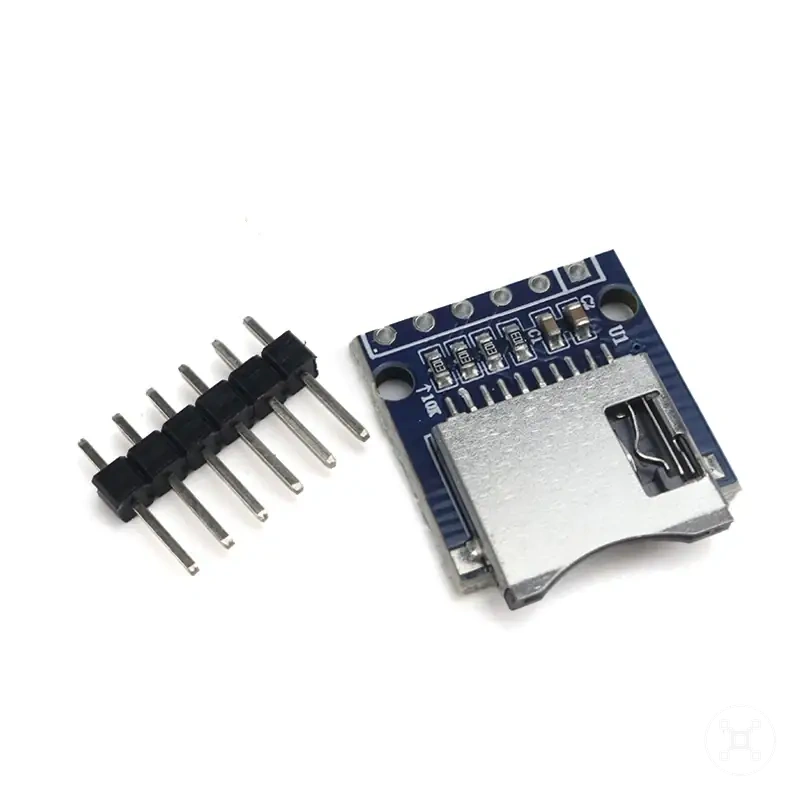
Here are product examples that may make comparison easier.
Here are product examples that may make comparison easier. Before buying, always review the compatibility criteria, essential features, and product details.

This chart shows the main steps and checks for restoring a Raspberry Pi backup, including pre-restore precautions, the write process, and post-restore verification.
Restore target checks before writing an image
A restore operation replaces the contents of the selected restore target, so the correct device must be confirmed before writing an image. Checking the target device details before a destructive write helps prevent applying the backup file to the wrong device.
Before selecting the write image action, verify the target identity and confirmation details shown by the restore tool.
Before selecting the write image action, verify the target identity and confirmation details shown by the restore tool. Device name, capacity, partitions, and connected removable drives provide checks that help distinguish the selected drive from non-target devices.
- Device name: Confirm the restore target device name because the selected drive determines where the backup file will be written.
- Capacity: Check the target capacity because an unsuitable size can prevent the backup image from being applied correctly.
- Partitions: Review the target partitions because partition details can help identify the intended device before writing.
- Backup file: Verify the selected backup file because choosing the wrong image can restore an unintended system state.
- Confirmation prompt: Read the confirmation prompt before continuing because it confirms the selected target before the destructive write begins.
- Non-target drives: Disconnect non-target drives when possible because fewer connected removable drives reduce the chance of selecting the wrong device.
For example, two removable drives with similar sizes may appear similar during a restore operation. Identify each drive using the available device details before choosing the write image target rather than assuming the drives are interchangeable.
Boot checks after restoring a backup
Boot checks after restoring a backup confirm whether the restored backup starts correctly and whether recovered data can be accessed. Check boot behavior through power-on behavior, boot screen or LED cues, login access, recovered data, services, and storage mount state before considering the restore check complete.
The checks below verify the restored system state without replacing a broader troubleshooting process.
Persistent symptoms after a restore require further investigation because boot issues, overheating symptoms, and power-related problems can have different causes. The checks below verify the restored system state without replacing a broader troubleshooting process.
- Power-on behavior: Check the power-on behavior after starting the Raspberry Pi because normal startup shows that the restored system begins the boot process.
- Boot screen or LED cues: Review boot screen messages or LED cues because these visible signals can indicate the current boot state.
- Login access: Confirm login access because reaching the user session or remote access point verifies another stage of startup.
- Recovered data: Check recovered data and file presence because accessible files confirm that expected content is available after the restored backup is loaded.
- Services: Verify service startup because required services and applications should be checked after the restored system becomes available.
- Storage mount: Confirm storage mount state because attached storage availability can affect applications that depend on stored data.
If persistent boot failure, overheating symptoms, or power-related symptoms continue after these checks, move to a broader diagnostic process rather than treating the issue as a normal restore verification step.
Common Raspberry Pi update and backup problems
Common Raspberry Pi update and backup problems require separating similar symptoms because failures can come from different areas such as repository access, package state, storage capacity, backup images, or restore targets. Identifying the likely area before taking action helps determine whether to retry, verify the backup, use another restore copy, or escalate further.
Update errors, backup problems, and restore problems each require different first checks.
Update errors, backup problems, and restore problems each require different first checks. The diagnostic signals below separate repository failure, mirror failure, insufficient space, corrupted image states, cloned-card mismatch, failed restore boot, and unsafe shutdown effects without replacing dedicated troubleshooting paths.
| Symptom | Likely area | First check | What to do next |
|---|---|---|---|
| Repository failure | Repository access | Check whether repository information is available during the update attempt. | Retry the update after confirming the repository condition. |
| Mirror failure | Mirror source access | Review the mirror response shown during the update process. | Verify the mirror condition before another update attempt. |
| Insufficient space | Storage capacity | Check available space before package, backup image, or restore operations continue. | Free suitable storage space or verify the target capacity before retrying. |
| Corrupted image | Backup image integrity | Verify whether the backup image can be read as the expected copy. | Use another verified backup copy if the image cannot be relied on. |
| Cloned-card mismatch | Clone target conditions | Compare the cloned data and target device details. | Verify the clone source and target before another recovery attempt. |
| Failed restore boot | Restore image and system context | Check the restored image, target device, and current boot conditions. | Verify the restore result or use another backup copy if the restored state is unsuitable. |
| Unsafe shutdown effects | Storage write consistency | Check whether shutdown occurred during an active write operation. | Verify the affected system or backup state before continuing maintenance. |
Use the symptom, likely area, and first check together before deciding the next action. If update, backup, or restore issues continue beyond these maintenance checks, continue with Raspberry Pi troubleshooting for broader system investigation.
Repository, mirror, and network update errors
Update errors should be separated from backup and restore errors because a failed update usually relates to repository access, package state, or network conditions. Identifying the update error category first helps determine whether a retry is appropriate or whether the configuration needs closer inspection.
Repository, mirror, package metadata, package lock, and disk space conditions can create similar update symptoms.
Repository, mirror, package metadata, package lock, and disk space conditions can create similar update symptoms. Temporary access issues may clear after conditions change, while repeated errors related to configuration require a more detailed review of the update environment.
| Error pattern | Likely condition | Safe first check | Avoid |
|---|---|---|---|
| DNS or connectivity | Network or DNS conditions may prevent access to the repository. | Check network state and whether the update source can be reached. | Avoid changing package settings before confirming the connectivity condition. |
| Repository warning | Repository access or package metadata may not be available as expected. | Review the package warning and confirm the repository condition. | Avoid applying unrelated fixes before identifying the warning source. |
| Mirror timing | Mirror availability or timing can affect package metadata retrieval. | Check whether the mirror condition is temporary before retrying. | Avoid treating a temporary mirror issue as a permanent configuration failure. |
| Package lock | A running package process may prevent another package operation from continuing. | Check whether another package process is active before retrying. | Avoid removing package state without confirming the cause of the lock conflict. |
| Disk space | Insufficient disk space can prevent packages or upgrades from completing. | Check available disk space before continuing the update. | Avoid repeated retries without addressing storage limits. |
If an update error clears after a retry, the condition may have been temporary. Repeated errors after checking network state, repository access, package metadata, package locks, or disk space indicate a configuration issue that needs closer inspection.
Backup images, cloned cards, and restore mismatches
Backup image and cloned card mismatches do not always mean data loss. A restore mismatch can result from target compatibility, image state, source selection, storage condition, or boot context, so the backup image, cloned card, and target conditions should be checked before assuming the restore has failed.
Backup image and cloned card mismatches do not always mean data loss.
Restore mismatch checks compare target capacity, image creation, clone conditions, and boot mode before further recovery decisions are made. An incomplete write, wrong source image, card wear, file system expansion state, or verification gap can affect how a restored image behaves.
- Target capacity: Check target capacity against the backup image and cloned card because a capacity mismatch can prevent the restored data from fitting the target device.
- Incomplete write: Verify the image creation or clone process because an incomplete write can affect whether the copied data can be used successfully.
- Wrong source image: Confirm the backup image source because an incorrect source image can create a restore mismatch even when the write process completes.
- Card wear: Consider card wear as a possible condition because storage health can influence cloned card behavior and verification results.
- Boot mode: Check boot mode and hardware context because a restored image may behave differently when startup conditions change.
- File system expansion: Review file system expansion state because restored image capacity behavior can depend on the storage condition after changes.
- Verification gap: Check whether verification was completed because an unverified copy provides less confidence about the restore result.
One edge case is a cloned card that appears computer readable but fails to boot in a Raspberry Pi. This does not prove a single cause; the clone process, boot mode, target condition, and verification state may need to be checked together.